Introduction
The tracking plugin allows your customers to track their orders in your store, directly on a tracking page on your website. Below, you'll learn how to configure and install this plugin.
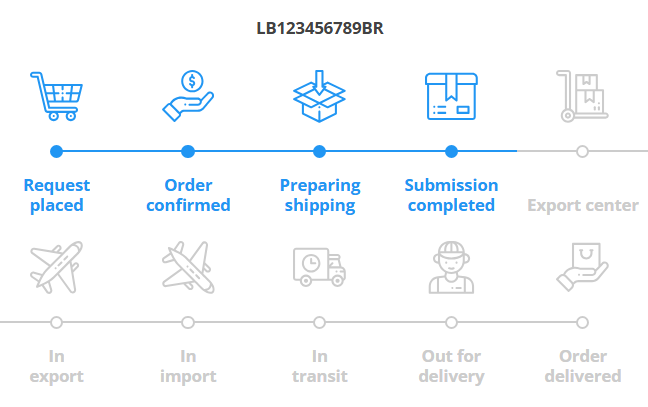
How it works
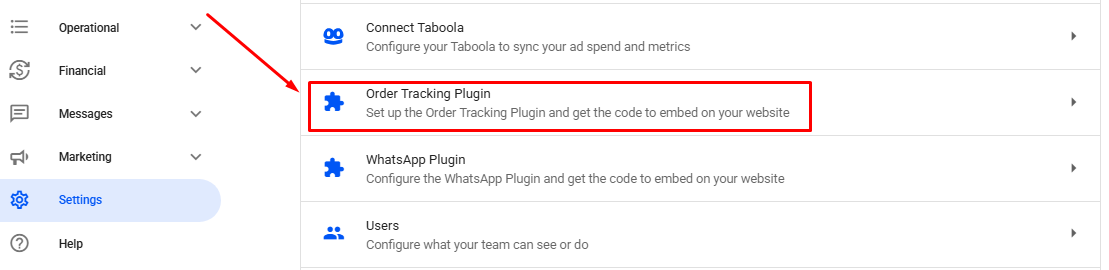
In your Reportana account, navigate to Settings in the side menu → Order Tracking Plugin. Or access: Settings — Order Tracking Plugin.
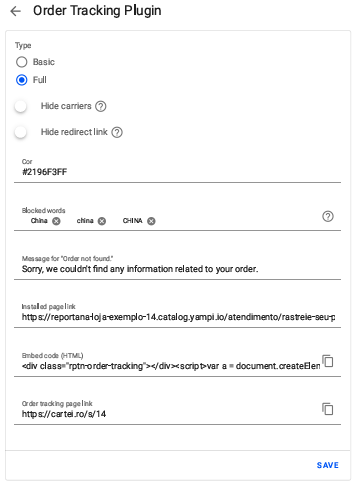
In this tab, you can define some initial settings for the plugin, such as:
- Type: Specify which animations are shown in our plugin according to the tracking steps;
Basic:
Full:
- Hide Carriers: Hides carrier icons (e.g.: Cainiao, Correios).
- Hide redirect: Hides redirect links to carriers.
- Color: Sets the color of the plugin's icons and buttons.
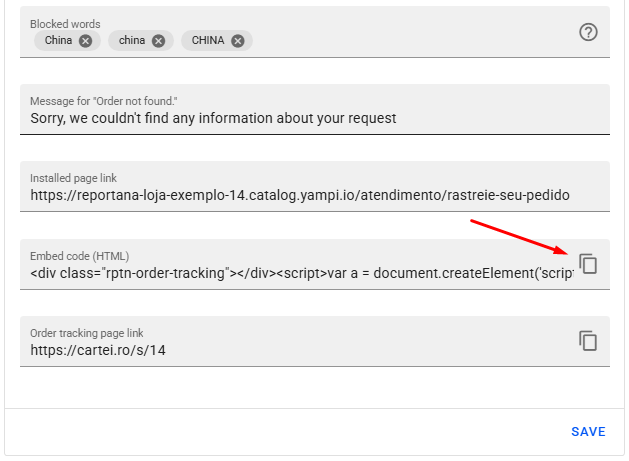
- Blocked words: Hides specific words or phrases from displayed updates. Example: China. To add a word, simply type the word and hit enter, remember to add all variations of the word. Example: China, china, CHINA.
- Messages for “Order not found”: Phrase displayed when the order is not found.
- Installed page link: Add the link to the page where the plugin was installed on your website.
After setting your desired configurations, to install the plugin, copy the Embed code (HTML).
In your e-commerce platform, create or access the tracking page.
Note: If you're having trouble creating a new informational page, we recommend checking out tutorials in your platform's help center. Look for tutorials related to how to add an informational page.
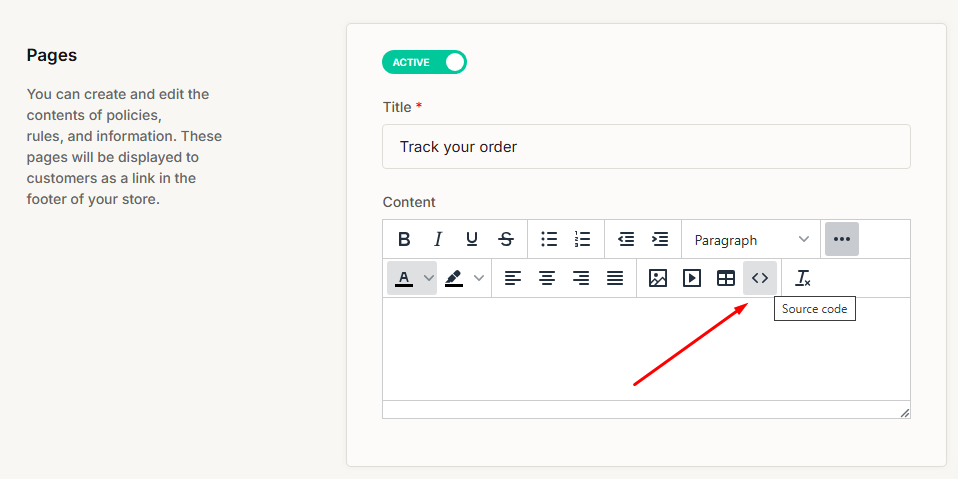
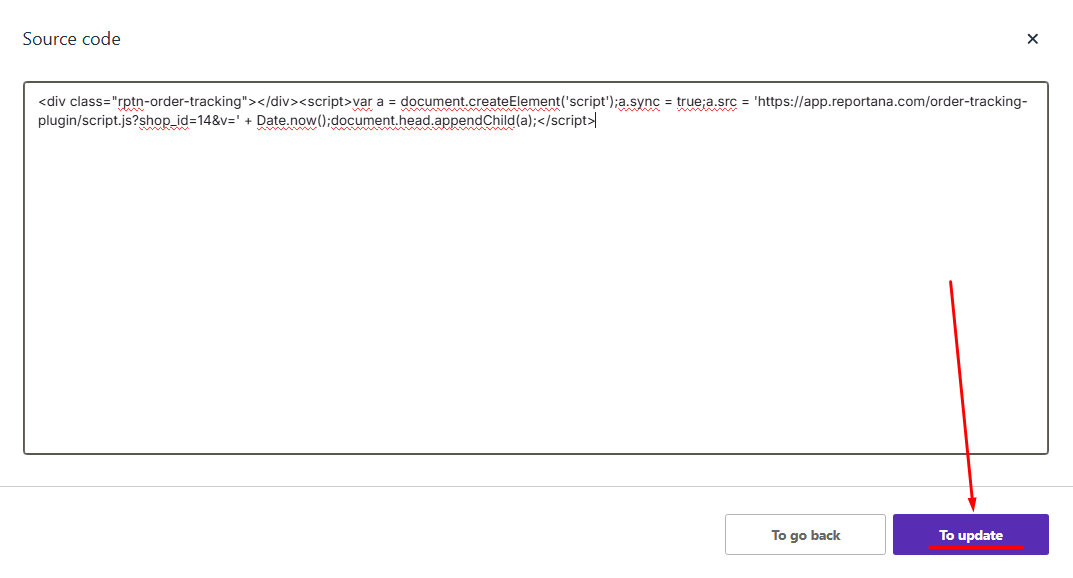
Look for the HTML embedding on the page, usually represented by the <> and paste the copied script.
Finish by saving all your changes.
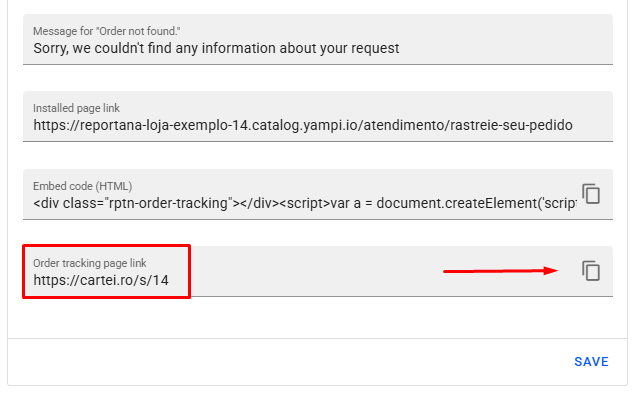
Some platforms, like Nuvemshop for example, don’t allow the use of external scripts. In these cases, use the Order tracking page link as an alternative when it is not possible to install the script from our tracking plugin.
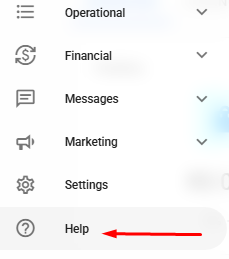
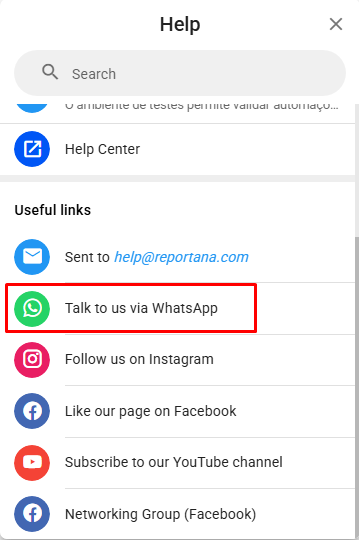
Important: The example uses a Yampi store, but the process is similar on other platforms. If you have any questions or difficulties, please contact our support team by visiting Help in the side menu of the account ➞ Talk to us via WhatsApp.
October 01, 2024
How to Configure the Tracking Plugin
Related articles
How to Set Up Team Accounts
"Users" are used to allow you to add collaborators to your Reportana account. In this article, we'll show you how to send the invitation link to your employee and how how to add them to your account.
How to Change Your Subscription Plan
At Reportana, it is possible to adjust the subscription plan, guaranteeing access to the functionalities best suited to the growth of the business. In this lesson, you'll learn the step-by-step process of changing your account's subscription plan.
How to Connect WhatsApp
By connecting your company's WhatsApp to our platform, you can use our messaging chat to handle customer support, send automations, and run WhatsApp campaigns. Learn how to connect and synchronize in this tutorial.