Introduction
WhatsApp automation has proven to be a powerful ally in optimizing customer relationships, especially when integrated with platforms that simplify its implementation. This article provides a practical and objective guide on how to create automated flows using the Official WhatsApp API. We will explore the possibilities that this type of automation offers to make communication more efficient, personalized, and interactive, ultimately contributing to improved operational performance and customer service.
How It Works
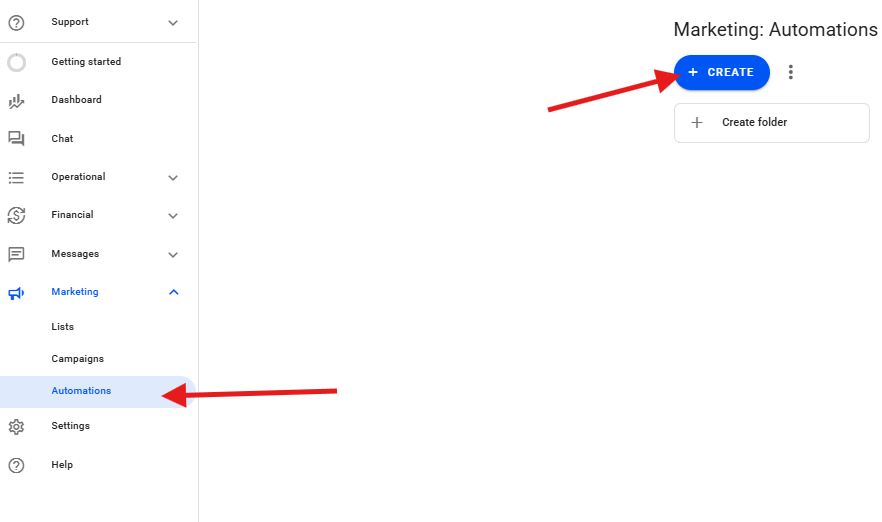
Navigate through the Reportana platform to the Marketing section and select Automations. Then, click on +Create to start a new automation. Or access: Automations
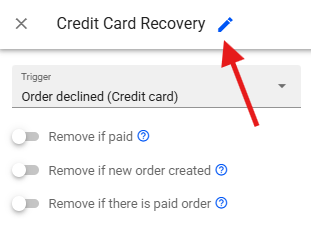
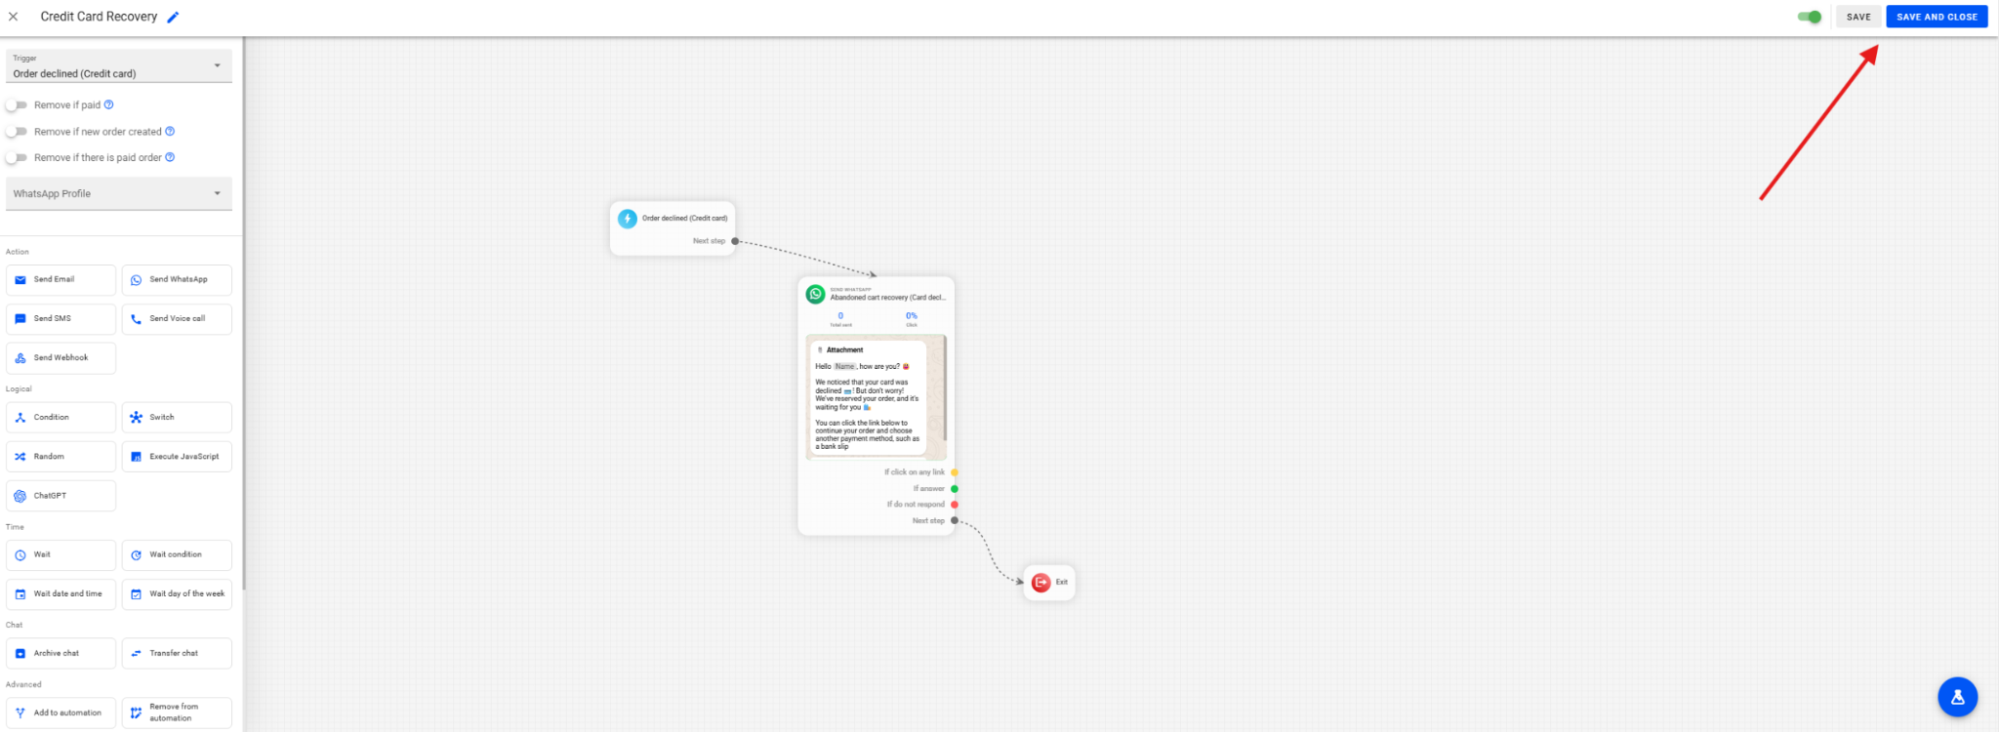
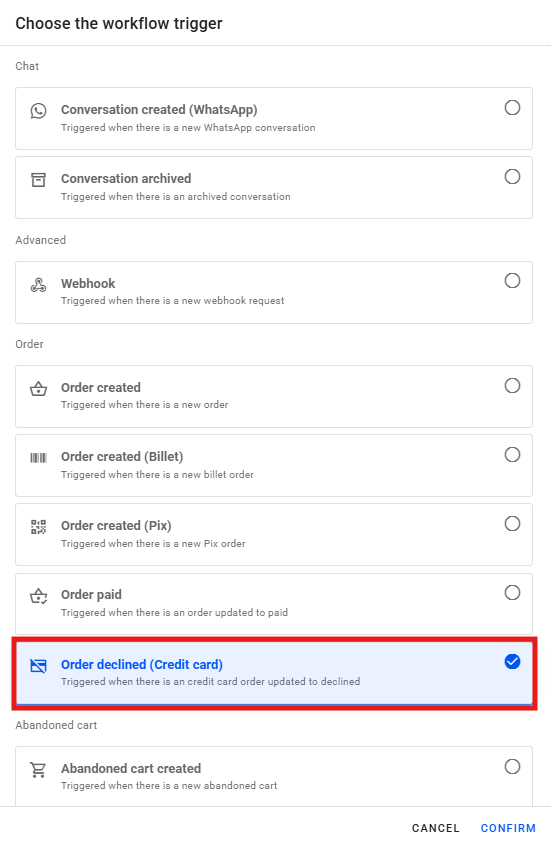
Assign a name to your automation. A practical example is "Credit Card Recovery". Select the trigger that will initiate the automation. For the credit card recovery example, the appropriate trigger is "Order declined (Credit card)", which is activated whenever a new order with a credit card is declined.
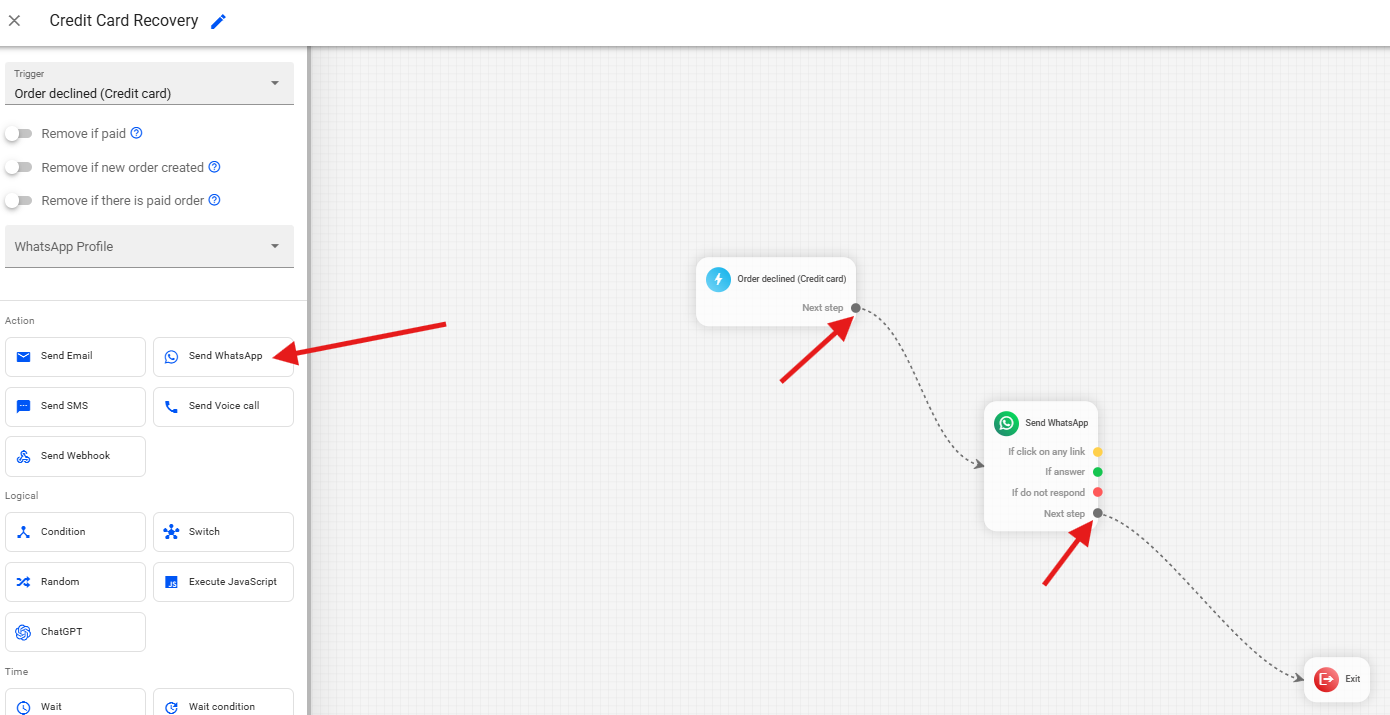
After defining the name and the trigger, add a Send WhatsApp action block to your flow. Arrange the blocks on the screen and create the necessary connections so that the trigger leads to the WhatsApp message being sent.
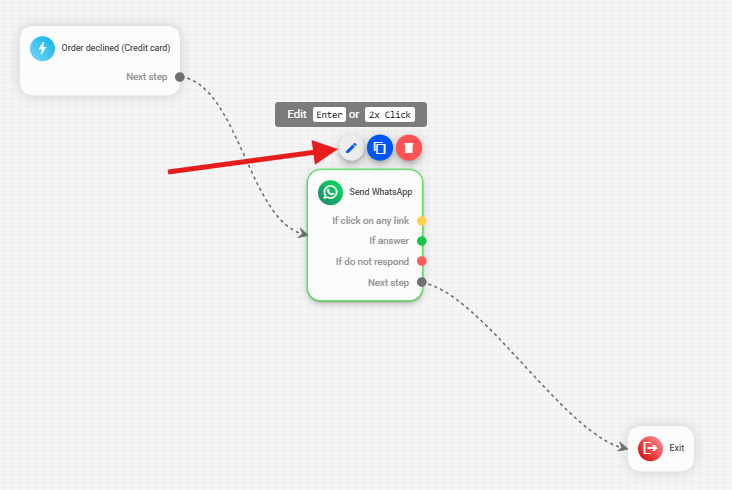
Click on the Send WhatsApp block and then on the pencil icon to edit the message.
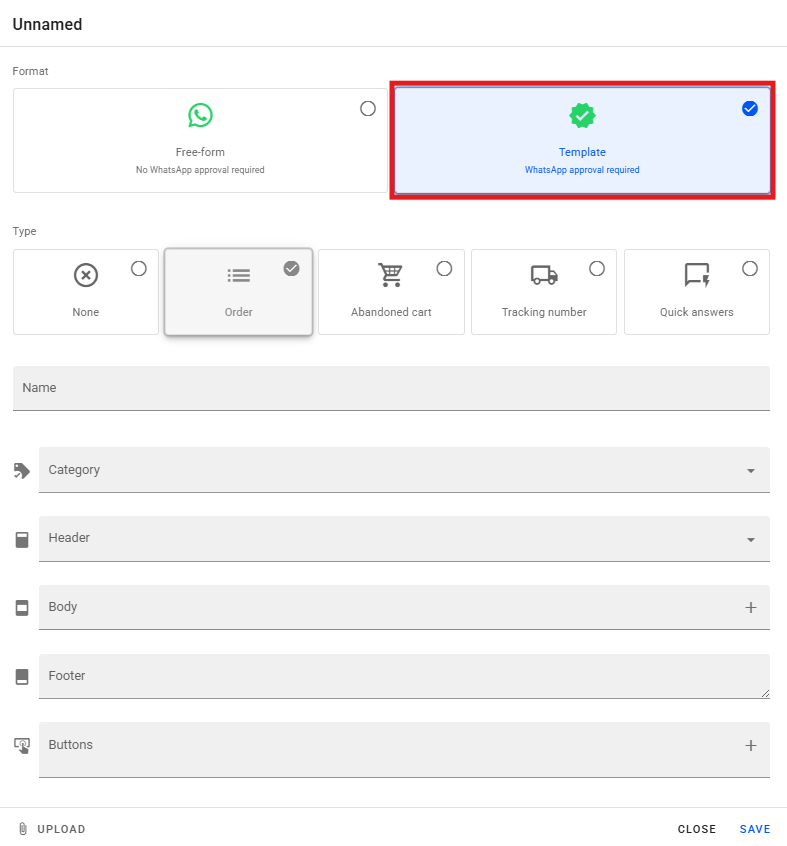
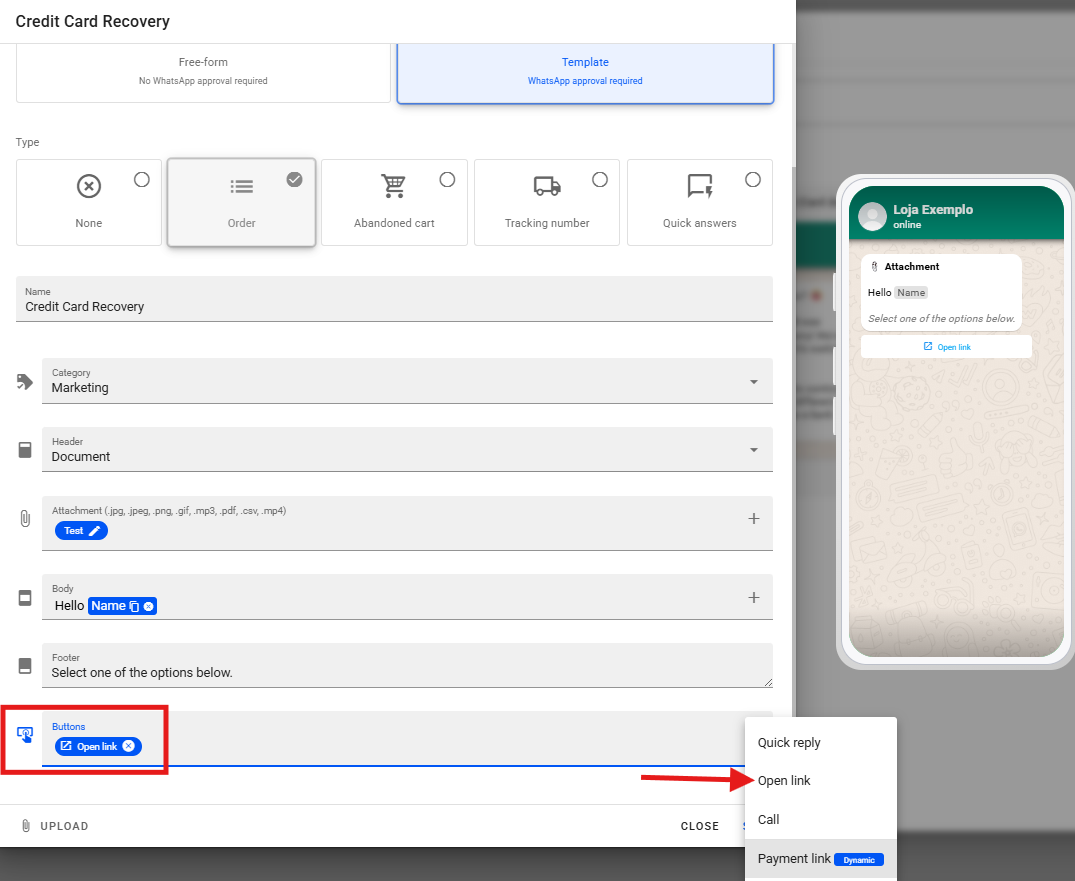
It is always recommended to select the Template format. This format corresponds to a message previously approved by WhatsApp, allowing it to be sent at any time to the user. Avoid using the "Free" format for proactive messages, as it can only be sent if the user has interacted with you within the last 24 hours.
Name the message, such as "Credit Card Recovery", and select the Message Category. Choose the category that best fits the purpose of your message (e.g., authentication, marketing, utility). For the credit card recovery example, the Marketing category is appropriate, as it is a market-oriented message. It is advisable to consult WhatsApp's documentation to understand each category and its associated sending costs.
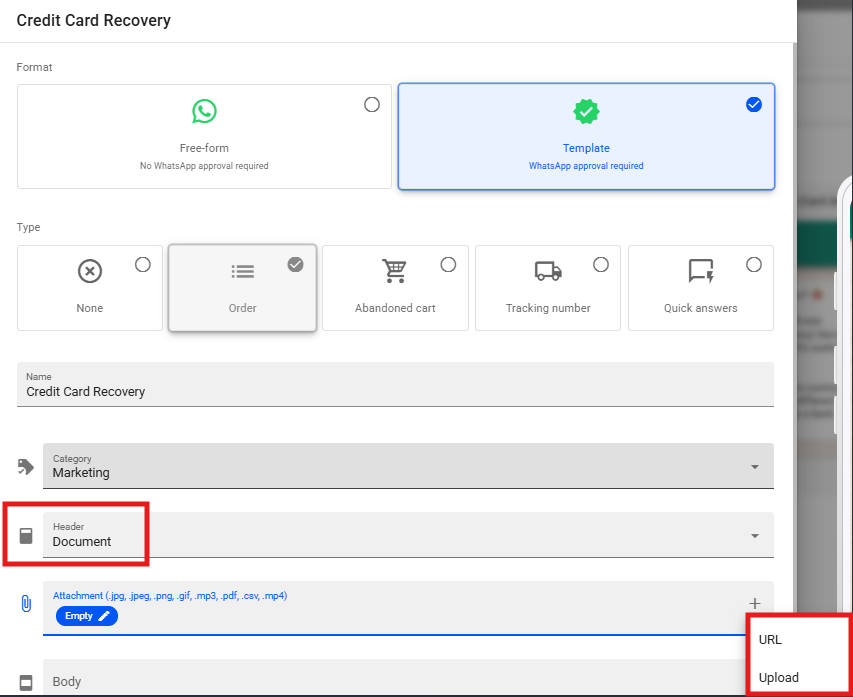
To begin configuring the message, start with the Header. In the header, you can include text, an image, a video, or a document. In document, you can use a fixed file or a URL.
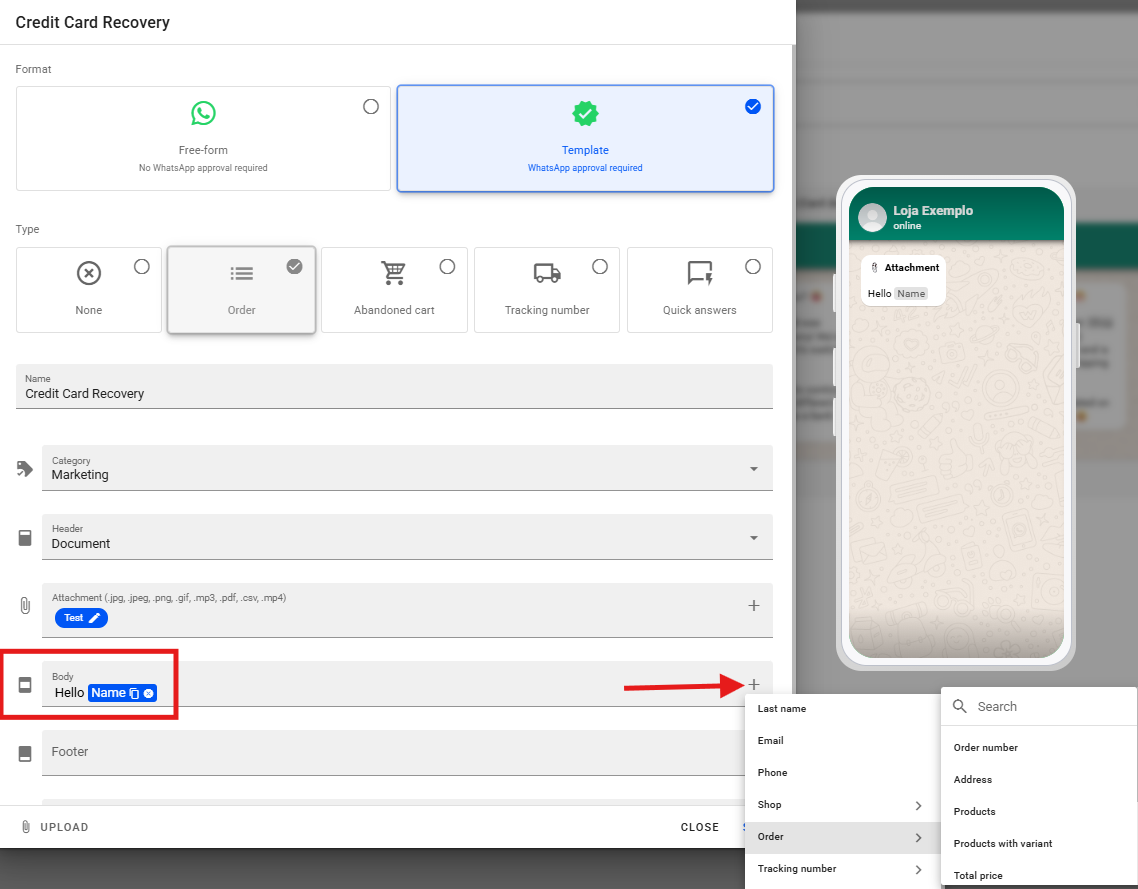
The Body of the message can be personalized with dynamic information, such as "Hello [Customer Name]", and include order details, products, and total amount using variables. You can also add the direct link to the credit card payment in the body of the message.
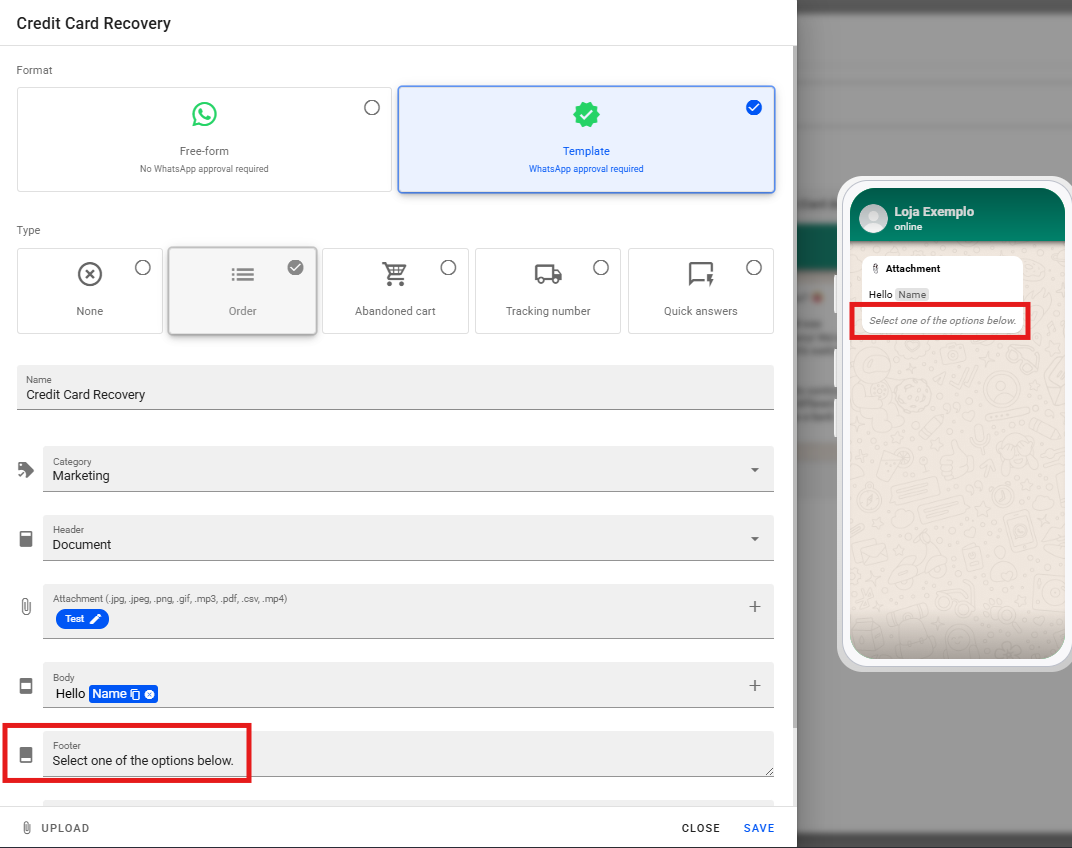
Adding a Footer is optional, but if you choose to include it, the footer will appear at the end of the message body in italic style with gray font. An example is "Select one of the options below"
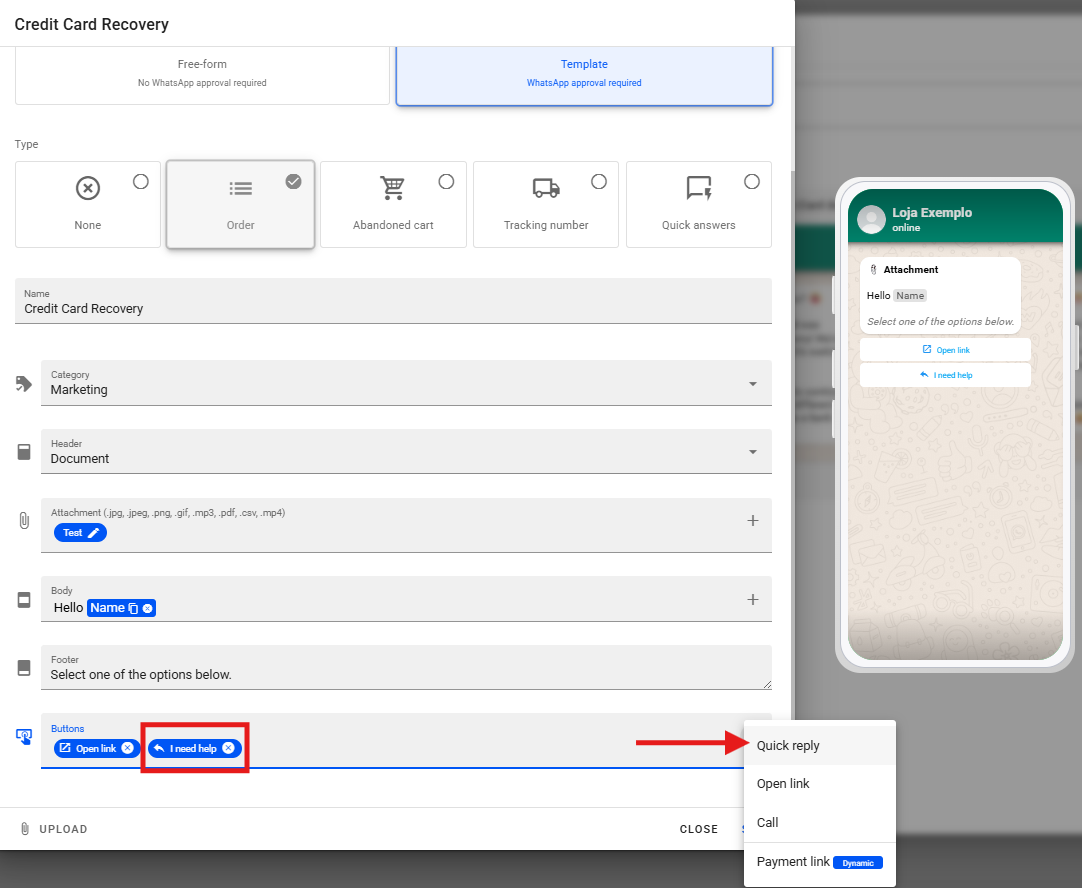
In Buttons, the following options are available:
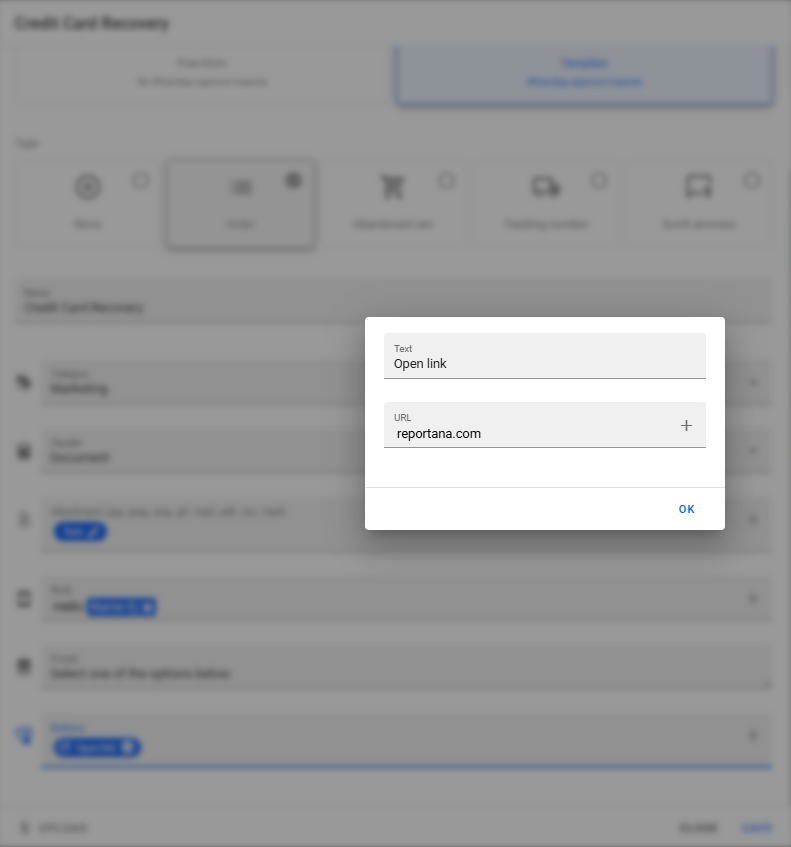
- Link Button: Add a button that redirects the customer to a link. For example, "Open Credit Card Payment", which can lead directly to the payment link. The official WhatsApp API allows links to be sent in button format.
- Quick Reply Button: Add buttons with predefined response options for the customer to select. An example is "I Need Help". These options can continue the automation by directing the customer to another message flow or even integrate a chatbot for more complex support.
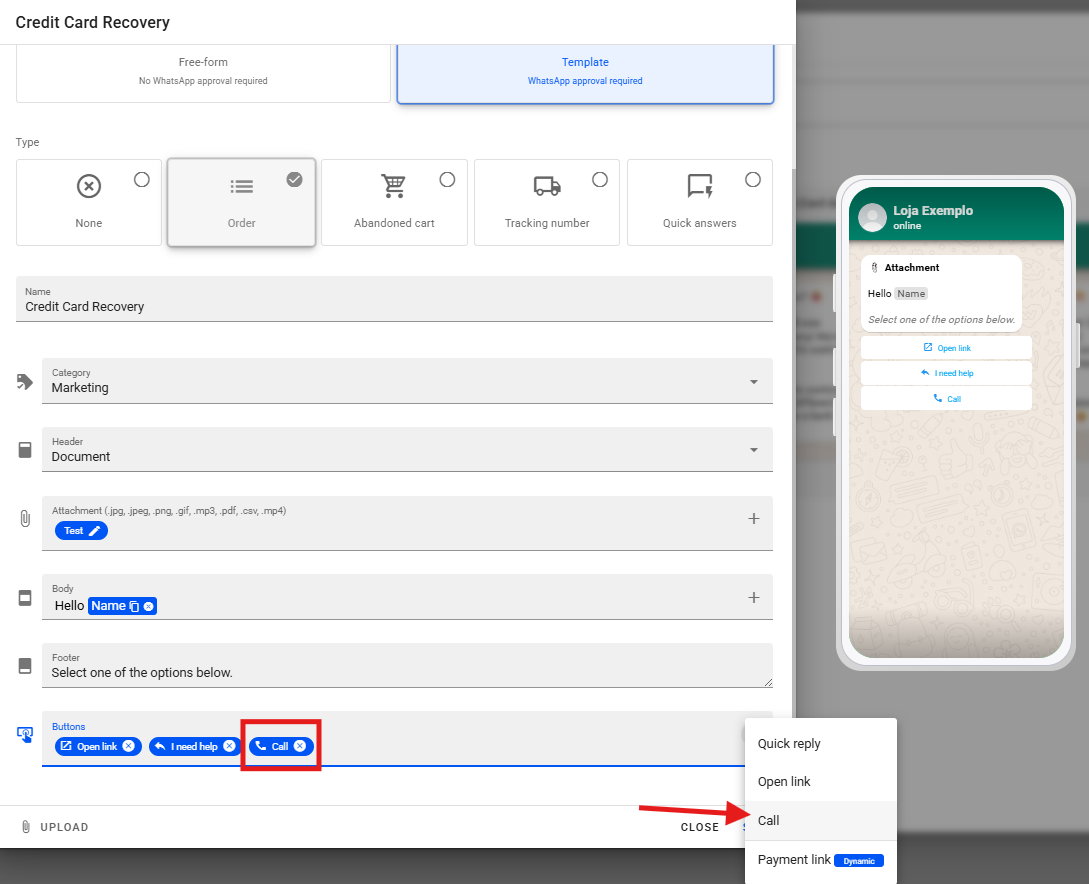
- Call Button: This button allows the customer to initiate a phone call to you.
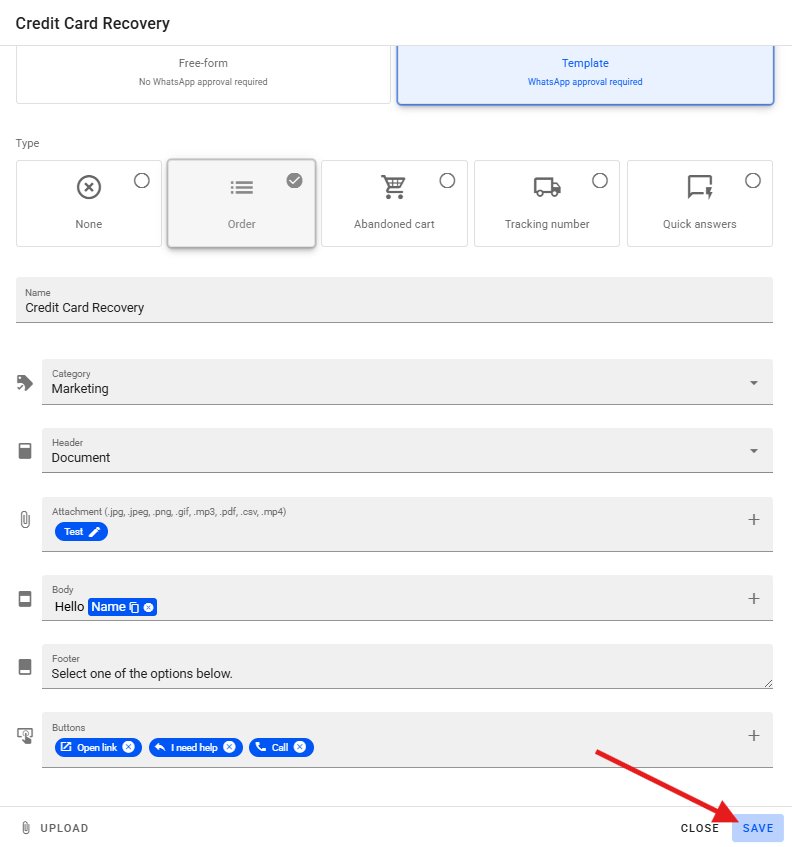
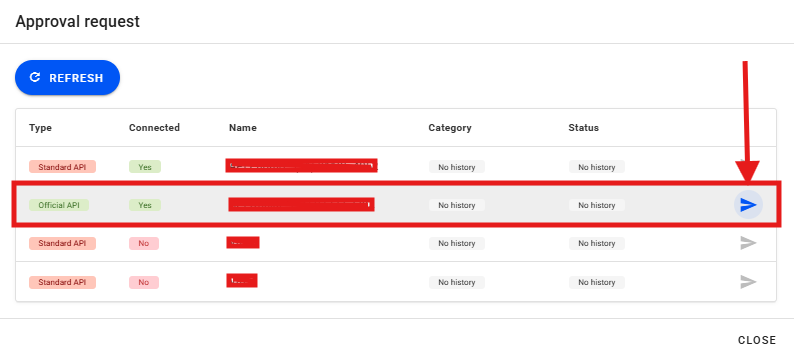
Once your message is complete, you will need to request WhatsApp Message Approval. To do so, click Save.
A window will appear to request message approval from WhatsApp. To submit the request, simply click the arrow icon indicated below. After submitting the request, check the message approval status (whether it is approved or still pending). Although the approval process may take a few minutes or even hours, experience shows that many messages are approved within seconds or minutes.
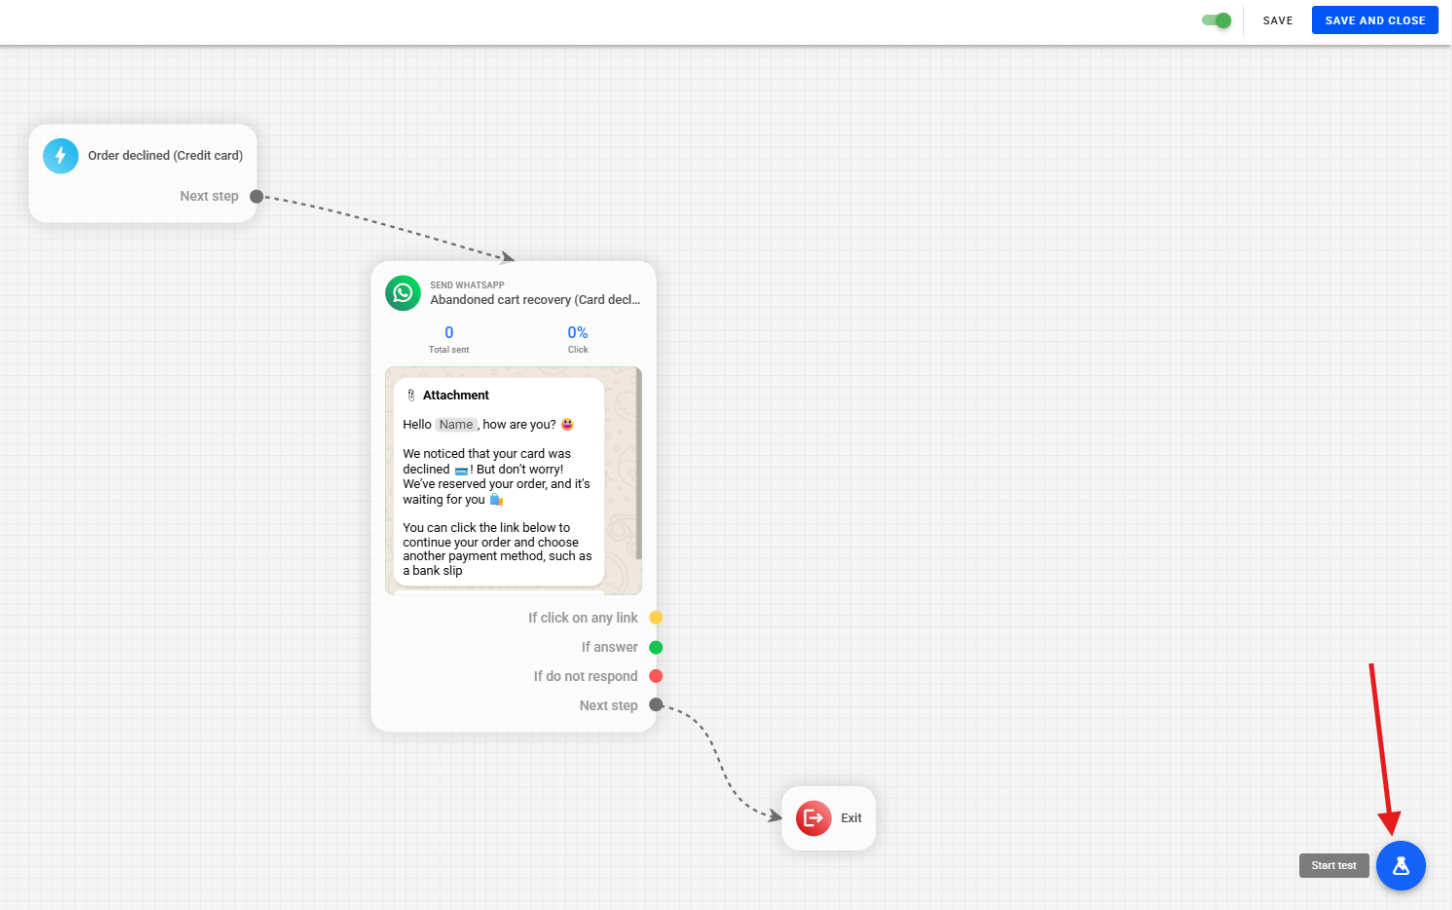
With our automation ready, we can perform the test in two ways:
Method 1: Activate the automation and place a real credit card order to test the full flow.
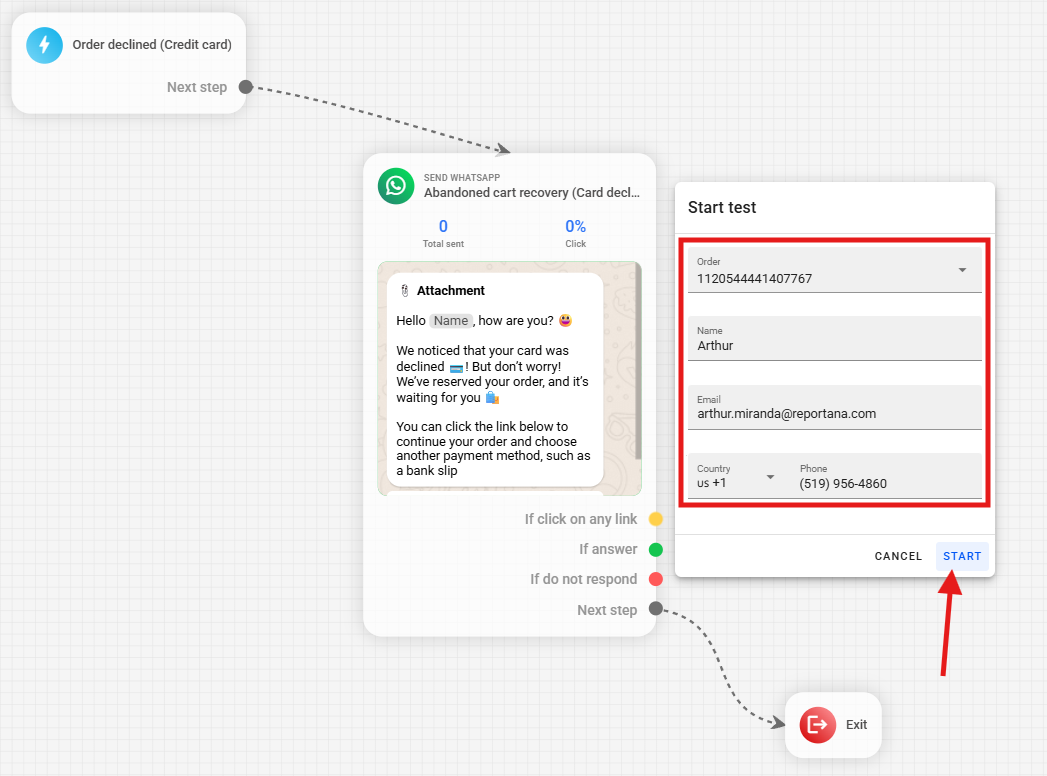
Method 2: Use Reportana's Testing Environment by accessing the test environment available on the platform.
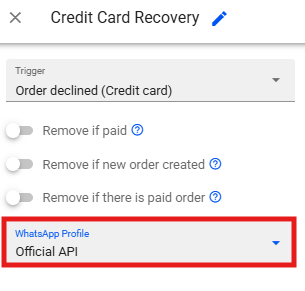
Select the WhatsApp Profile that will be connected to the automation (e.g., "Official API").
Choose a sample order, enter your name, email, and phone number where the test will be sent, and finally select Start.
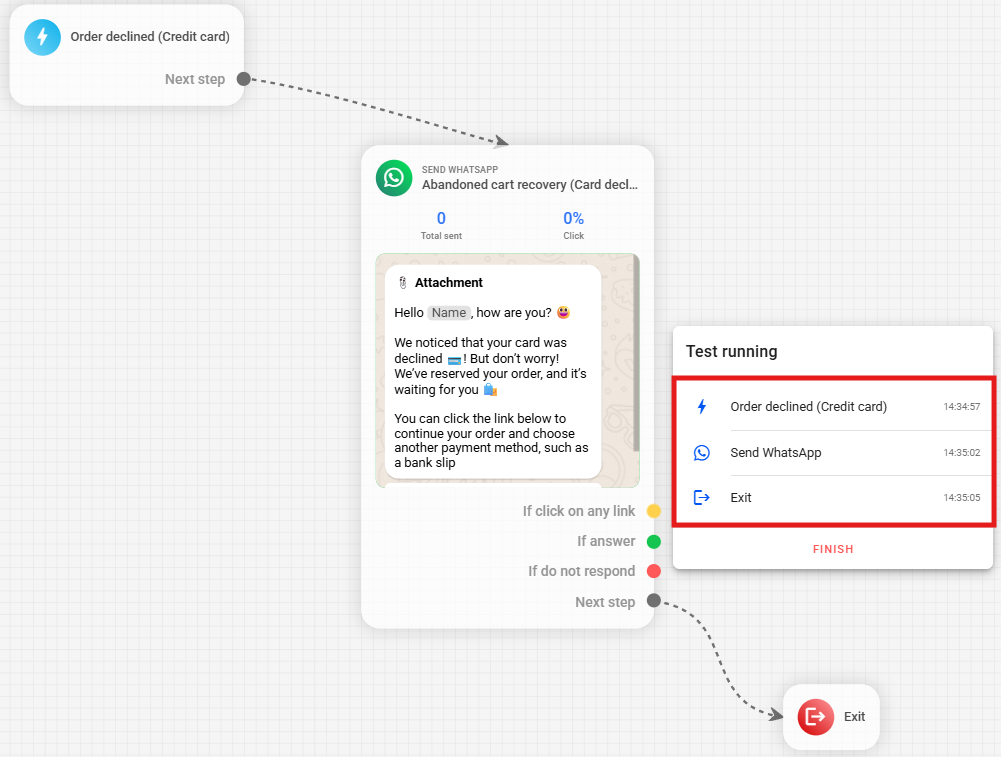
The testing environment will display the trigger event ("order created - credit card"), followed by the "send WhatsApp" event, and then the message being sent via the official API. Delivery to the user’s device may take a few seconds. Check the message received on your test device. It should contain the configured information, such as buttons, the dynamic credit card information, etc.