Introduction
With webhook automations, you can integrate Reportana with any other system that supports this technology. This facilitates unofficial integrations, improves communication between platforms by enabling data capture from other systems, and helps automate and centralize processes, making data management more efficient. In this tutorial, we will learn how to create webhook automations in Reportana.
How it works
Configuring the Webhook
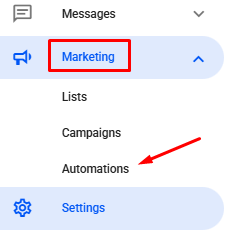
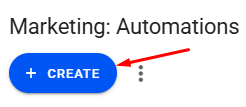
- First, in your Reportana account, navigate to the messages section. In the side menu, click on Marketing → Automations. Or access: Marketing - Automations
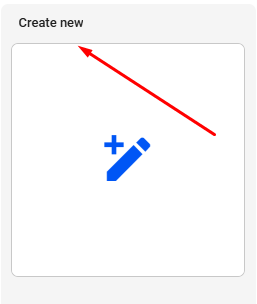
- In the Marketing tab, you will find the option to create a new automation. Click on the +Create button and click +Create New.
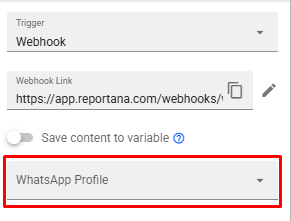
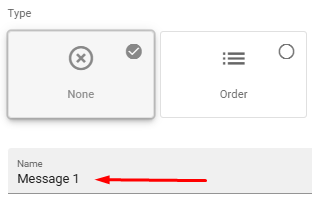
- Then, select the Webhook trigger and click Confirm.

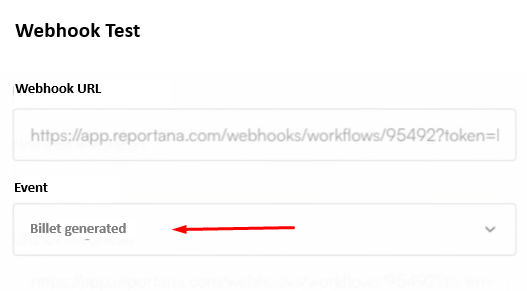
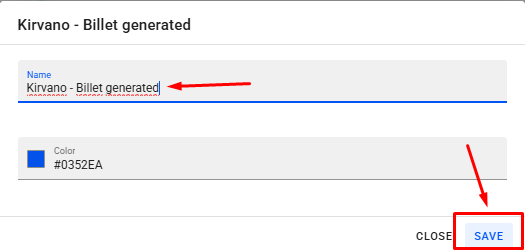
- Enter a name in the automation and then click on Save so that the Webhook link is created.

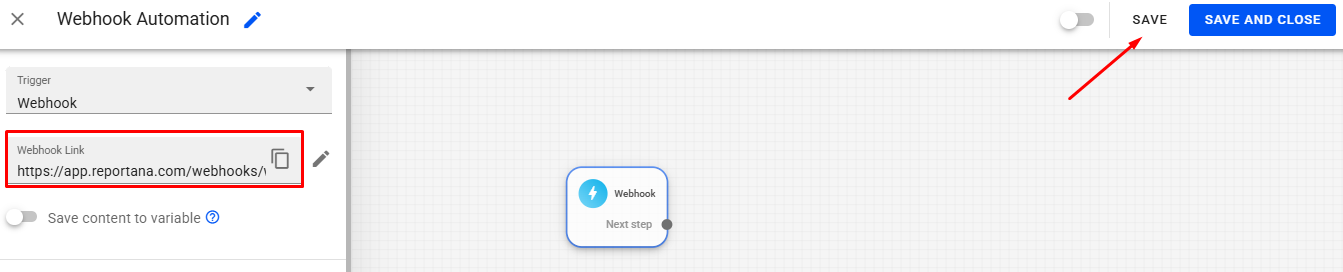
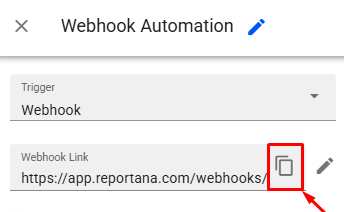
- Once the Webhook link has been created, just copy the link and access the platform you want to integrate.
Note: To identify which webhook events your platform sends or how to access the webhooks area, we recommend searching for tutorials or contacting support for the platform you want to integrate with Reportana. In this example, we will integrate the Kirvano platform via webhook automation.
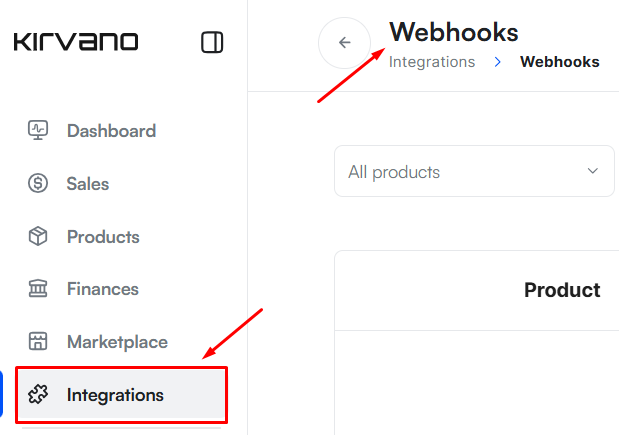
After logging in to the Kirvano platform, in the side menu, go to Integrations → Webhooks.
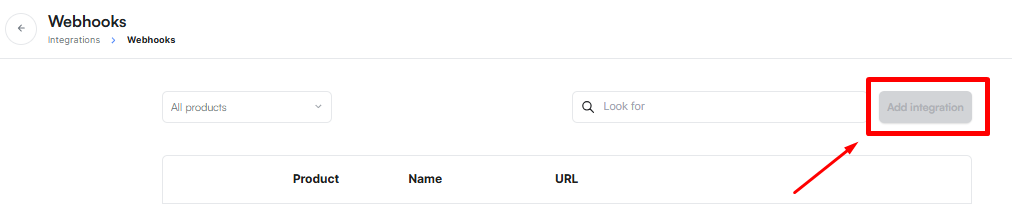
Then click on the button Add Integration.
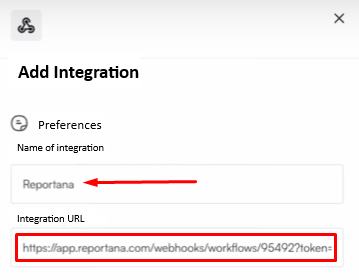
Enter a Name for the integration, and then paste the Webhook link copied from Reportana into the integration's URL field.
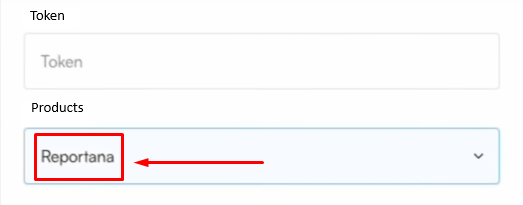
Select the Products that are related to this webhook.
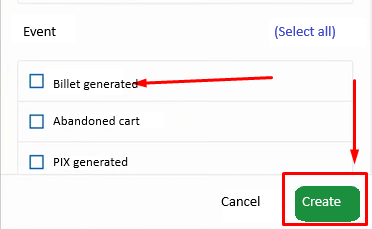
Next, select the events you want to trigger this webhook in Reportana. In this case, we'll select the Billet generated event and then click Create.
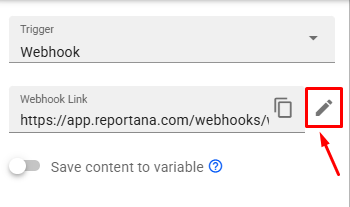
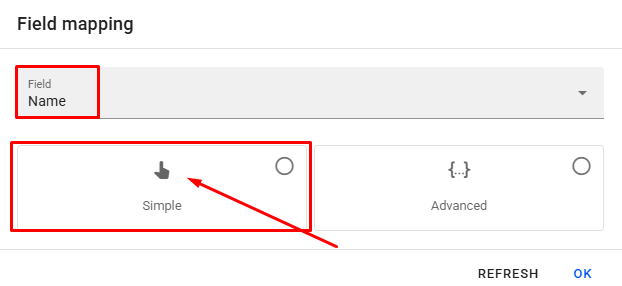
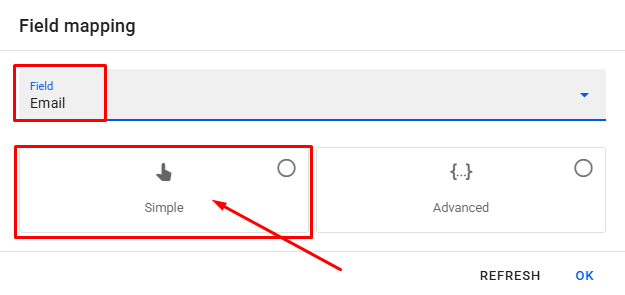
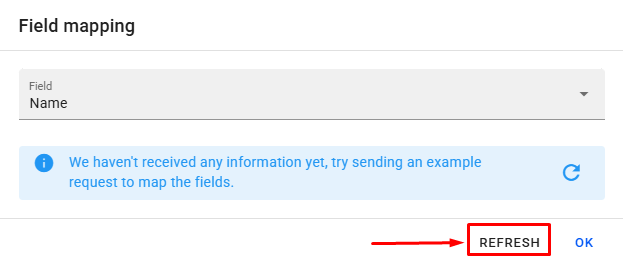
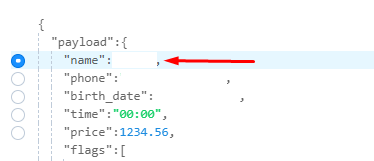
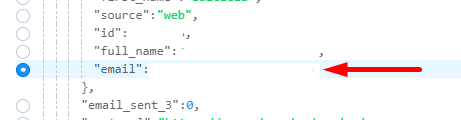
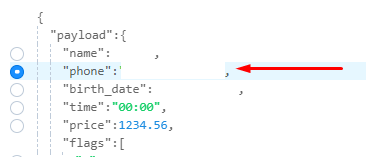
Then return to the automation in Reportana and click on the Pencil icon to map the name, e-mail and telephone fields.
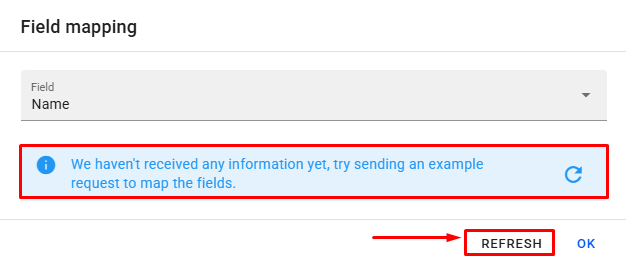
This highlighted message tells us that no information has yet been received from the platform. Even if we click on Refresh, the message will persist. This is because no events have yet been sent from the platform to Reportana.
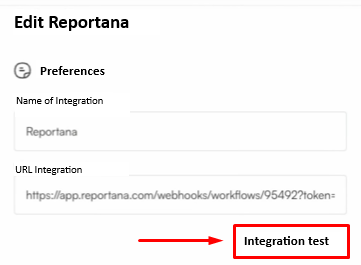
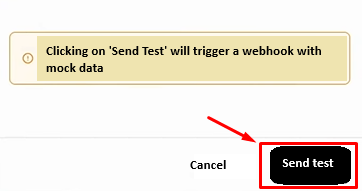
Return to the platform, then click on the Pencil button and click on Integration test.

Note: If the platform you're integrating with doesn't have the option to test the integration, you can, for example, simulate an event. By placing a new order, the webhook event will be triggered.
Select the event you want and click on Send test.
Once the test has been sent, return to Reportana and click on Refresh.
With the Name option already selected, click on the Simple option and search for your customer's name that was received via the webhook.
With the E-mail option selected, click on the Simple option and search for your lead's e-mail address.
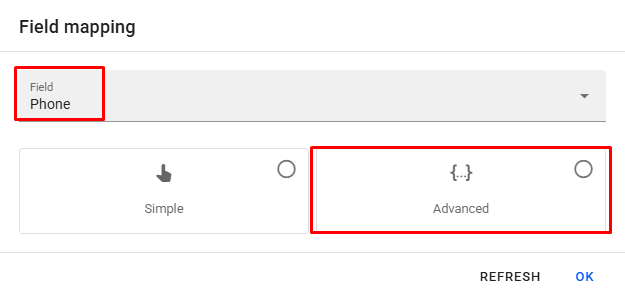
With the Phone option selected, click on the Simple option and search for your lead's phone number.

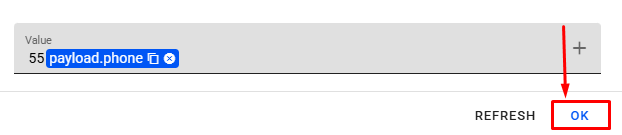
If the phone number does not have a country code, you can enter it as follows: With the Phone option selected, click on the Advanced option.
Next, you'll enter the Country Code in front of the Phone variable and you'll be able to see an updated preview of how the number will appear.
To finish, just click on Ok.
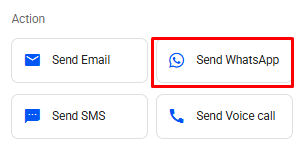
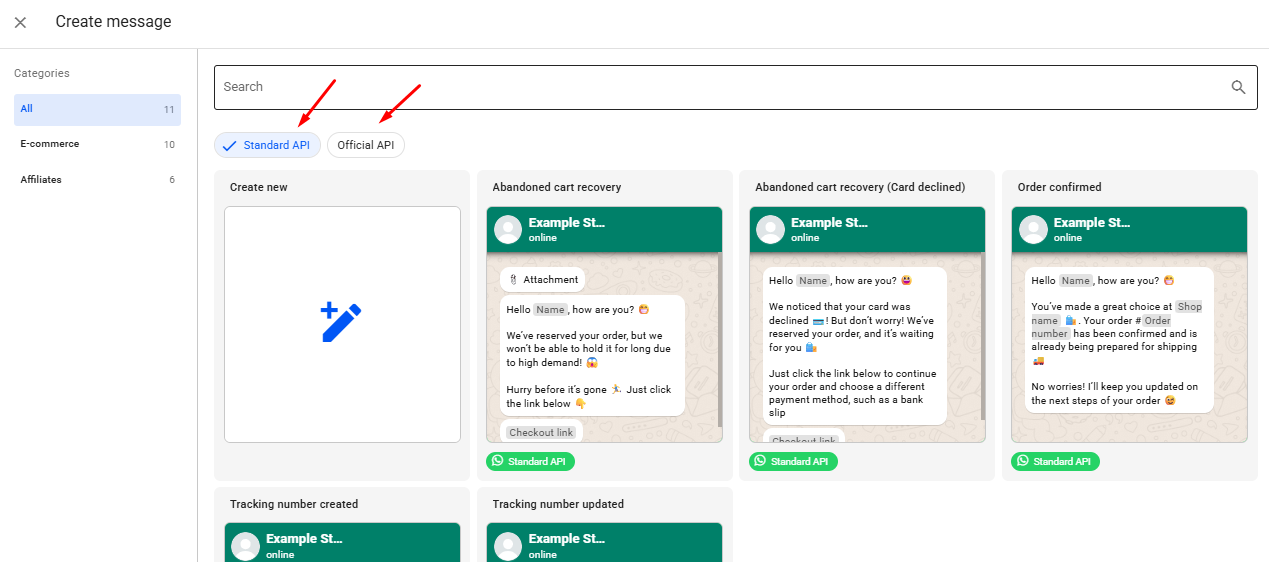
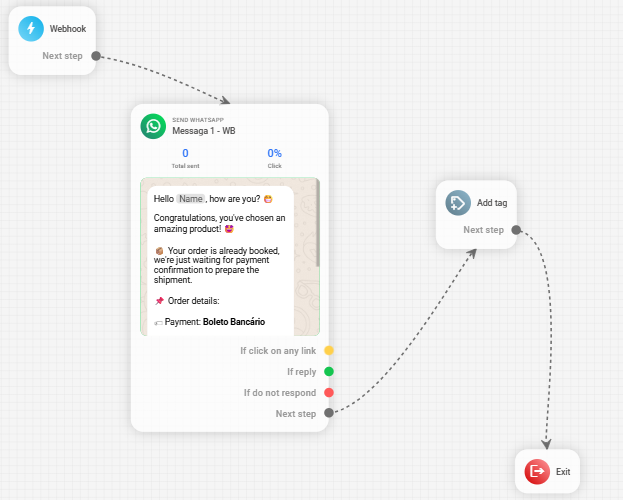
With the automation open, add a Send WhatsApp block to your automation and then click on the Pencil icon.
In this tab, you'll find some ready-made and validated message templates that can be used for both the Standard API and the Official WhatsApp API.
To create a new message, click on Create New.
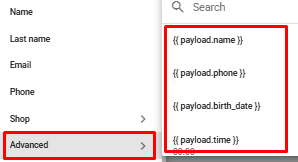
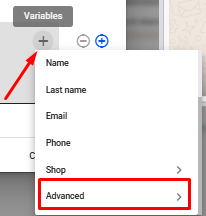
Enter a name and the order information in the message using the variables received by clicking on the gray + icon and then clicking Advanced.
Choose the correct available variables that appear in the Advanced field and enter them in the message.


Note: The variables with your customers' data must be inserted correctly in the message in order to be sent. The use of Reportana's standard variables in these cases of integration via Webhook does not load customer or order data.
We can also use the custom webhook variables to send payment information to the customer. To do this, simply add a new block of text to your message and, in this text, add the corresponding variable, in the example, we have added the variable corresponding to the customer's barcode.
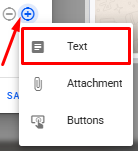
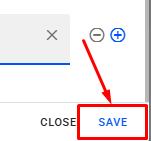
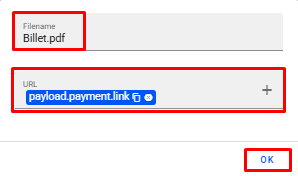
To add attachments to your message, simply click on the + icon in gray and click URL. Enter a file name and the billet variable and click on Ok.
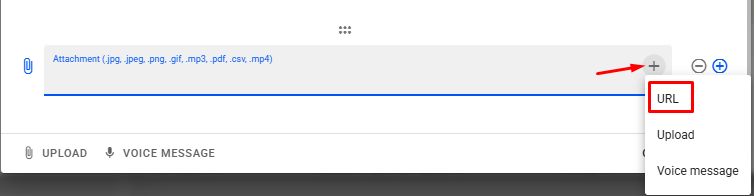
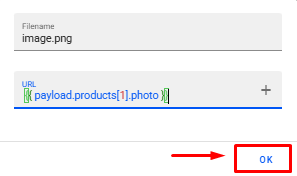
You can add an image of the product by clicking on add attachment and selecting the URL option again. Enter a file name, such as image.png and click Ok.
To finish, click on Save and make the connections in the automation.
Additional Settings
Adding a Tag
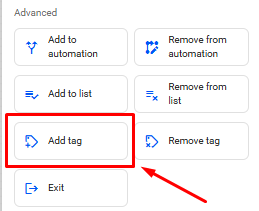
We can also add a block of tags to identify the lead that arrived via this automation. In the automation, right-click on the Add tag block.
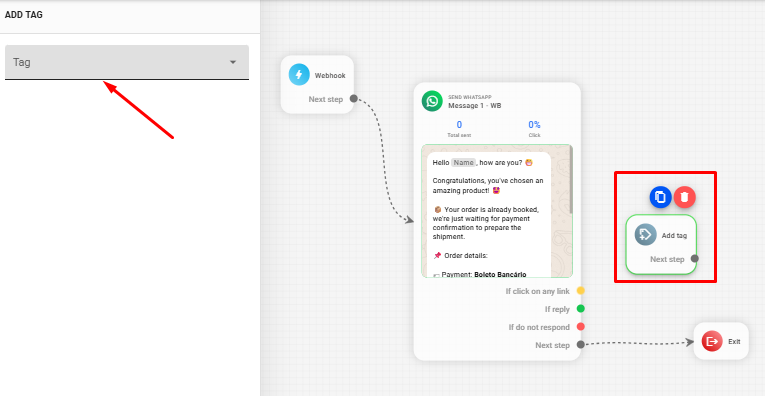
Select the block and click on the Tag option.
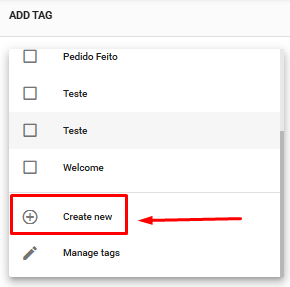
Click on Create new and enter a name and color for the tag, then click on Save.
Make the necessary connections for the automation to function properly.
Adding a Condition
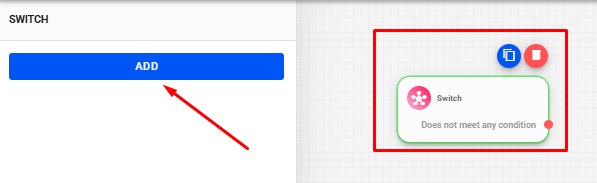
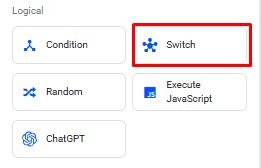
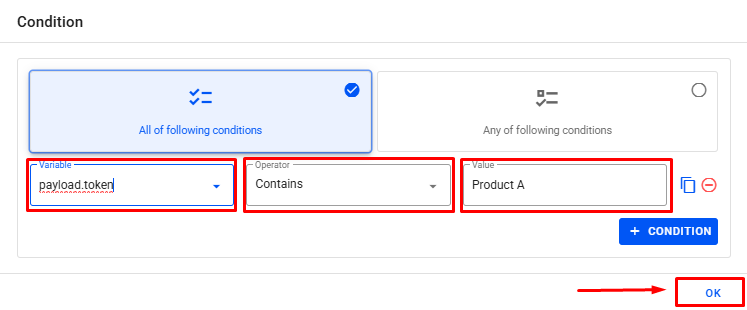
We can add a condition to send this message only if it meets a certain condition. To do this, right-click on Switch in the automation.
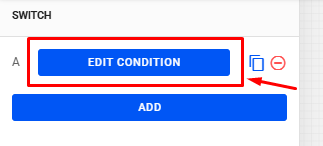
Select the block and click on Add and then on Edit condition.
To send messages to customers who have purchased a certain product, insert the variable of product reference → operator Contains → value Product Name, which means that only the customer who has purchased that product will receive the message.


Note: If you have other products and want to send different messages for each product, just add more conditions.
Make the connections in the automation flow and define the WhatsApp profile that will send the automation messages.

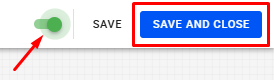
Activate the automation and click on Save and Close, so that the automation starts firing as soon as a webhook event is received in Reportana.
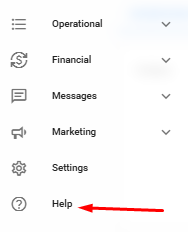
If you have any questions or difficulties, please contact our support by going to Help in the side menu of your account ➞ Contact Us via WhatsApp.