Introduction
Sending messages with tracking codes and order status is an effective way to keep your customers informed and reduce support inquiries. With Reportana, you can easily automate these messages, ensuring proactive and efficient communication. In this article, you’ll learn how to set up this automation and which variables to use to personalize your tracking messages.
How It Works
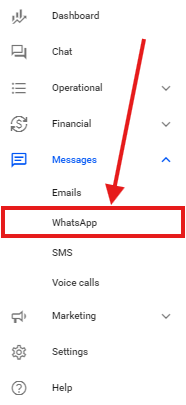
Log in to your Reportana account. Go to the side menu and click on Messages → WhatsApp. Or access: Messages - WhatsApp.
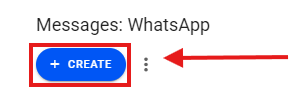
First, click on +Create.
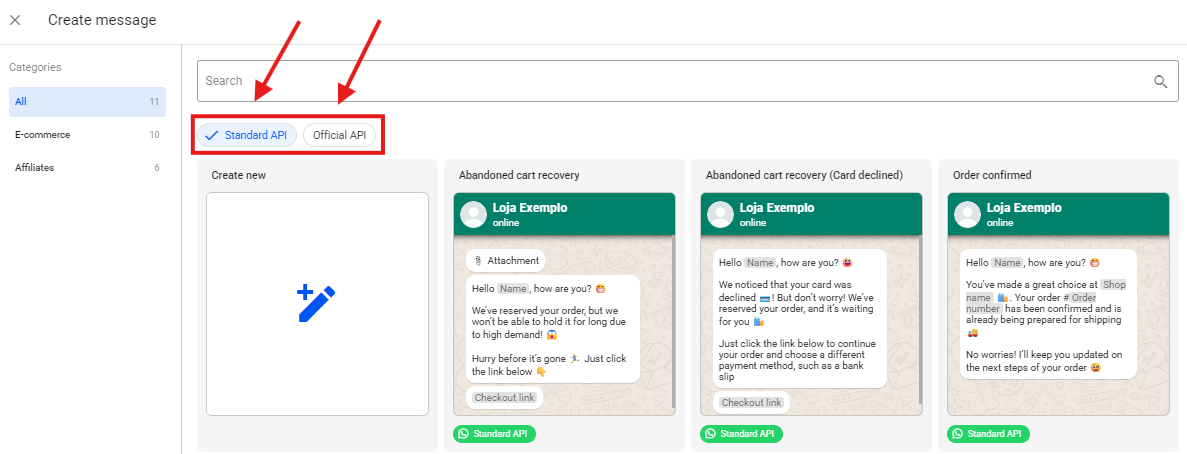
In this tab, you'll find some pre-approved message templates. They can be used as a base and freely edited to suit your needs.
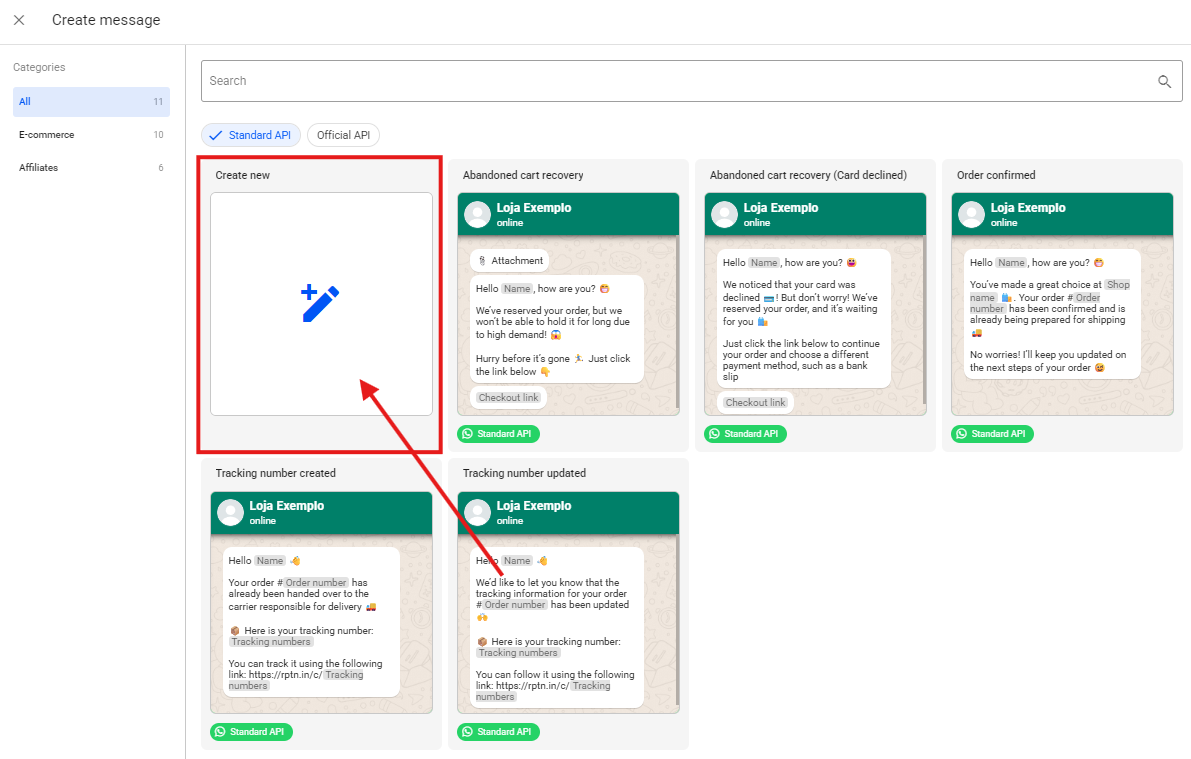
Select your connection type by choosing between Standard API or Official API.
Next, click on +Create New to start creating your personalized message.
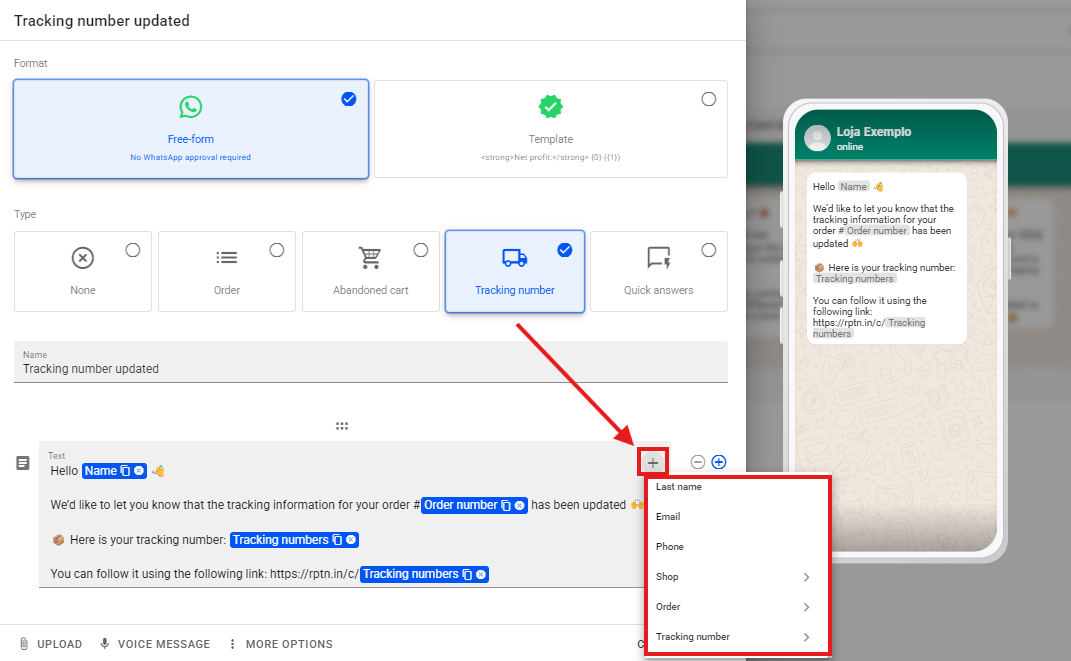
Select the Tracking Number option and create your message.
Create your message and click the “+” button to add the variables that will display your order details.


Note: For the tracking link to be sent correctly through the corresponding variable, the Reportana tracking plugin must be embedded on your website.
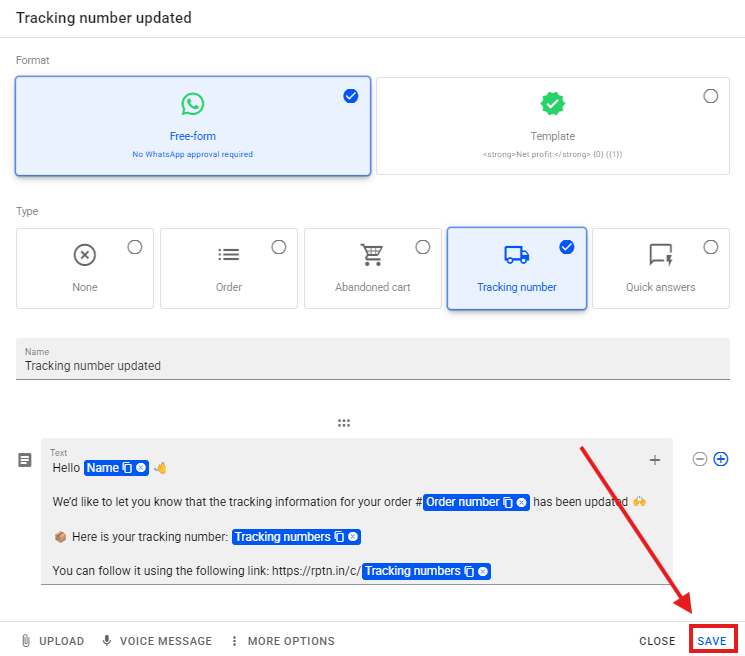
- After creating your message and adding all the desired variables, click Save to save your message.
Note: If you want to learn in more detail how to configure your messages on WhatsApp, we recommend that you watch our tutorial: Getting to know the WhatsApp message editor.
Sending semi-automatic messages
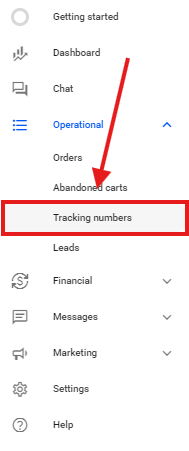
In addition to sending messages through automations, you can also send them manually. To do this, go to the side menu and select Operational → Tracking Numbers.
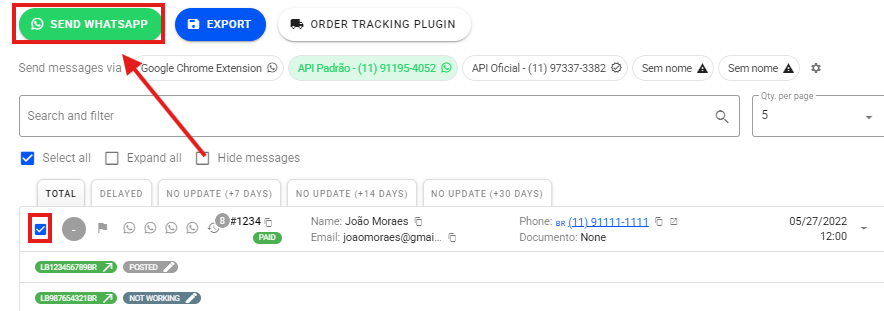
Select the profile responsible for sending the message.
Select the lead you want to send the message to → Send WhatsApp.
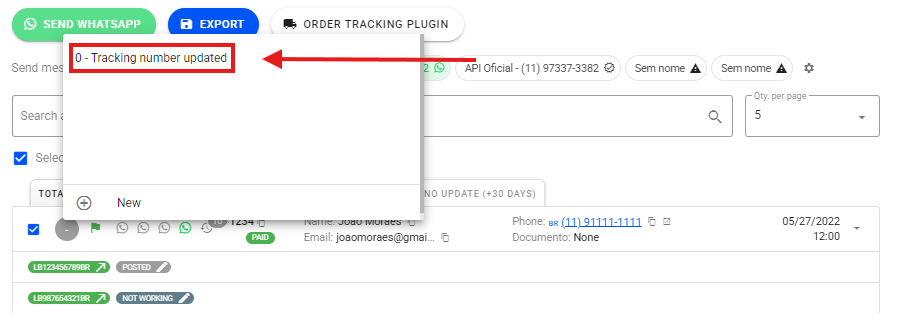
Select your created message.
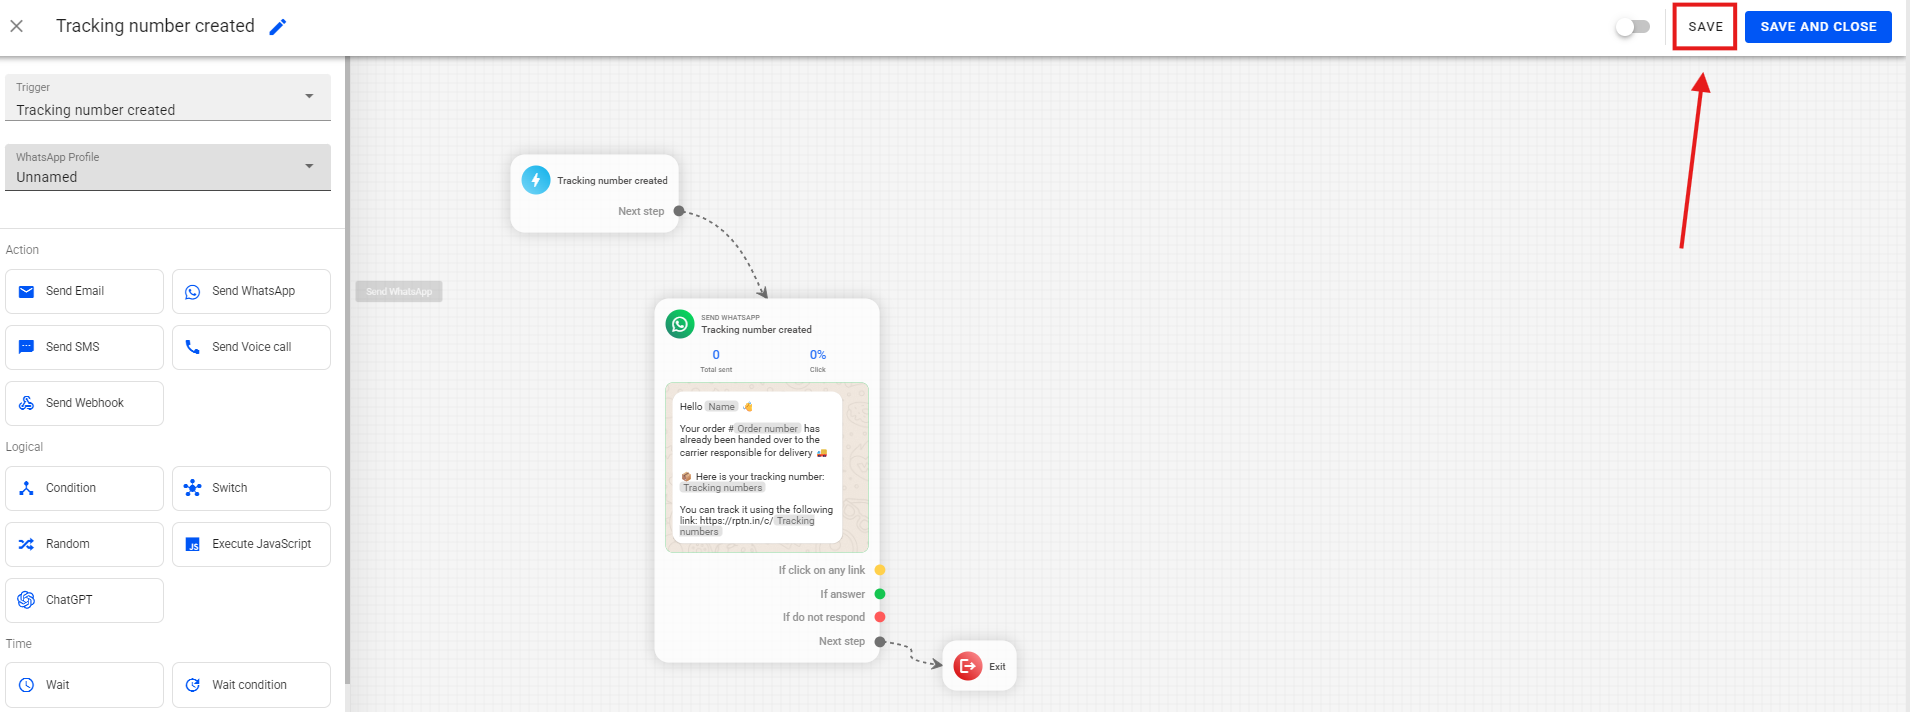
Tracking number Created
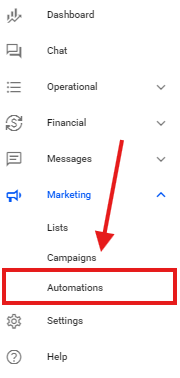
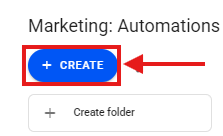
To add this message to your automation, go to the side menu and click on Marketing → Automations. Or access: Marketing - Automations.
Click on +Create.
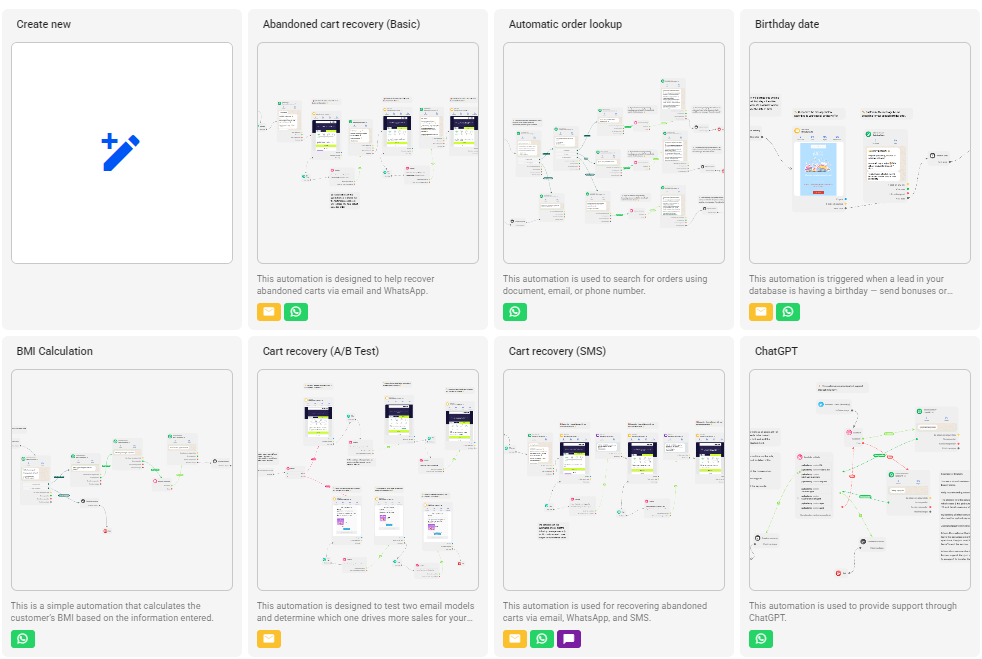
In this tab, you'll find some automation templates created and validated by the Reportana team. These can be used as a base and freely edited to fit your needs.
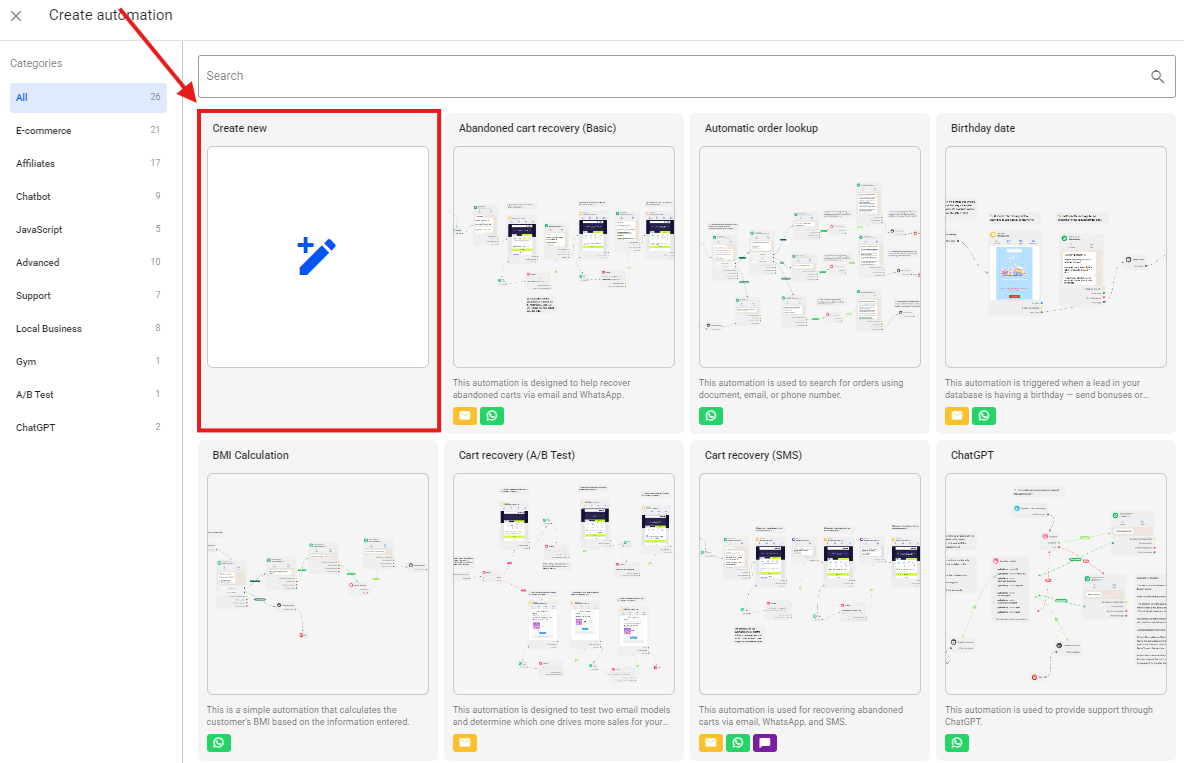
Select Create New.
Select the trigger for your automation based on the type of message created.
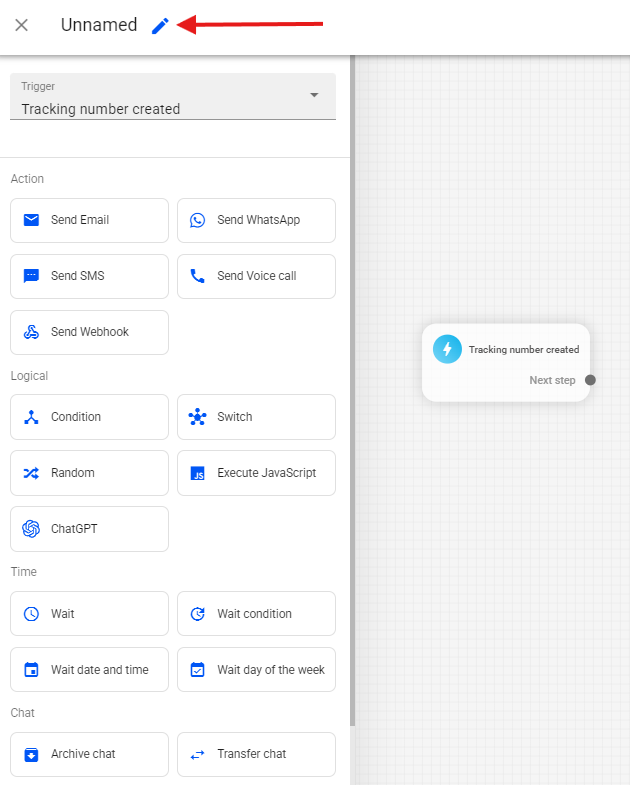
First, click the pencil icon and enter the name of your automation.
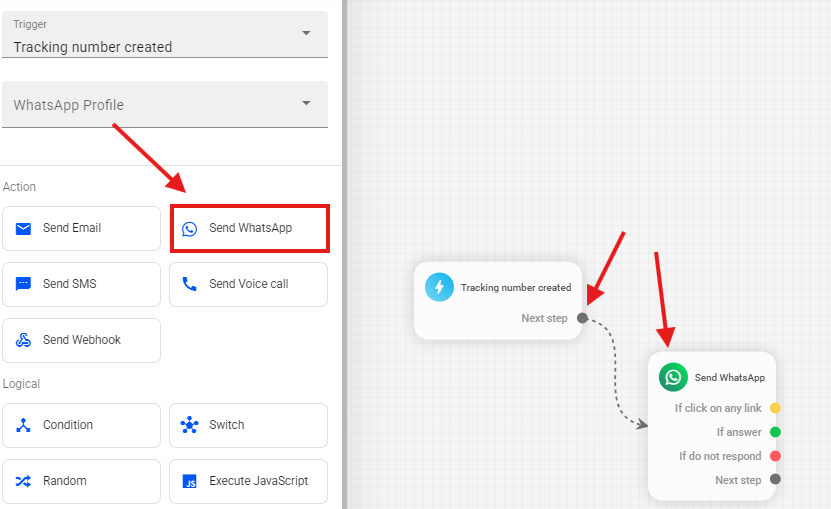
Next, in the side menu, select the Send Whatsapp option to add it to the flow, and link the Next step sub trigger of your trigger to the new block.
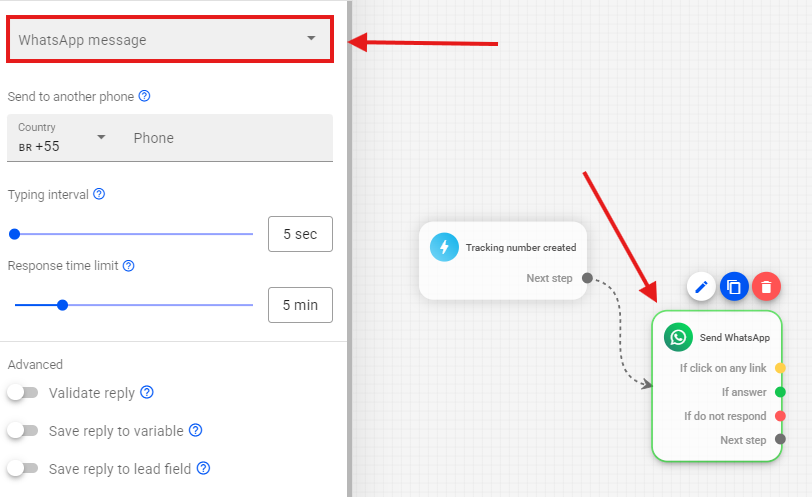
Select your WhatsApp block, and under the WhatsApp Message option, choose your created message.
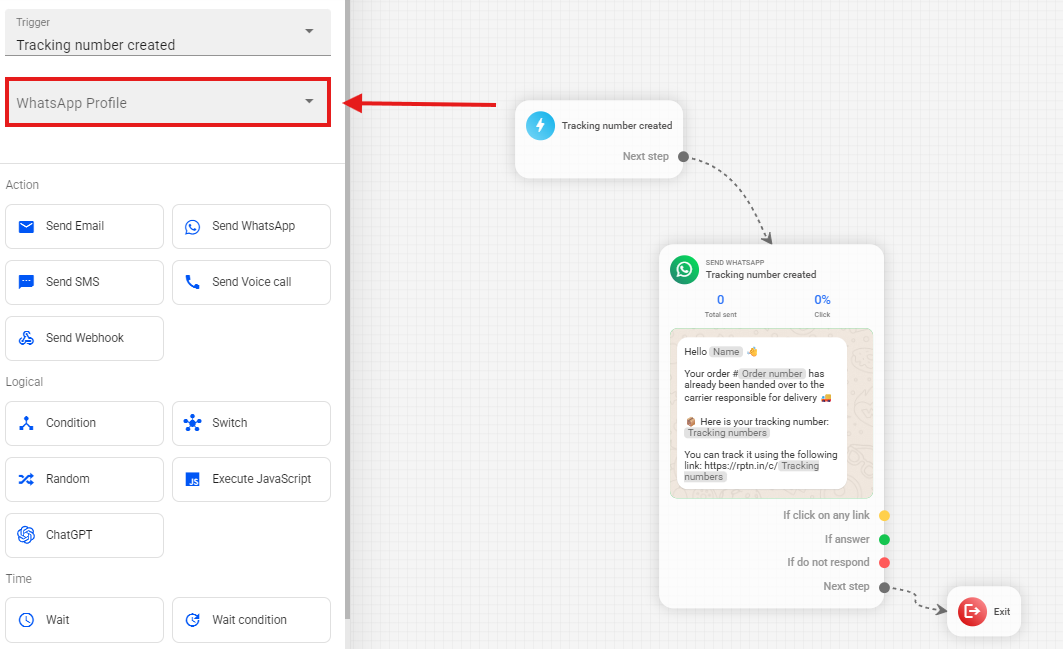
After adding your WhatsApp message to the flow, go to the side menu and select the WhatsApp profile that will be responsible for sending these messages.
After creating your flow, select the Save option to save your automation.
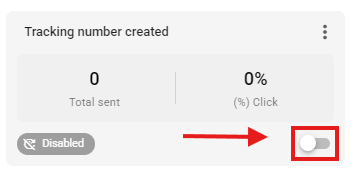
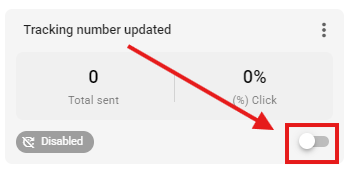
After saving your automation, it will be displayed as follows; select the highlighted button to activate it.
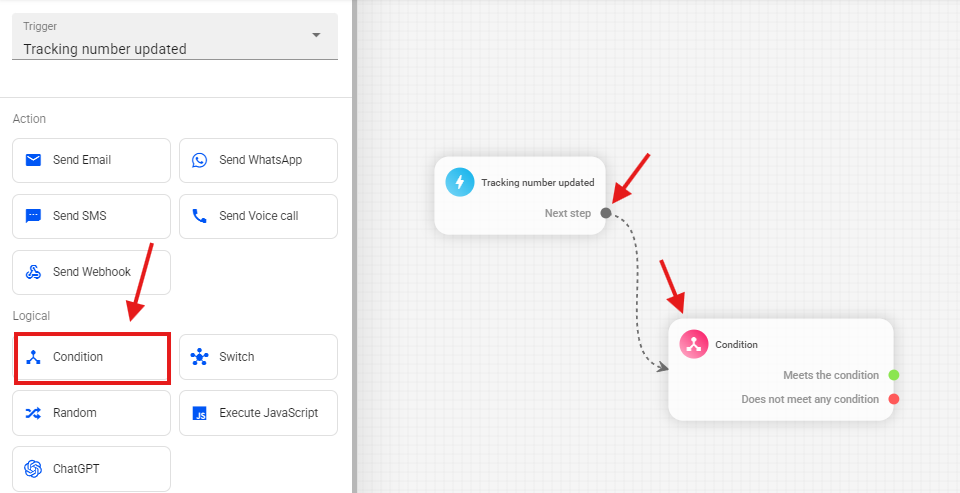
Tracking number updated
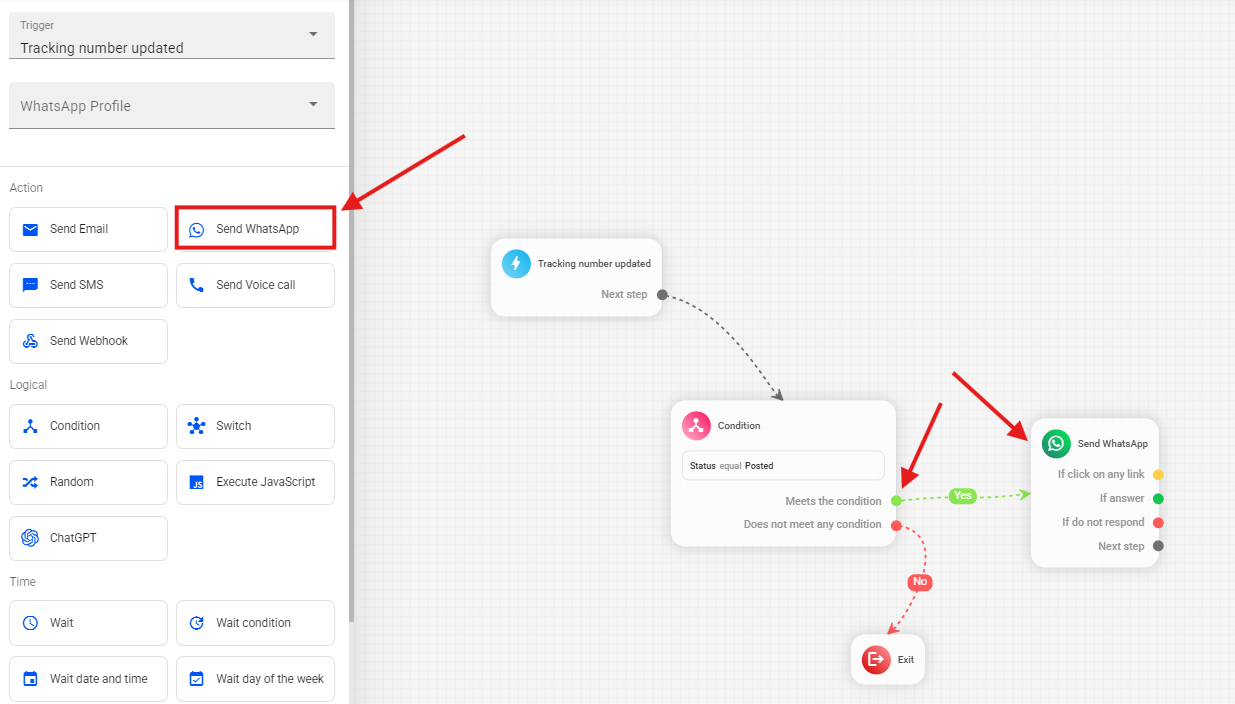
In this other example we will configure the automation for tracking updates, using the Tracking number updated trigger.
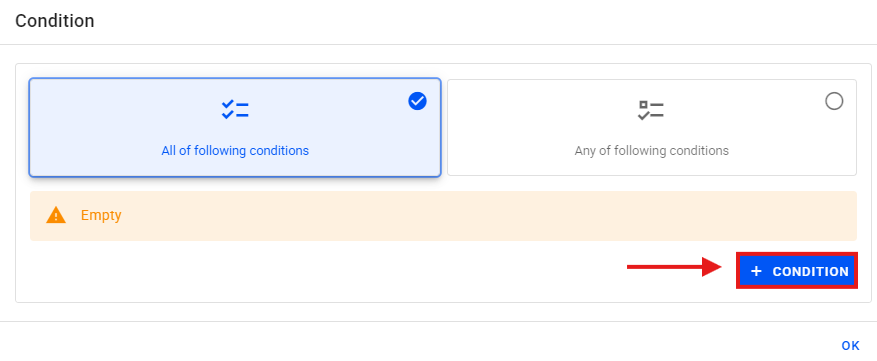
For this setup, add a Condition block to filter the order status before messaging, and link the trigger's Next Step sub trigger to your condition block.
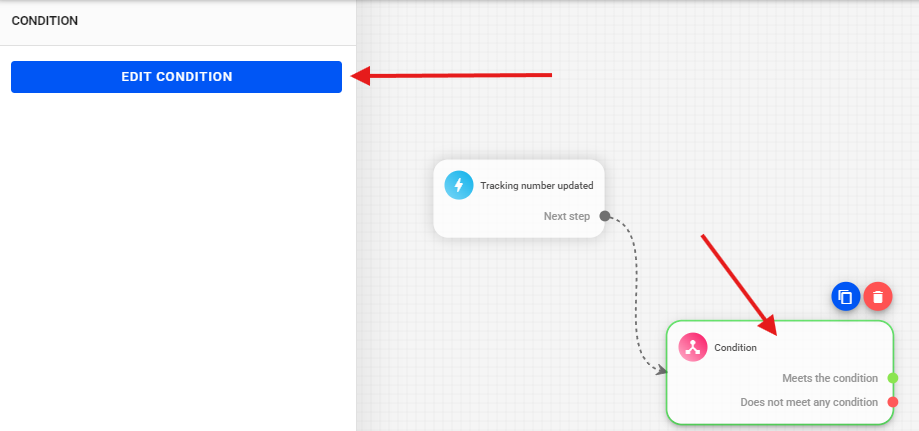
Select your condition block and choose the Edit Condition option.
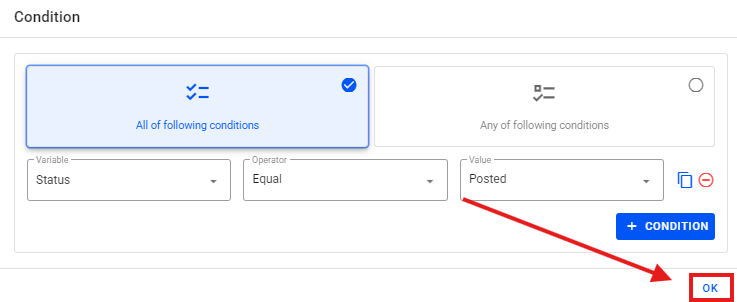
Select the option + condition.
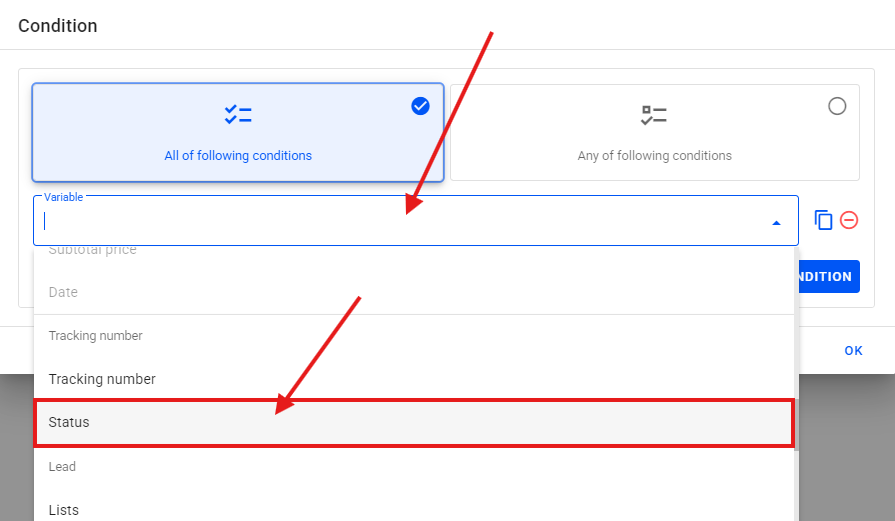
Select variable → Status.
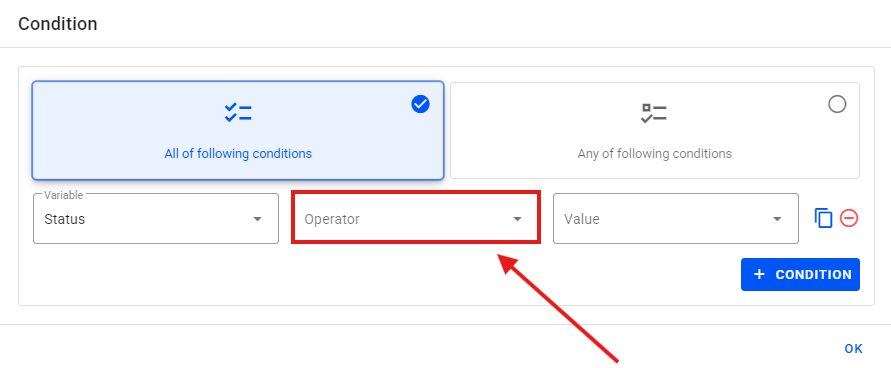
Select Operator → Equal.
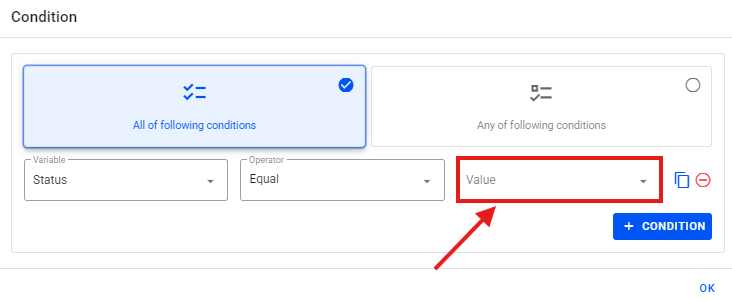
Select Value → Choose the status type you want. At this stage, you’ll be able to view all available status types. Select the one that matches the message you created.
Select Ok.
In the side menu, add the Send WhatsApp block and link it to the Meets the Condition sub-trigger from your condition block to the message block.
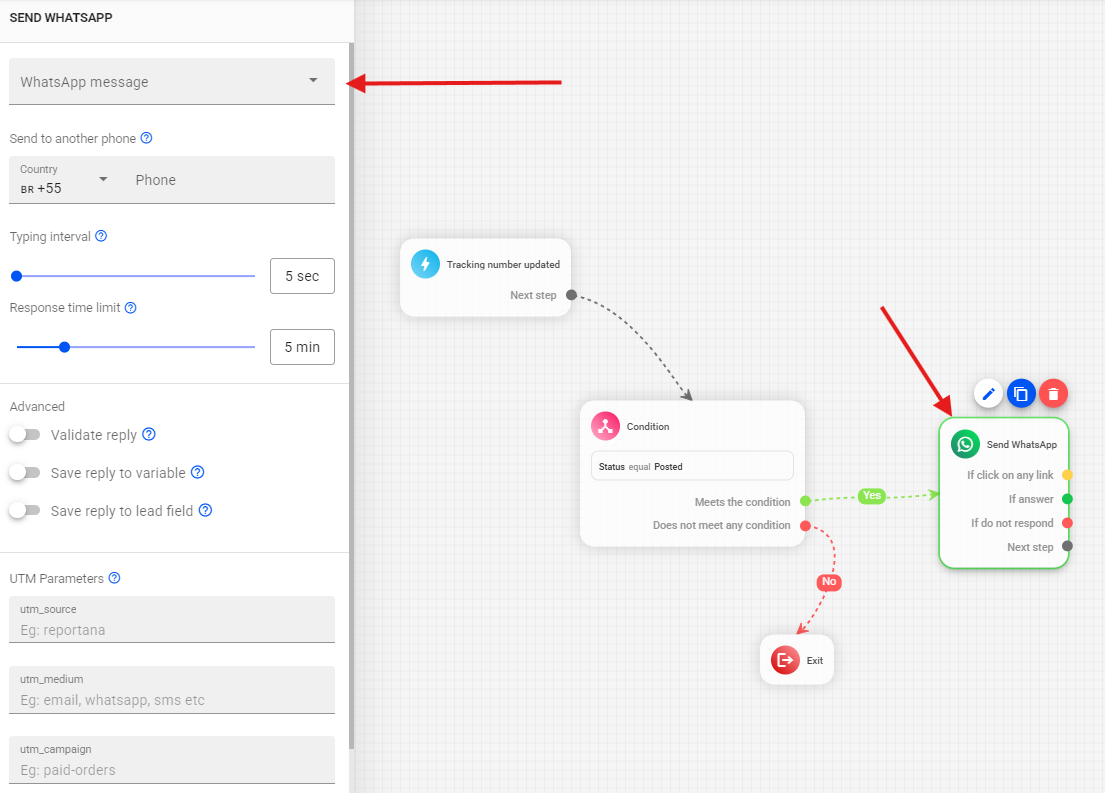
Select your WhatsApp block, and under the WhatsApp Message option, choose your created message.
After adding your WhatsApp message to the flow, go to the side menu and select the WhatsApp profile that will be responsible for sending these messages.
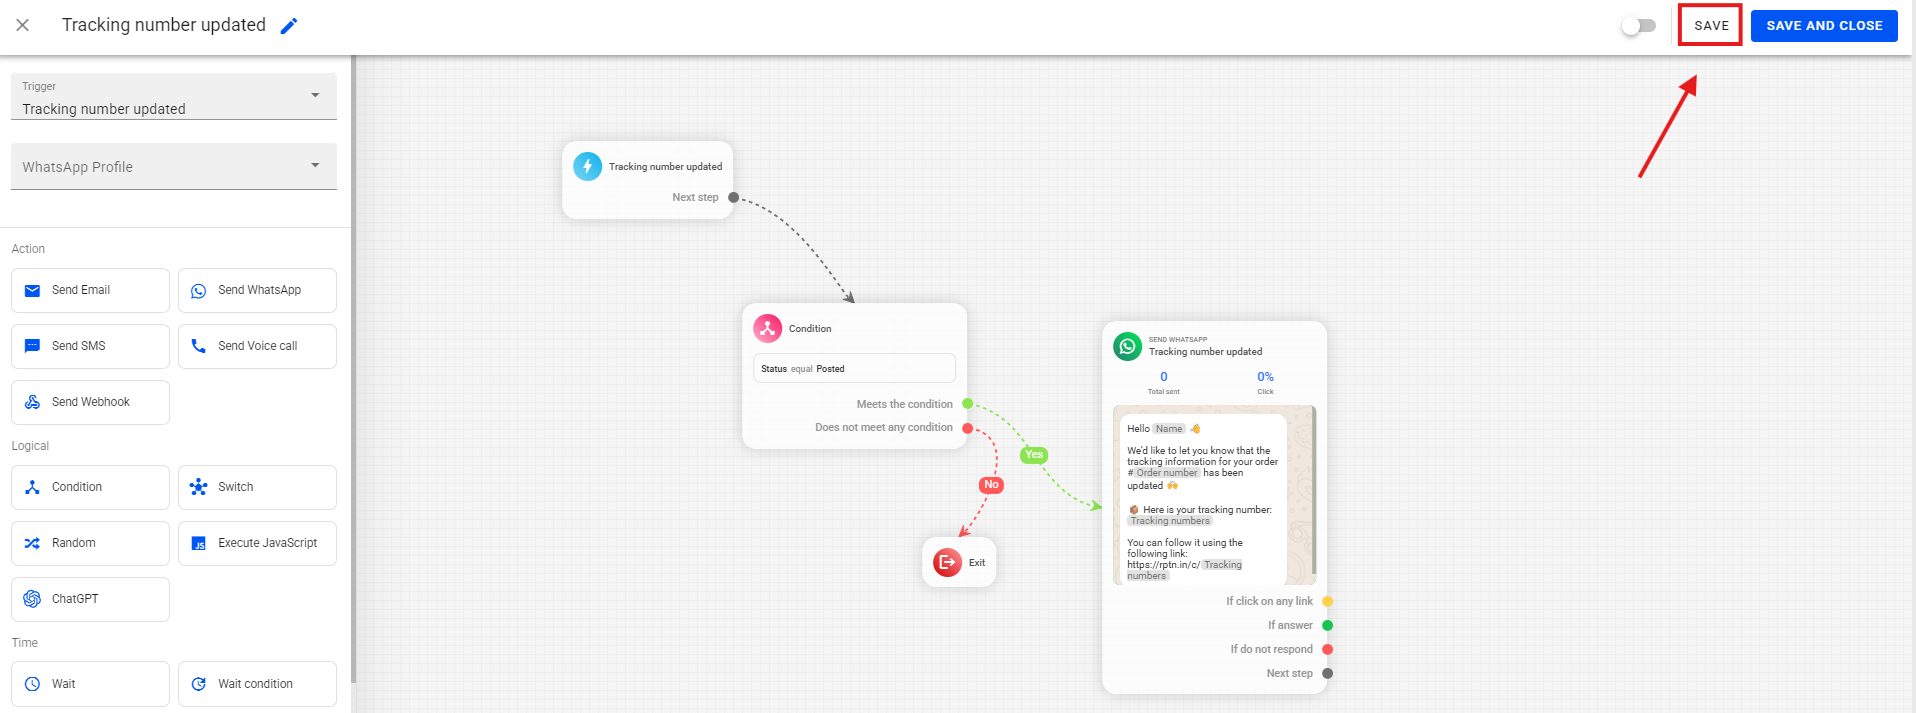
After creating your flow, select the Save option to save your automation.
Finally, click the highlighted button to activate your automation.