Introduction
Validating your own email domain is essential to ensure that your emails reach your customer’s inbox and are not blocked by spam filters. At Reportana, we can generate and publish the SPF, DKIM, and DMARC records on your domain’s DNS server, which increases the credibility of your business’s email sends and improves the security and deliverability of your messages.
How It Works
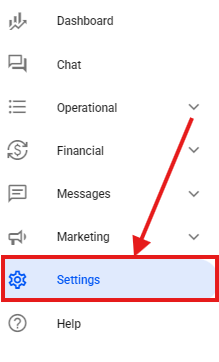
- In your account, go to the side menu and select Settings.
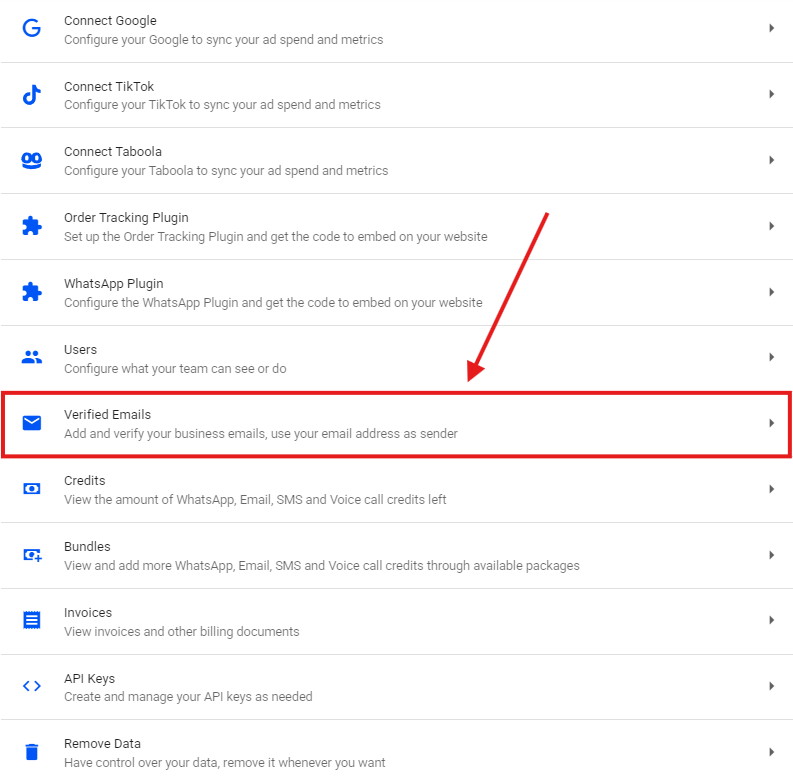
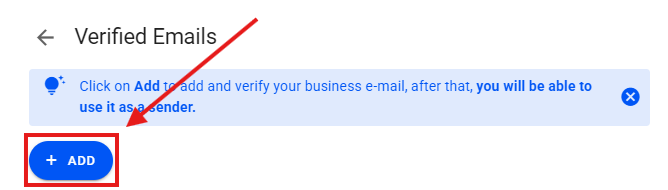
- Then, click on the Verified Emails option. Or access: Settings — Verified Emails
- Click + ADD.
- In the Email field, add the business email address you want to verify and click Save.
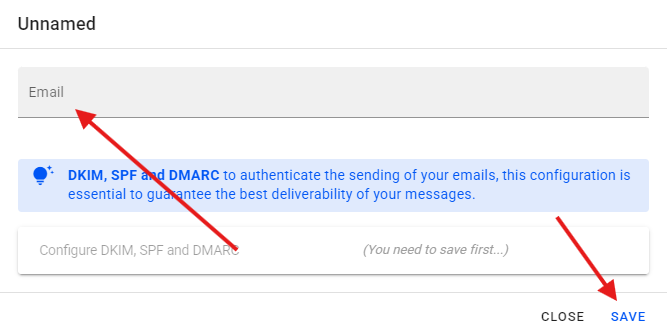
Note: If you're using a custom domain, it's essential to add your business email (for example: [email protected]). This conveys more professionalism, increases customer trust, and reduces the chances of your messages being marked as spam.
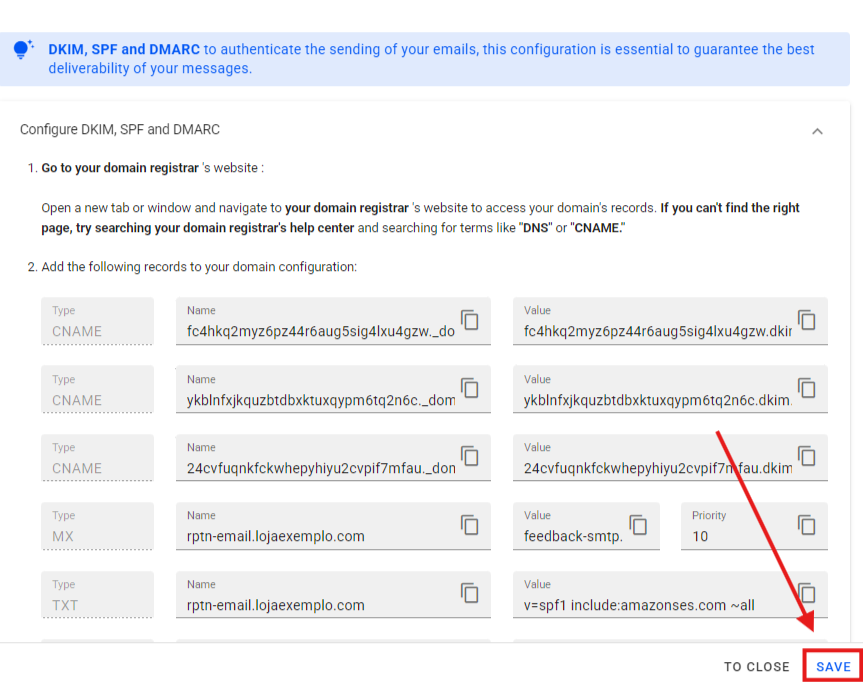
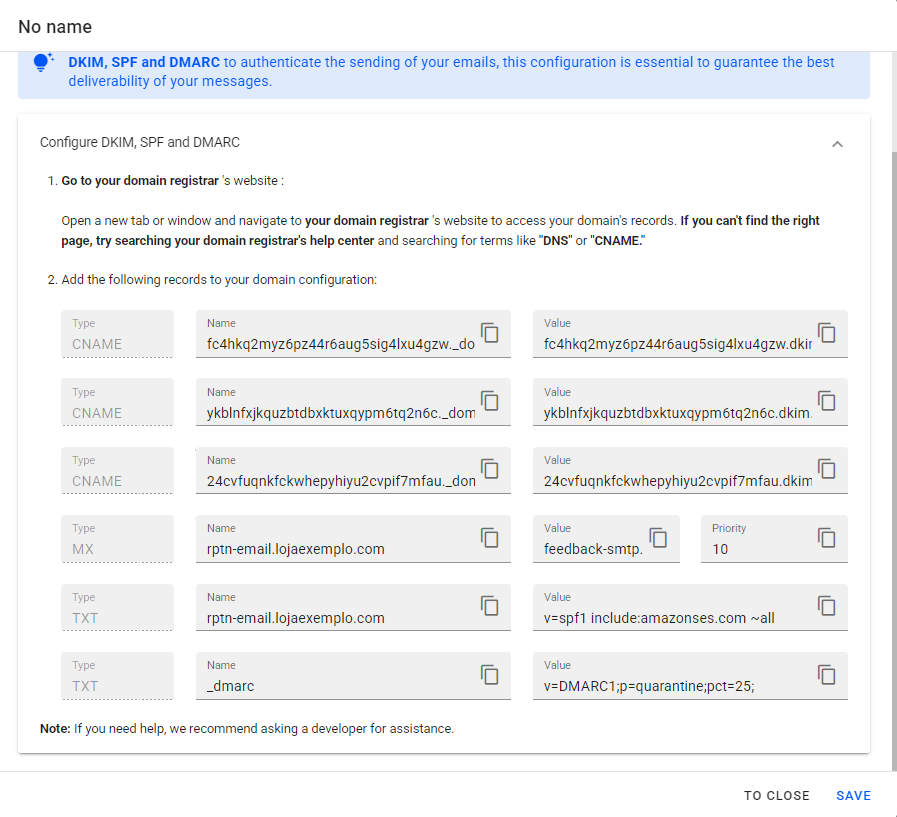
- A new tab will automatically open, where you can view the DKIM, SPF, and DMARC records needed to verify your domain.
Note: If you have questions about what DNS is, we recommend contacting your domain registry support for guidance.
The setup steps may vary depending on your domain registrar platform. In this example, we’re using Cloudflare as the domain registrar, but if you're using another provider, we recommend checking your platform's help center and searching for terms like “DNS” or “CNAME”.
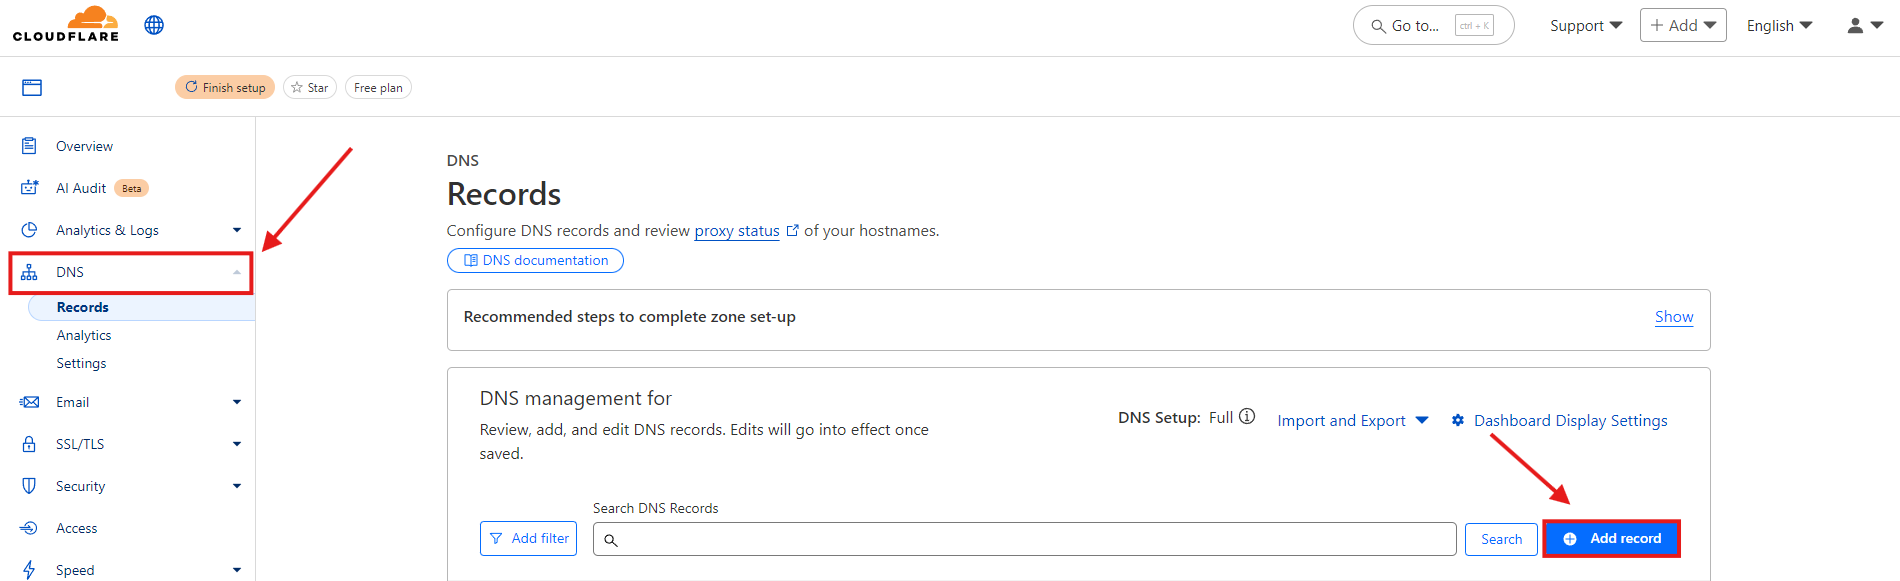
To start configuring the records, open a new tab or browser window, go to your domain registrar’s website, and look for the “DNS” or “DNS Zone” management area.
In the example using Cloudflare, navigate to the DNS Management section and click Add record to include the necessary settings.
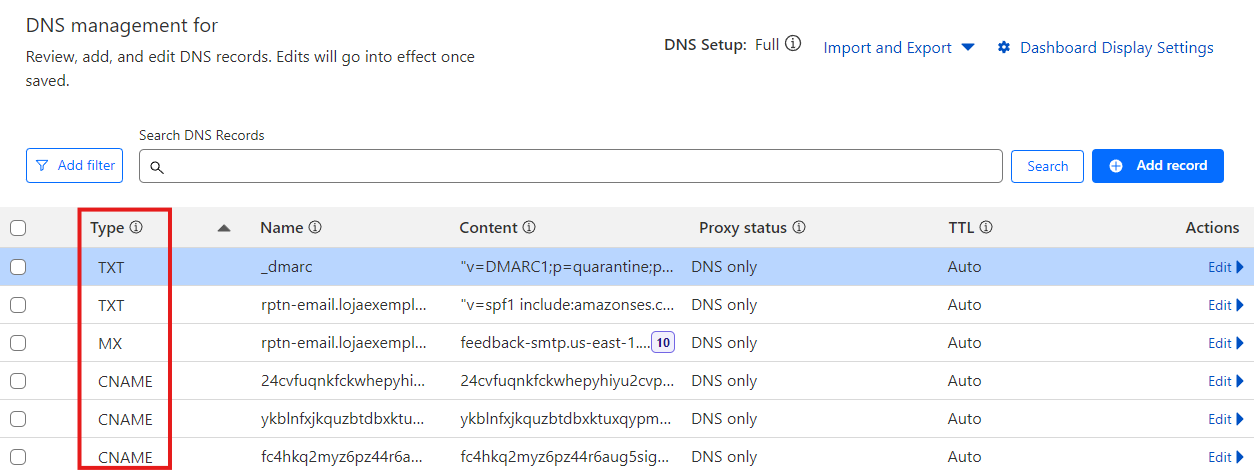
Add all the records available in your Reportana account, just copy and paste them correctly.
Once finished, return to your Reportana account under Settings → Verified Emails and click Save.
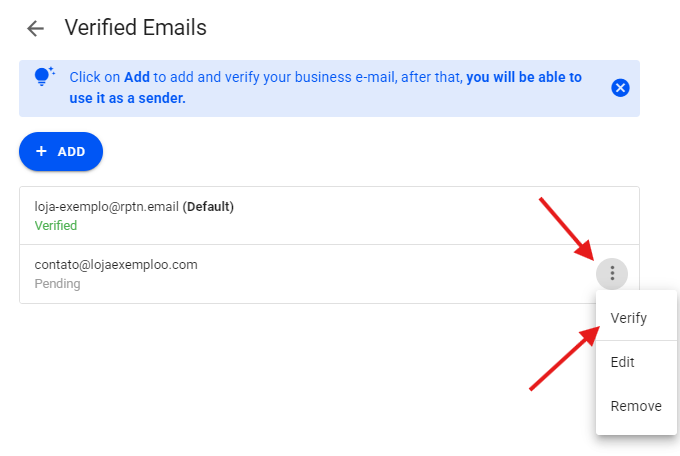
To confirm that the email has been verified, click on the three dots → Verify. Keep in mind that this verification process may take a few minutes or even several hours to complete.
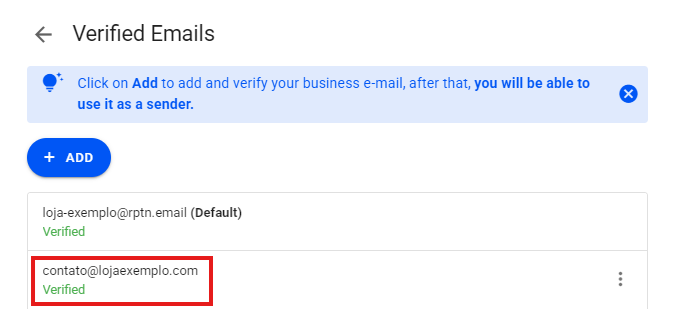
Once verified, your email will appear as ”Verified” just below.
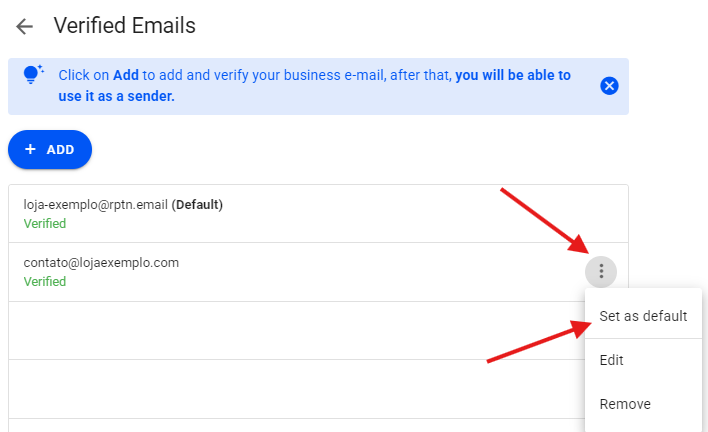
Finally, to use it for your mailings, you must set it as the default. Just click on the three dots again → Set as default.