Introduction
In our automation editor, you can use logic, time, and advanced actions to customize your automations to follow specific rules and schedules. This increases the possibilities when creating automatic funnels and allows the creation of advanced automations. In this article, we will teach you how to use each of these options to configure your automations.
This article is organized into sections, containing instructions related to Logic actions, followed by instructions for Time, Chat, and Advanced, with topics related to each action. You can use the side summary to locate the desired instructions.
How It Works
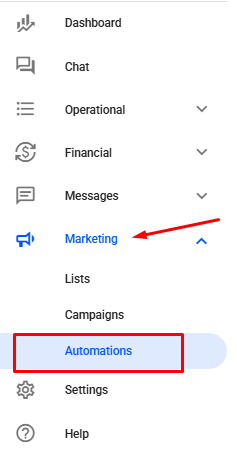
First, access our automation editor by going to the Marketing → Automations tab. Or access: Marketing — Automations.
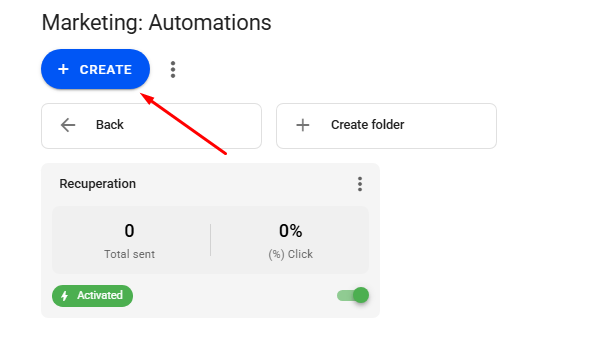
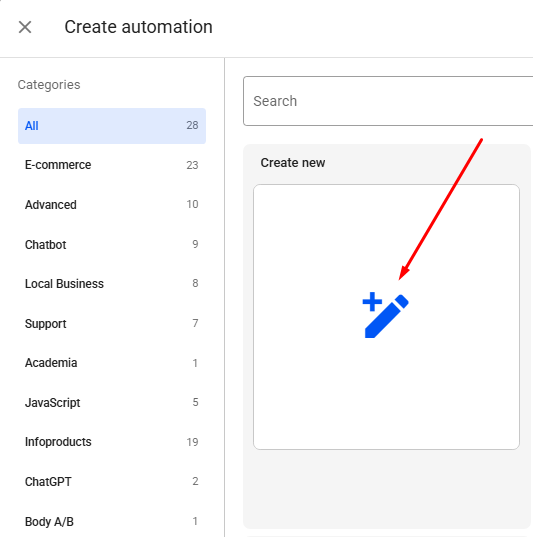
Then, click on + CREATE and Create new to create a new automation.
Or click on the three dots on an existing automation → Edit.
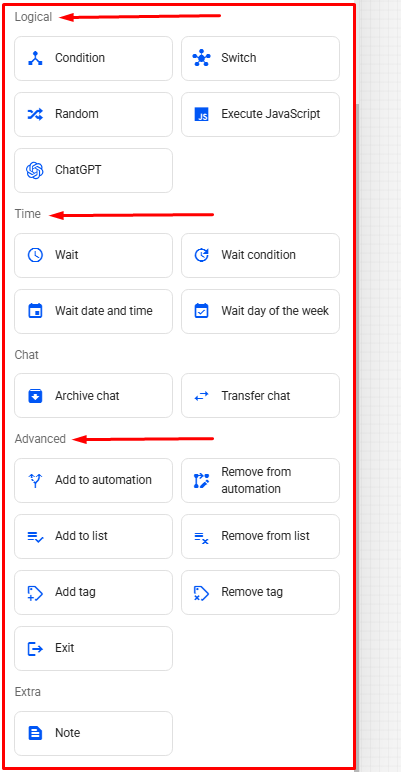
In the automation editor, in the side editing tab, you will find all available actions to customize the automation sendings.
How to Use Logic Actions
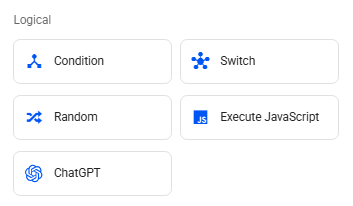
In Logic actions, you can add Condition, Multiple Condition, Randomizer, Execute JavaScript, and ChatGPT.
Condition
The first option available is Conditions. A condition is basically a rule that needs to be met or not for the funnel to continue.
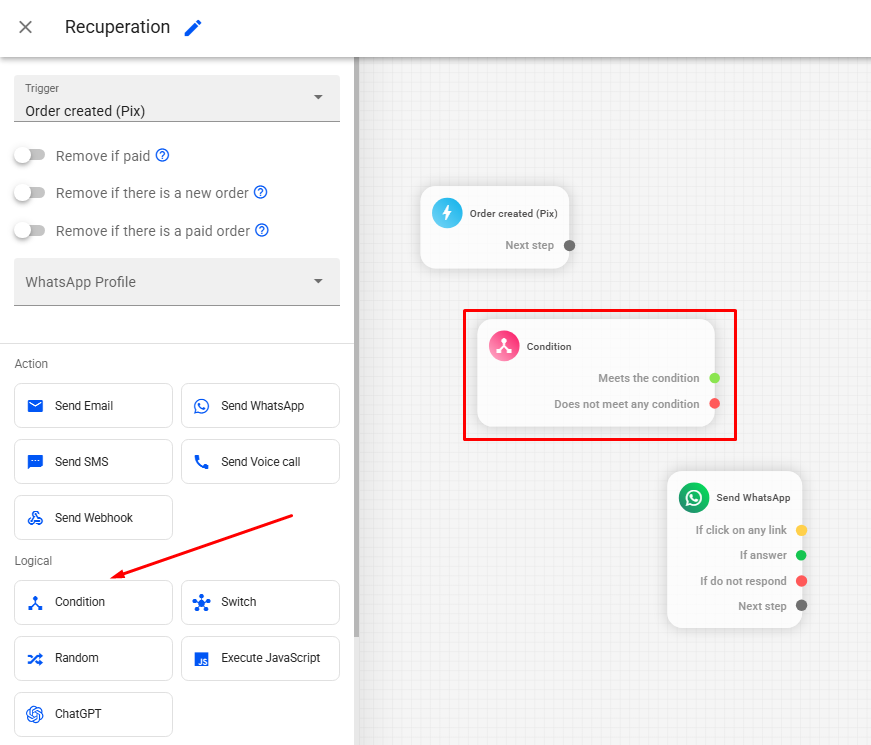
To add a new condition, click on the Condition block in the editor's side menu.
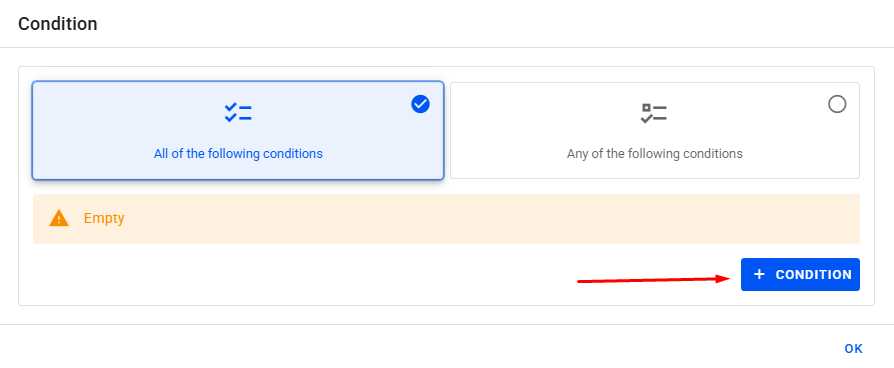
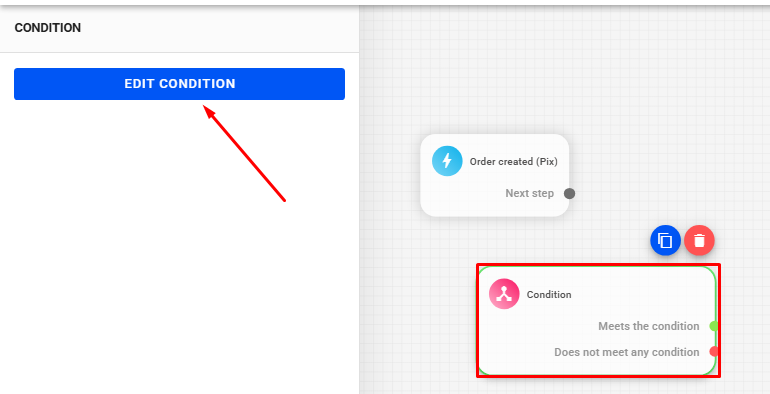
To define the logic of a new condition, select the condition block and click on Edit condition.
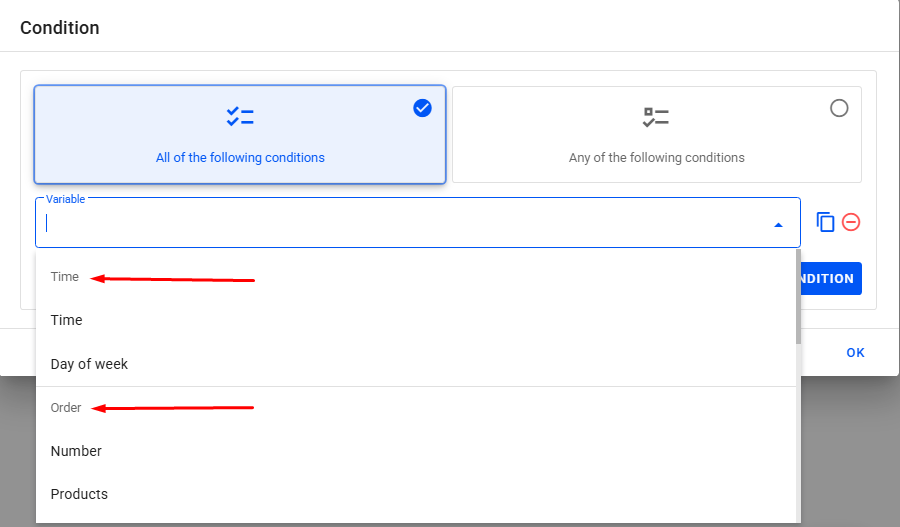
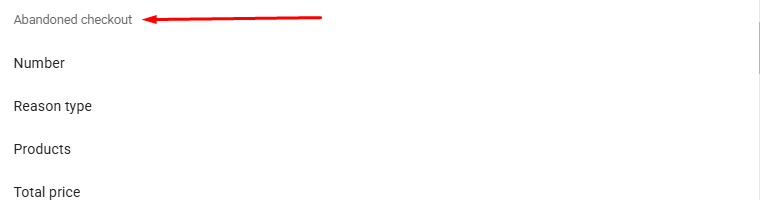
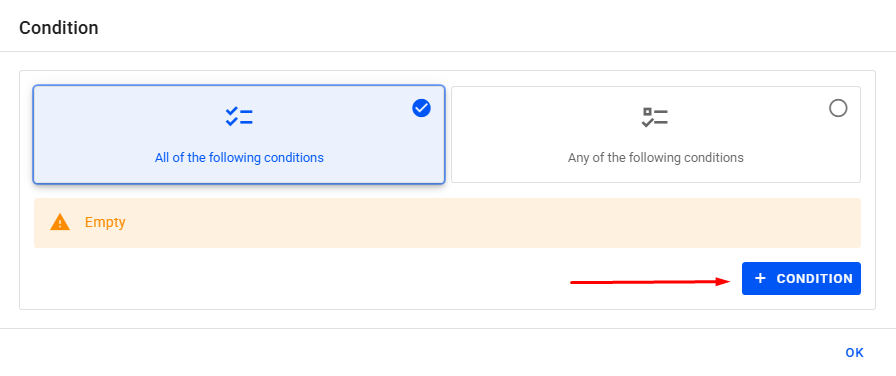
By clicking on + Condition, we can define filters related to time, orders, abandoned carts, tracking numbers, and leads. These options become available for use in the condition depending on the trigger used in the automation. For example, if using an automation with the "order created" trigger, time, order, and lead conditions will be available.

It is possible to add more than one condition in the same session, if necessary for the logic you want to apply. Just define your first condition and click again on + Condition.
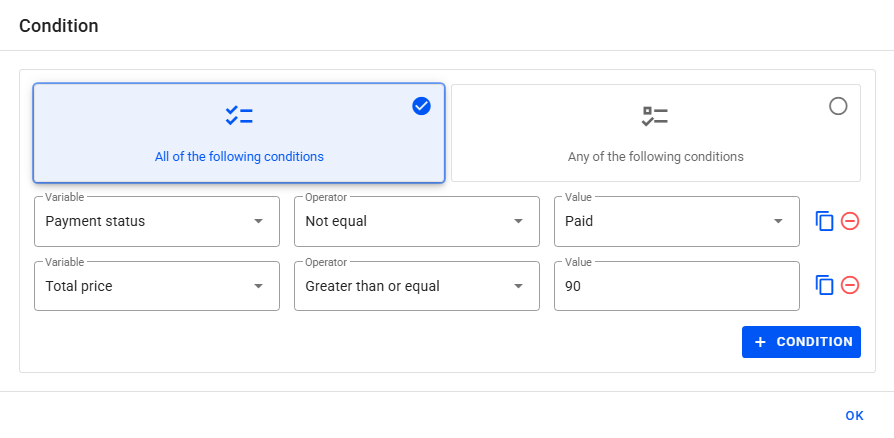
We can also relate the conditions through the option All of the following conditions or not relate them through the option Any of the following conditions.
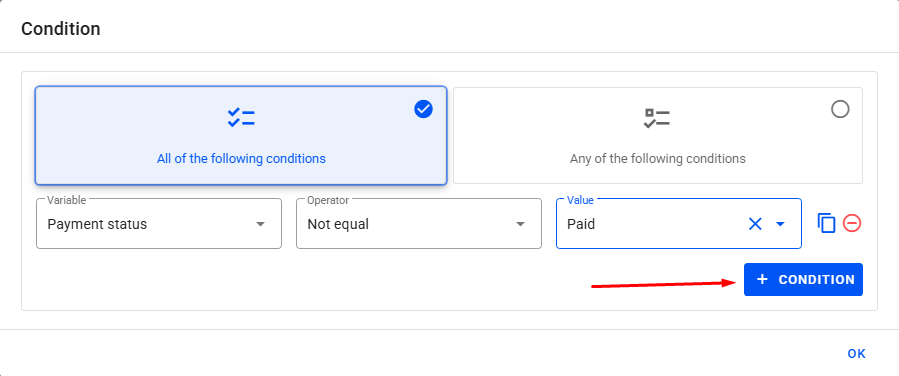
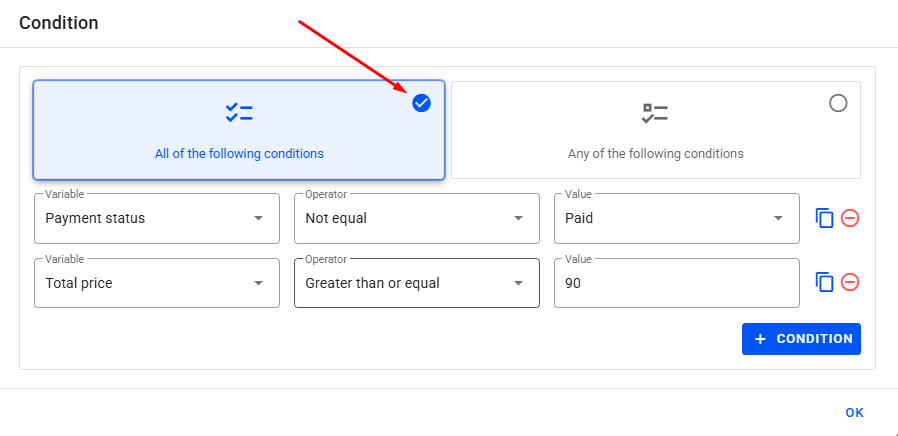
In the example below, we are setting the rule that for a customer to pass through the condition, they must not have paid for the order and the total value of the order must be equal to or greater than 90:
In this other example, we are defining that the customer can receive the message regardless of the payment method being boleto or Pix:
Multiple Condition
Just like using single conditions, we can also add several conditions at the same time by using multiple conditions. With this, it is possible to create a different outcome for each condition. This allows the automation to be segmented for different situations.
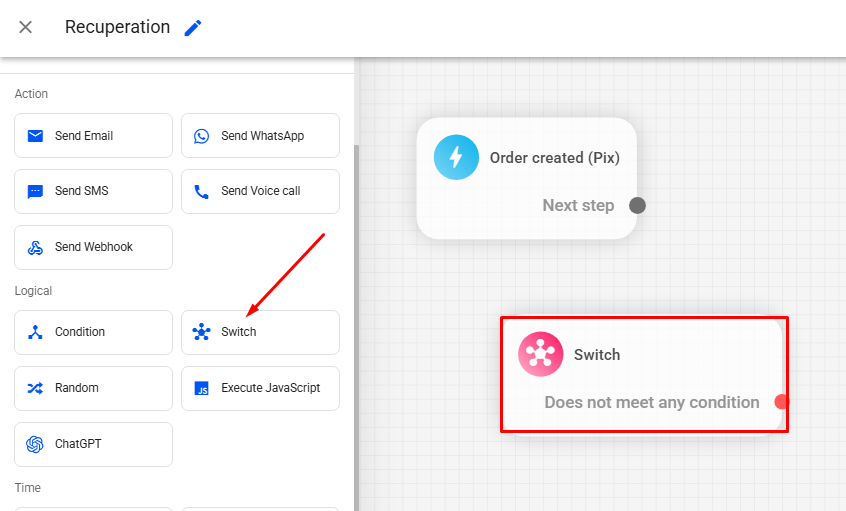
To add a multiple condition in your automation, click on the Multiple Condition block in the editor's side menu.
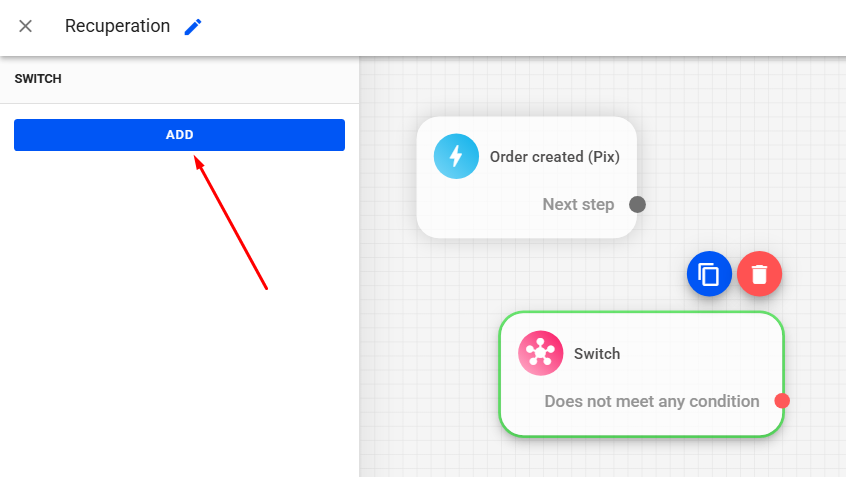
To define the desired conditions, select the block referring to the multiple condition and click on Add. Each new condition will be added as a new output.
To apply the logic of each added option, just click on Edit condition. Edit the condition as described in the previous topic.
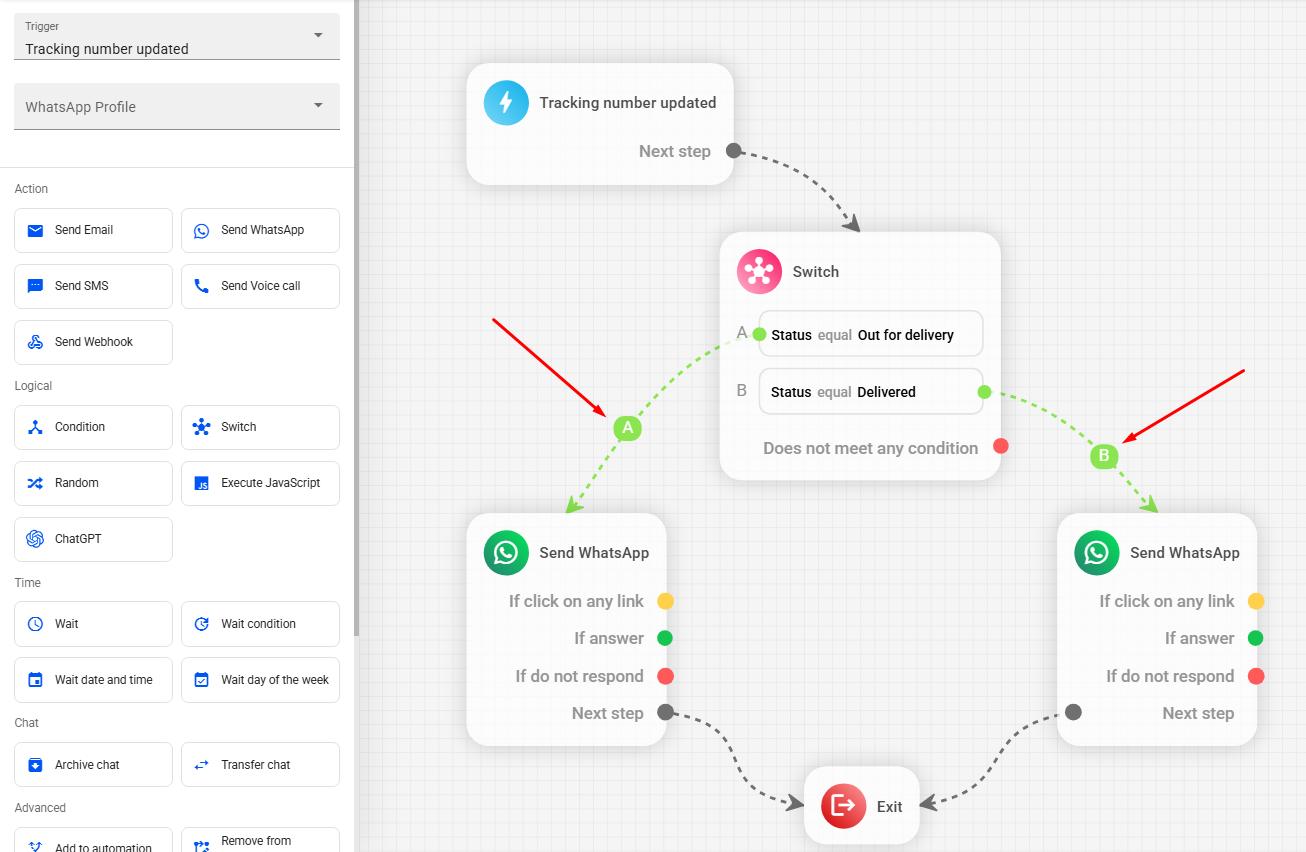
In the example below, we used the multiple condition in an automation to inform the customer about tracking updates. If the tracking status is “Out for delivery”, the customer will receive the message connected to output “A” of the multiple condition, informing that the order is out for delivery. If the status is “Delivered”, they will receive the message connected to output “B”, informing that the order was delivered:
Randomizer
The Randomizer allows you to divide the automation into different probabilities, with as many outputs as you need. It is ideal for performing A/B tests or testing different flows in a single automation.
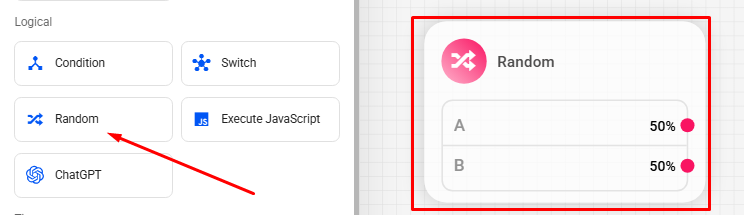
To add a randomizer in your automation, click on the Randomizer block in the editor's side menu.
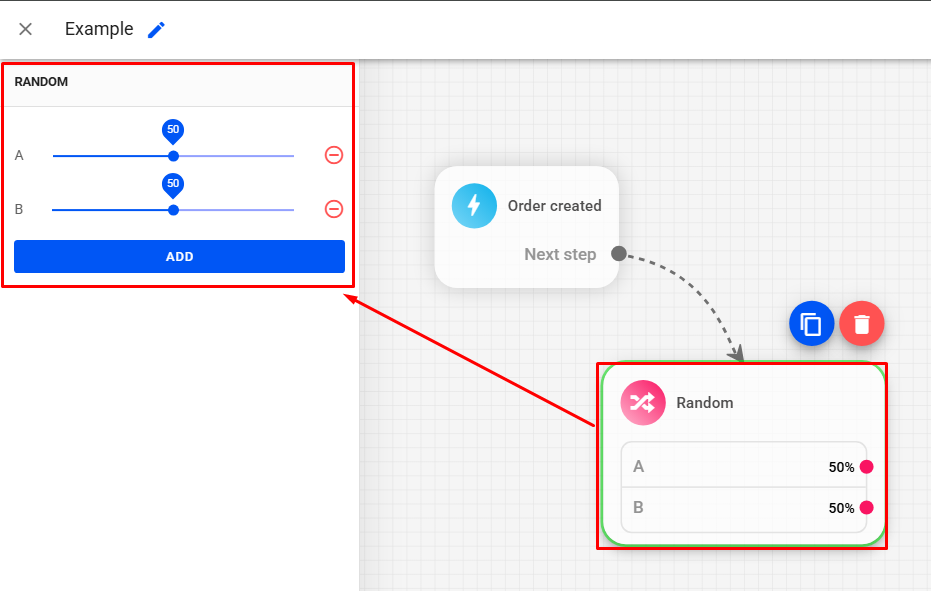
Click on the block to select it.
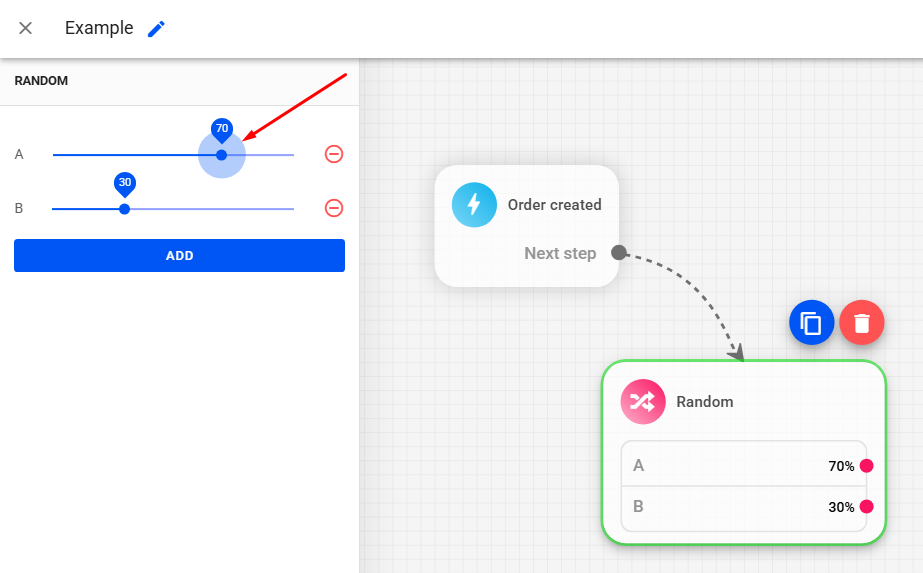
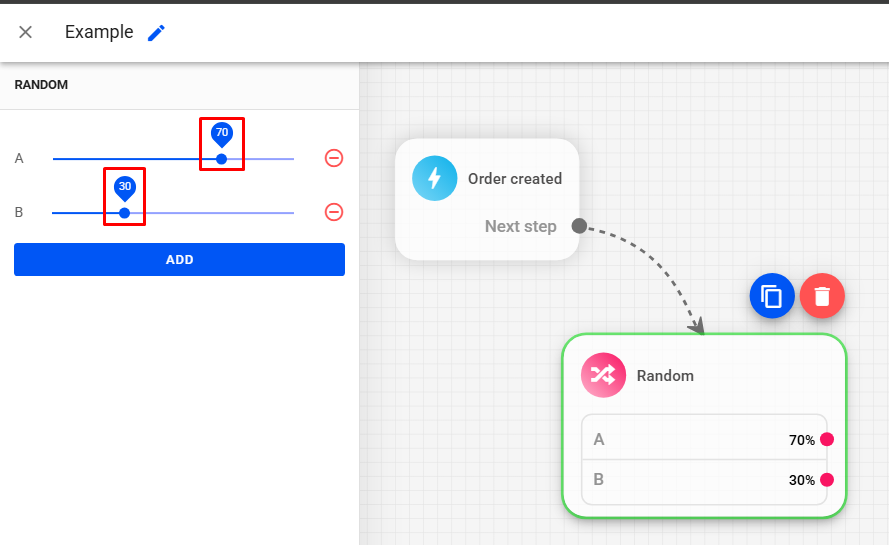
To configure the percentage of each output, just click on the blue dot and drag according to the desired percentage.
The other outputs will automatically adapt according to the remaining percentage once you define the first.
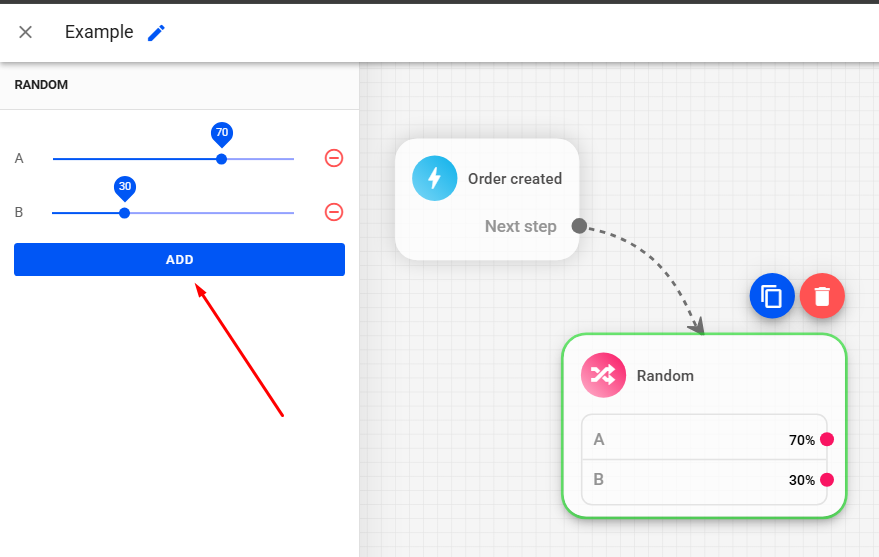
By default, we will have two outputs, but we can add new outputs by clicking ADD.
When adding a new output, all outputs will automatically adapt equally.
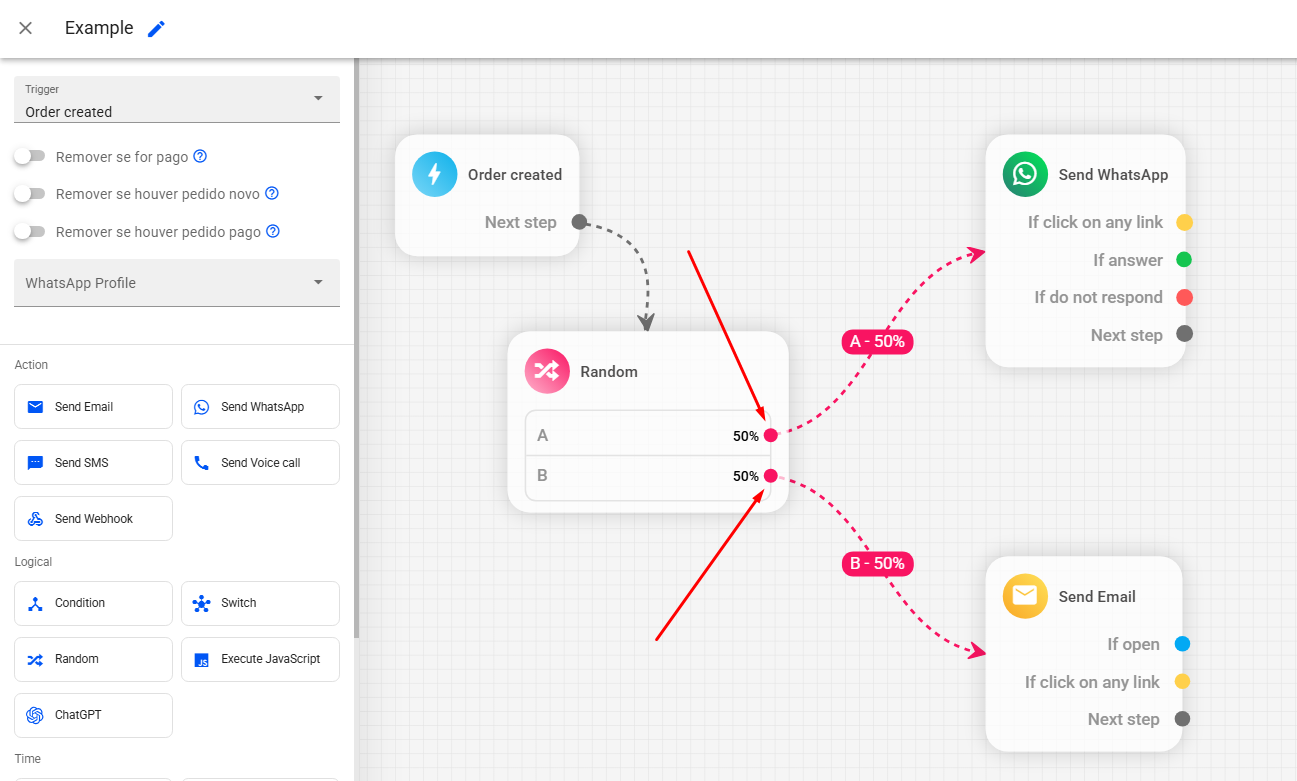
In the example below, from one of our model automations, we used the Randomizer to test two different message flows in a single automation, one for email messages and the other for WhatsApp:
Execute JavaScript
The Execute JavaScript feature is intended for those with programming knowledge. With it, you can insert code directly into automations, allowing for new features and increasing the level of customization.
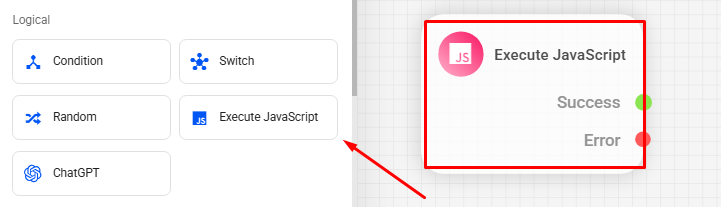
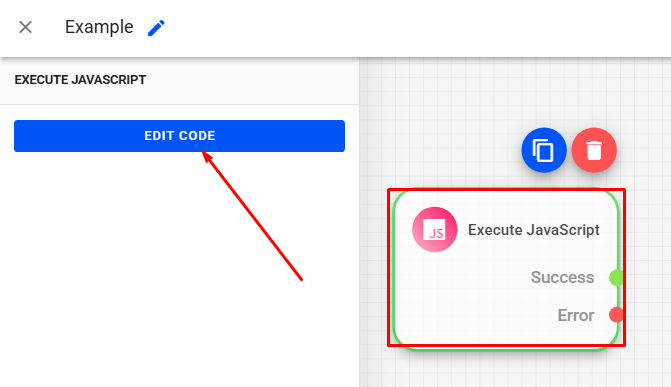
To add a JavaScript block in your automation, click on the Execute JavaScript block in the editor's side menu.
Click on the block to select it. Then click on EDIT CODE.
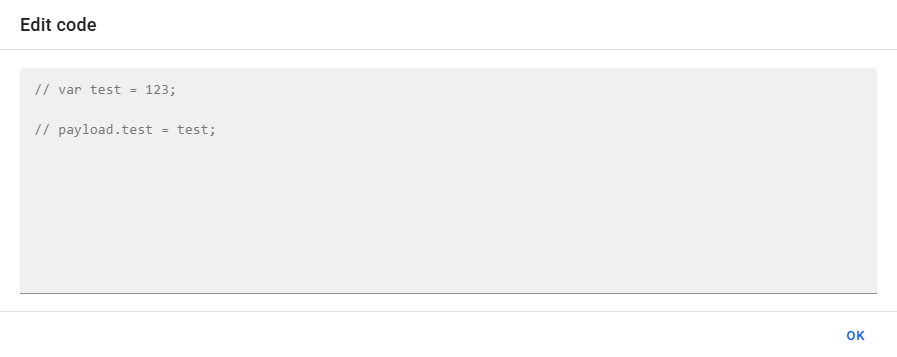
Add your code in the code editor.
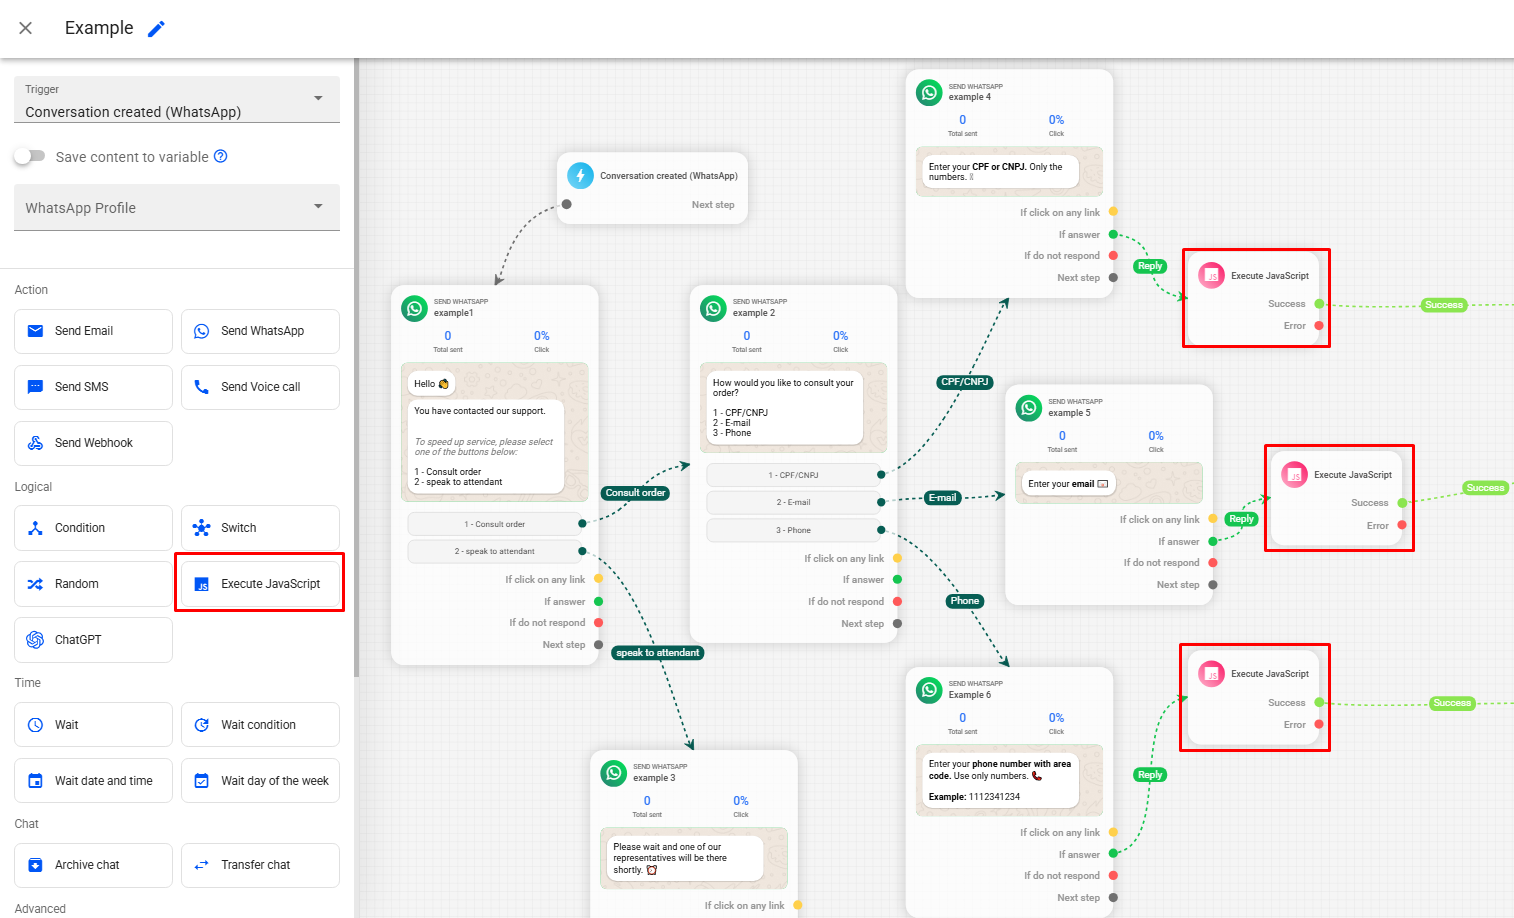
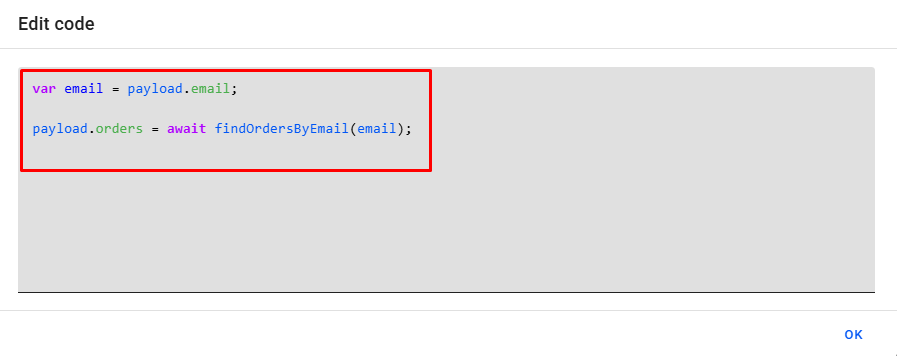
An example of using Run JavaScript would be our automation model Automatic order inquiry, which works together with the Conversation created trigger. In this automation, every time a customer contacts via WhatsApp and then selects to retrieve the order information, whether by providing their CPF, email, or phone number, a JavaScript code is executed and sends the order information in the message.
ChatGPT
Still in the Logic actions, there is the option to integrate ChatGPT to automate customer service, specifically for messages sent via WhatsApp. With this integration, ChatGPT can interact directly with your customers, automatically responding in a personalized way, based on the instructions passed to it. This allows ChatGPT to talk to the customer in real time, answering questions, offering support, and even recommending products — all automatically.
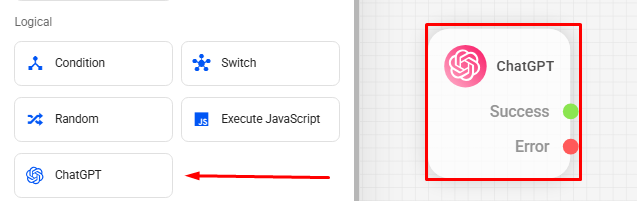
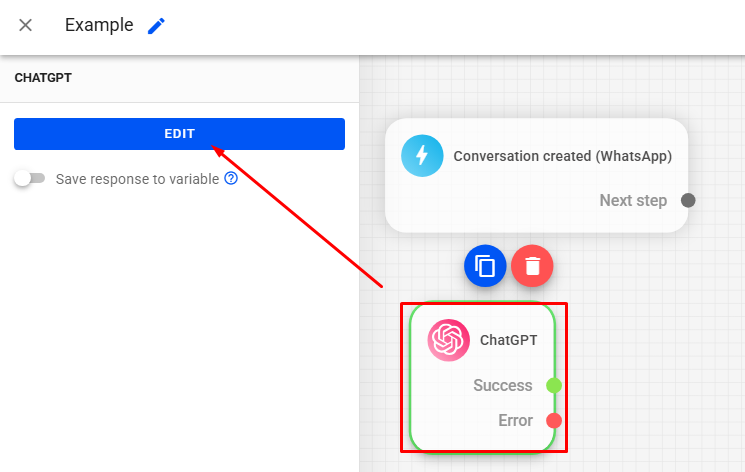
To set up the integration, first add the ChatGPT action to your automation.
After that, select the ChatGPT block and click Edit.
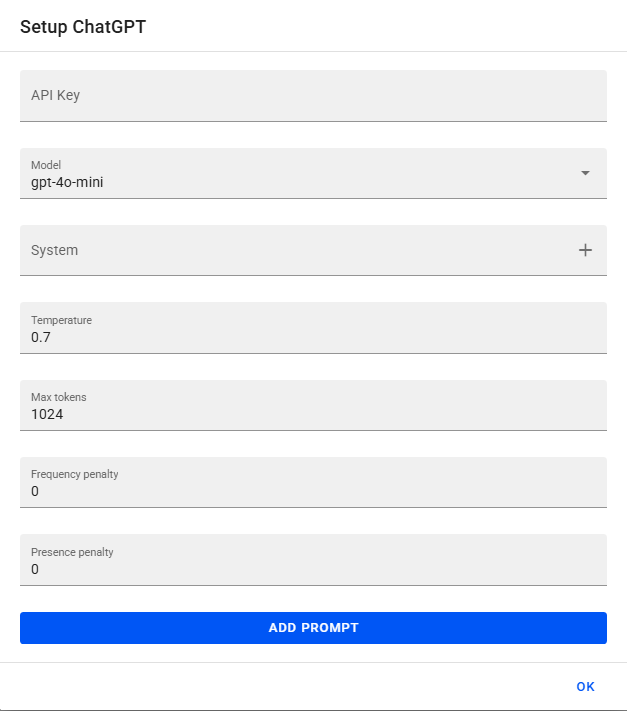
In this part, you will need to define the following fields:
- API Key Insert the API Key linked to your OpenAI account. To generate this key, you will need to create an account at OpenAI and access: API Keys — OpenAI API
- Model: Refers to the ChatGPT model that will be used in your subscription. Choose the model that best fits your needs.
- Temperature: Defines the level of creativity in the responses generated by ChatGPT. Values range from 0.1 to 1.0 — the higher the value, the greater the creativity. However, very high values may result in less coherent answers.
- Tokens: Determines the maximum number of characters for each response. A lower number of tokens restricts the size of the responses provided by ChatGPT.
- Frequency and presence penalty: Defines ChatGPT's tendency to repeat or avoid repeating responses. Adjust this parameter as needed to diversify the answers.
- System: In this option, you should add a script with instructions on how ChatGPT should behave. Add detailed information about your business to guide ChatGPT's behavior in its responses to the customer.
- At the bottom, in Add Prompt you can add new prompts beyond the instructions defined in “System”. These prompts can be configured as user or assistant (ChatGPT) instructions. This field is not mandatory — fill it out only if you truly want more personalized interactions beyond the “System”.
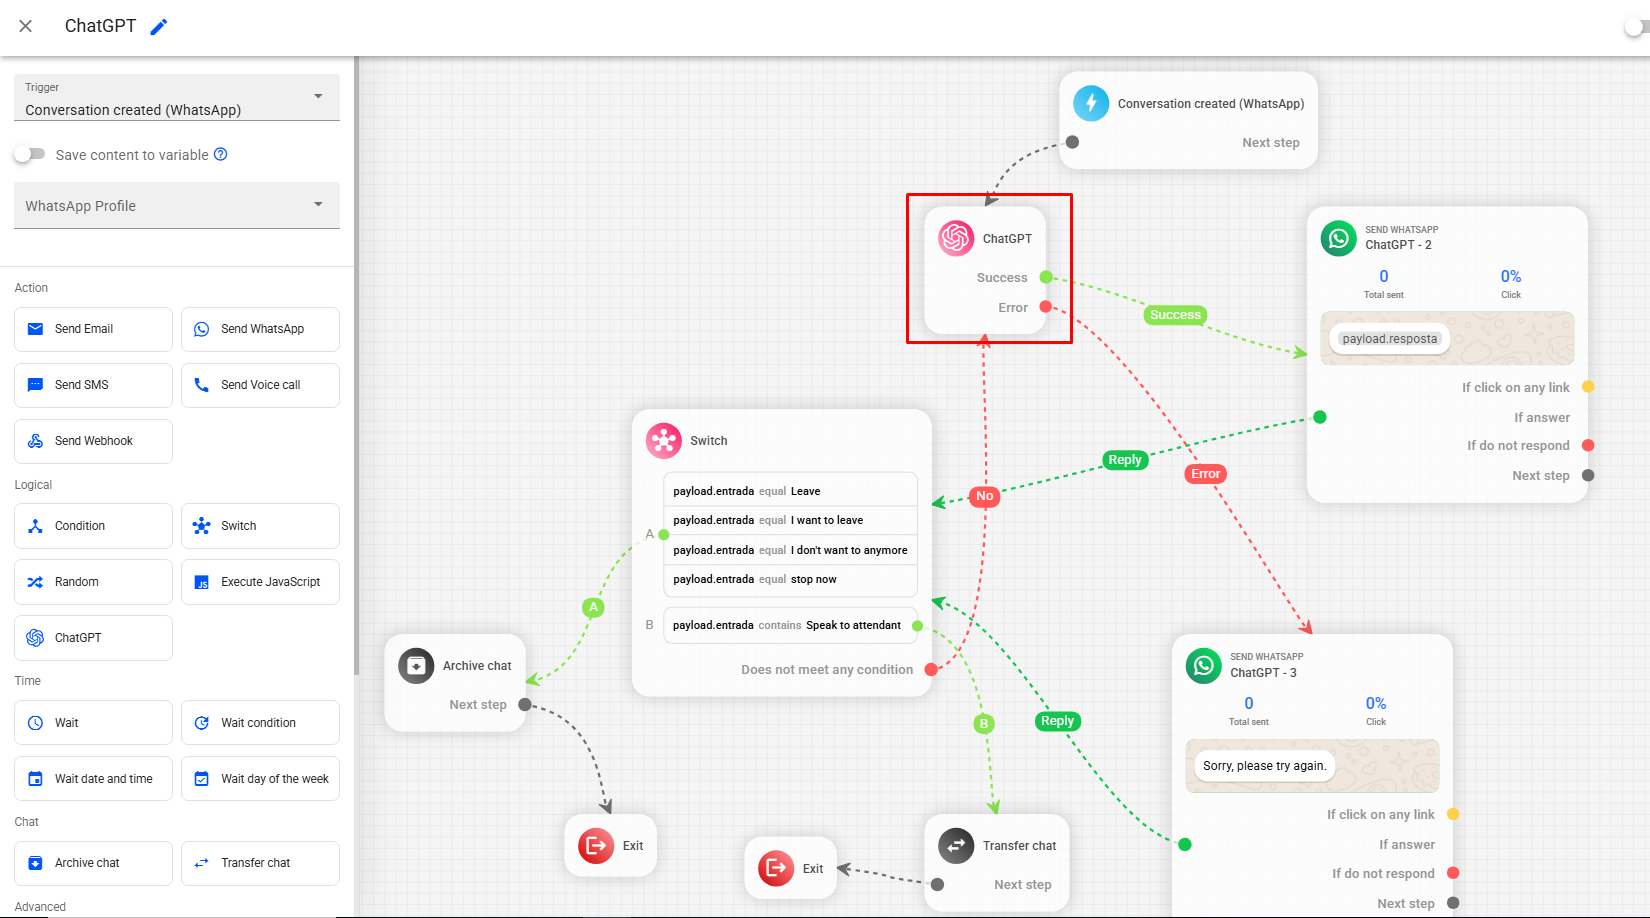
In our automation gallery, you will find ready-to-use models that utilize ChatGPT — all tested and validated by our team. One example is the “ChatGPT” model, which already comes pre-configured with a system instruction template. To use this model automation, simply customize the “System” with your business-specific information and add your OpenAI API Key to integrate ChatGPT.


Note: After completing the above settings, we recommend running tests to ensure ChatGPT meets your business's specific needs appropriately.
How to Use Time Actions
Time actions allow you to schedule message sending at specific times and days, or set wait intervals before the next sending, ensuring that your automations run at the ideal time.
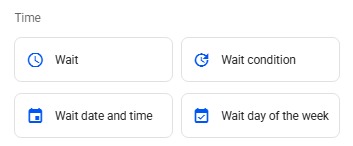
In our Time actions we have: Wait, Wait for condition, Wait for date and time, and Wait for weekday.
Wait
The Wait action allows you to define an interval between message sending in your automations. This interval can be configured in minutes, hours, or days.
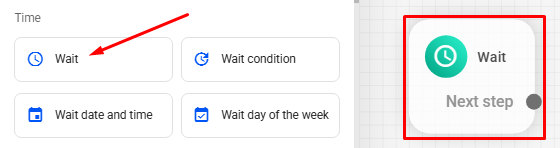
To add a Wait in your automation, click the Wait block in the side menu of the editor.
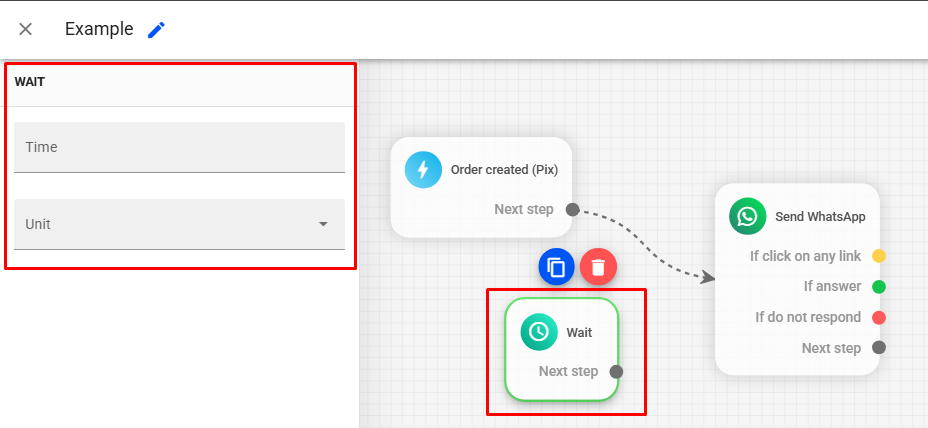
Click on the block to select it.
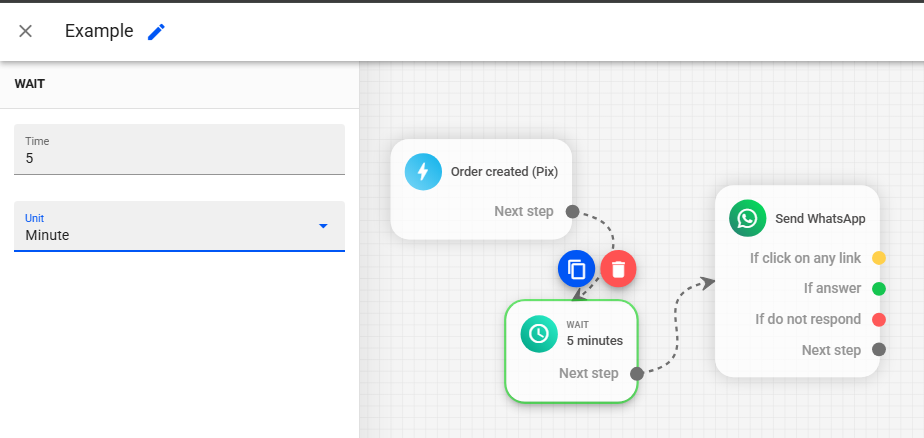
Then define the desired unit (Minute, Hour, or Day) and enter the interval time.
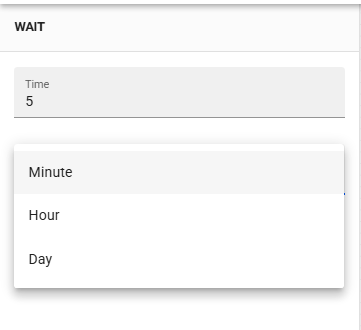
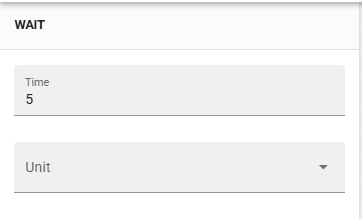
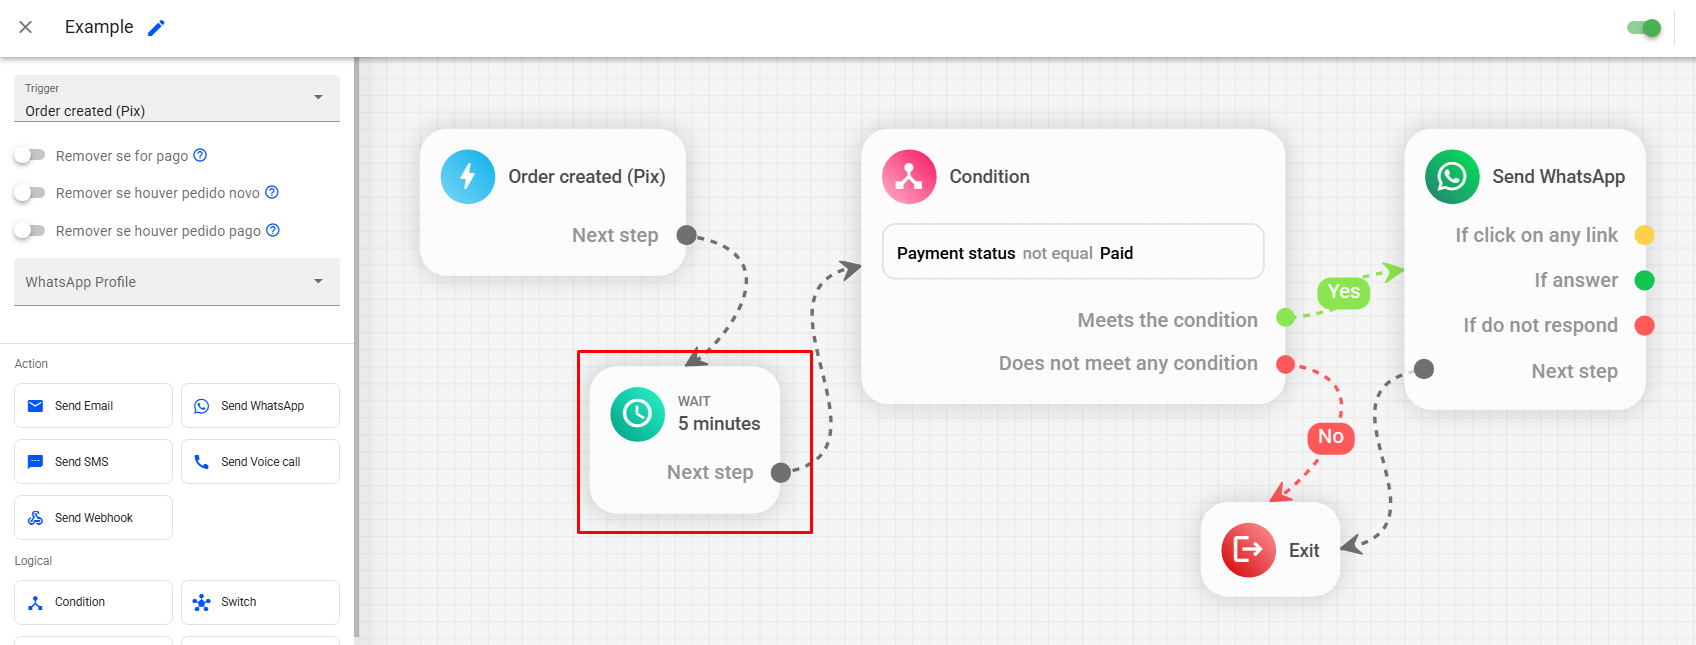
In the example below, we use the wait to define an interval rule at the beginning of the automation, that is, whenever a new Pix order is created, the system waits 5 minutes before checking if the condition has been met, that is, if the order has been paid. After this interval, if the condition is true, the recovery message is sent to the customer:
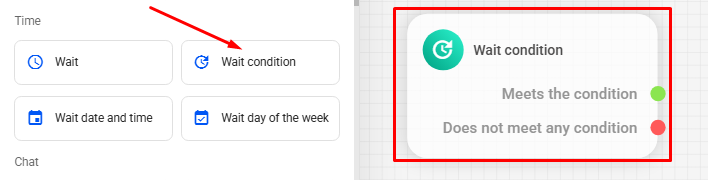
Wait for condition
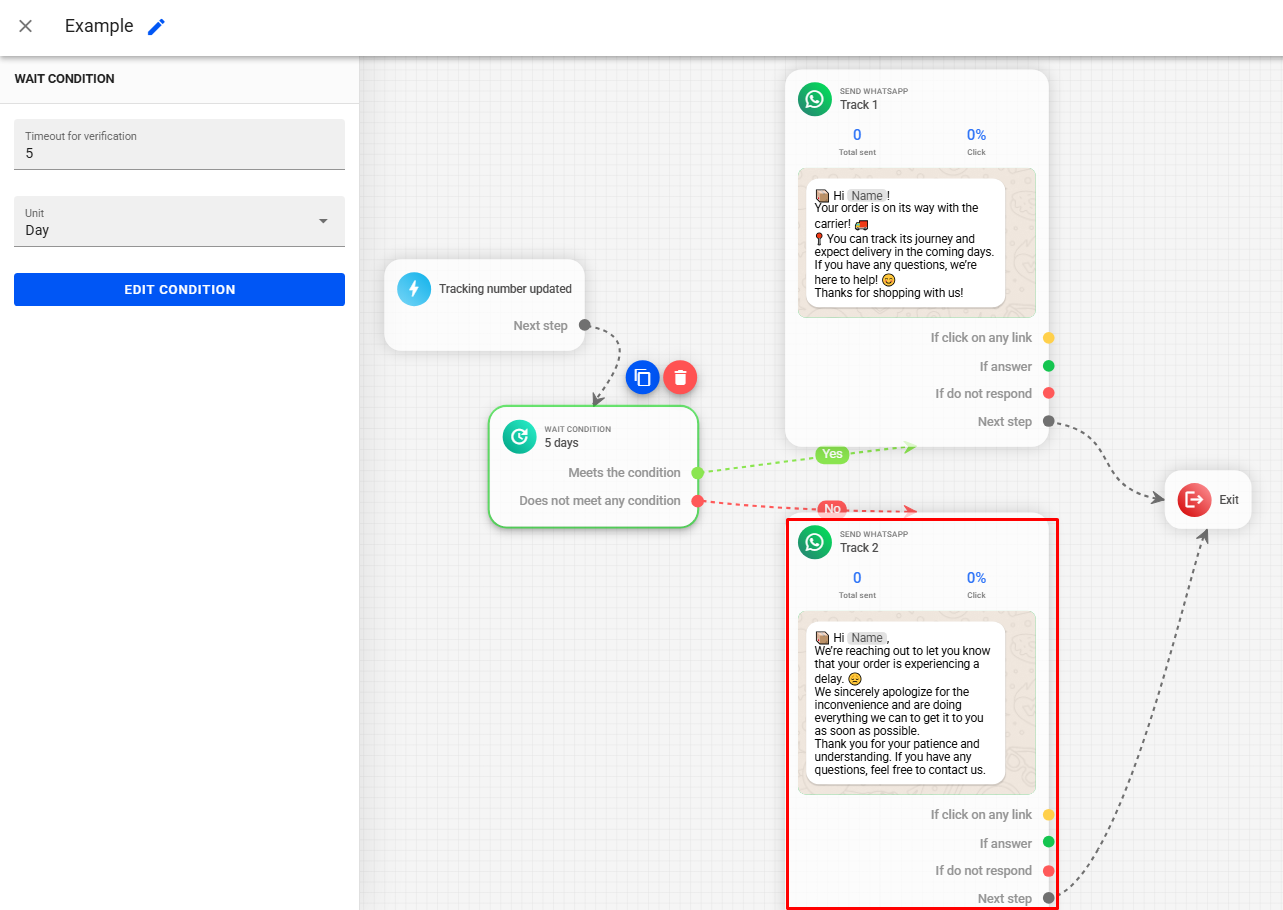
The Wait for Condition action is used to wait a certain period until a specific condition is met before sending the next message, creating a wait time until the defined condition is true. This wait time can be configured in "Timeout for verification", which is the time the automation will wait until the defined condition is true.
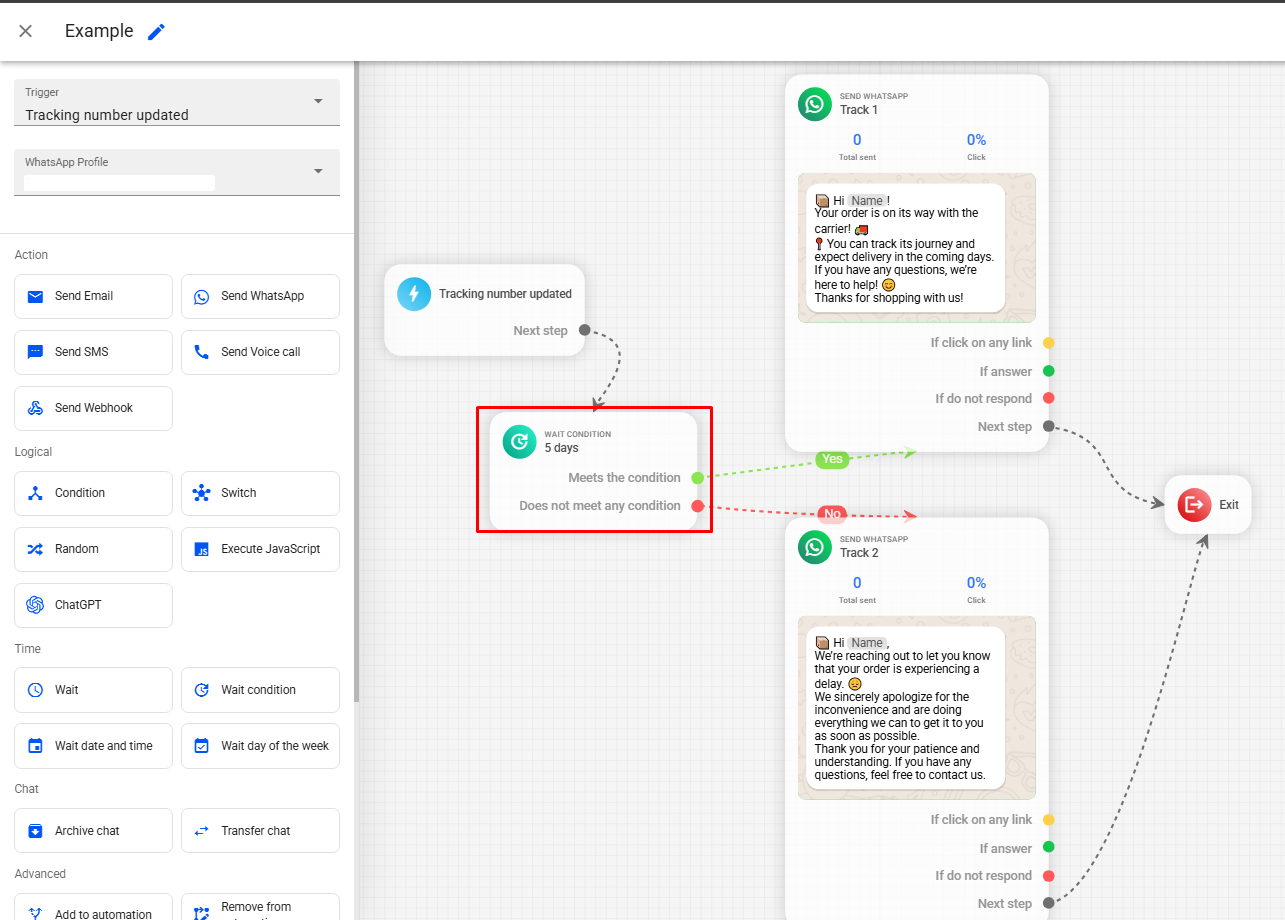
To add a Wait for condition in your automation, click on the Wait for condition block in the editor's side menu.
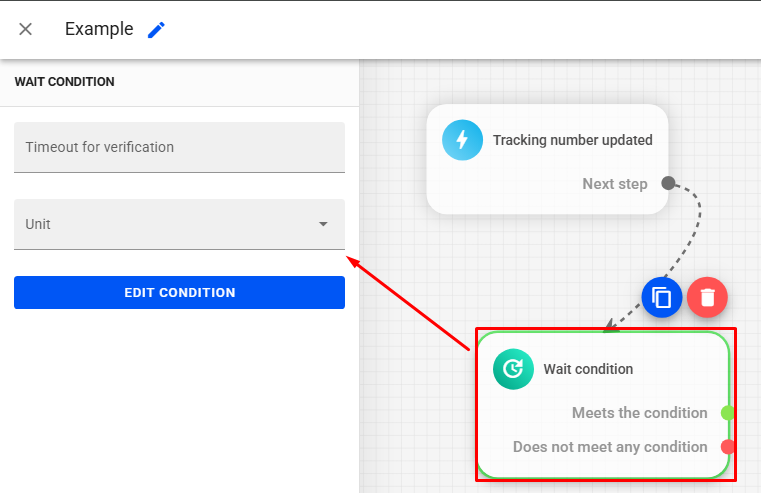
Click on the block to select it.
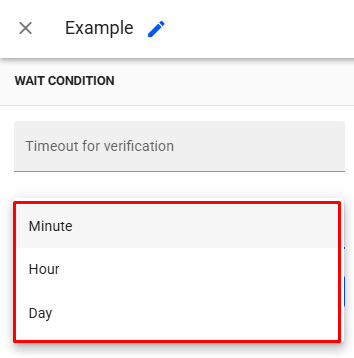
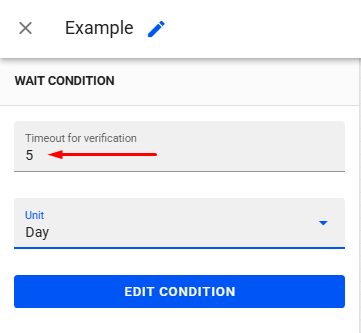
Set a timeout for verification. This timeout is the maximum time the automation will wait for the condition to be met. Set the desired unit: Minute, hour, or day.
Set the time the automation will wait until the condition is true.
After setting the timeout, click the EDIT CONDITION button. By clicking + Condition, we can define filters related to time, orders, abandoned carts, tracking numbers, and leads. These options are available for use in the condition depending on the trigger used in the automation. For example, if you are using an automation with an order created trigger, time, orders, and lead conditions will be available.
It is possible to add more than one condition in the same session, if necessary for the logic you want to apply. Just define your first condition and click + Condition again.
We can also relate the conditions using the All of the following conditions option or not relate using the Any of the following conditions option.
If the configured timeout ends and the condition is not met, we can use the "No" branch to trigger another action, such as sending another message.
In the example below, we use Wait for condition to check if the tracking status is equal to "In transit". In this way, Wait for condition monitors for the timeout of 5 days and, if the status is updated to "In transit" during this period, the customer receives a message informing that the order is already in transport. Otherwise, after 5 days, the customer receives a message apologizing for the delay:
Wait for date and time
Wait for date and time allows you to send messages starting from a specific date and time. We can use it, for example, to segment the sending of a message or automation after a certain date and time.
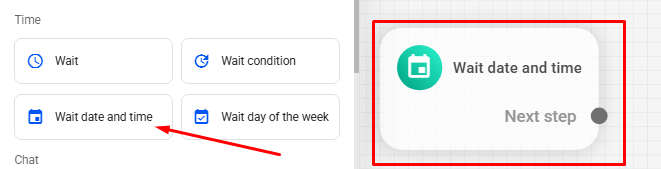
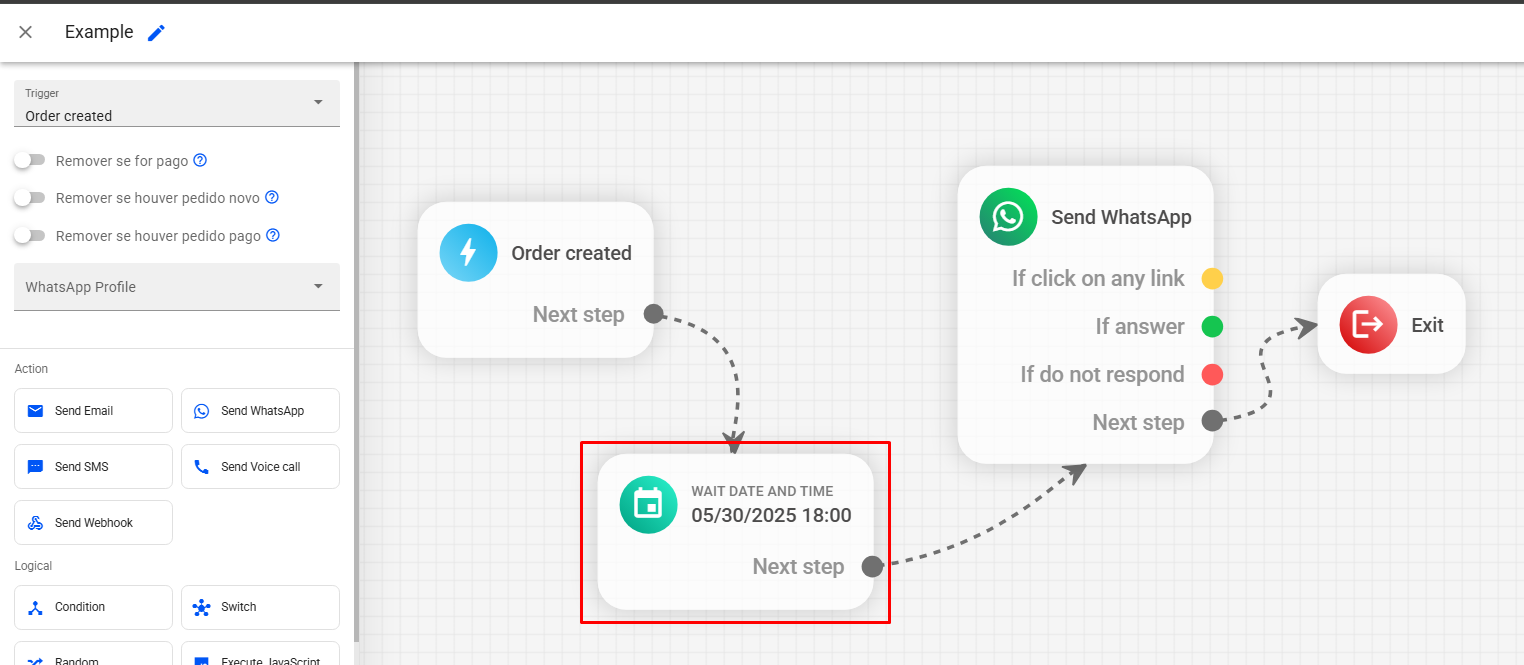
To add a Wait for date and time in your automation, click on the Wait date and time block in the editor's side menu.
Click on the block to select it.
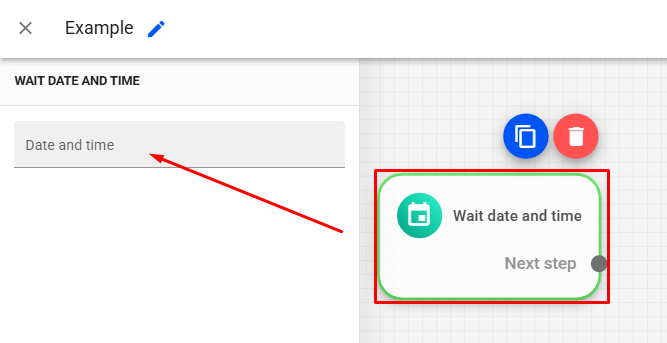
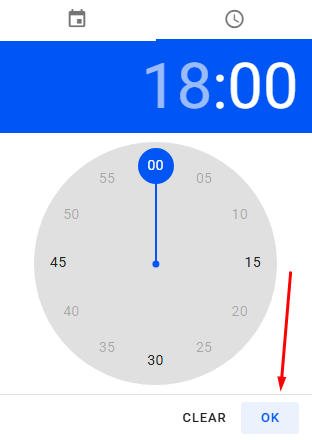
Click on date and time and set the time.
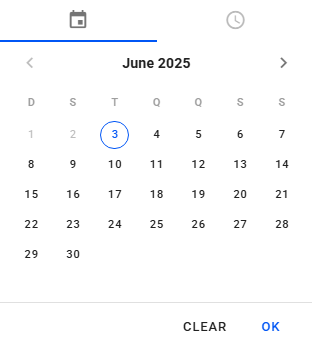
In the example below, we set the promotional message to be sent starting on 05/30/2025 at 18:00 PM:
Wait for day of the week
The Wait for day of the week action is used to schedule automation sending on specific days and times. This is useful when you want your automations to be sent only during your support's business hours.
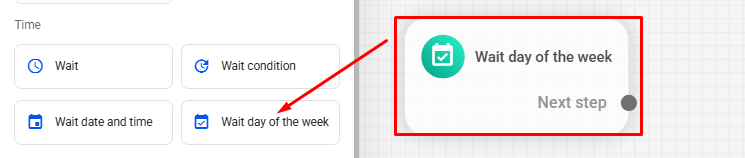
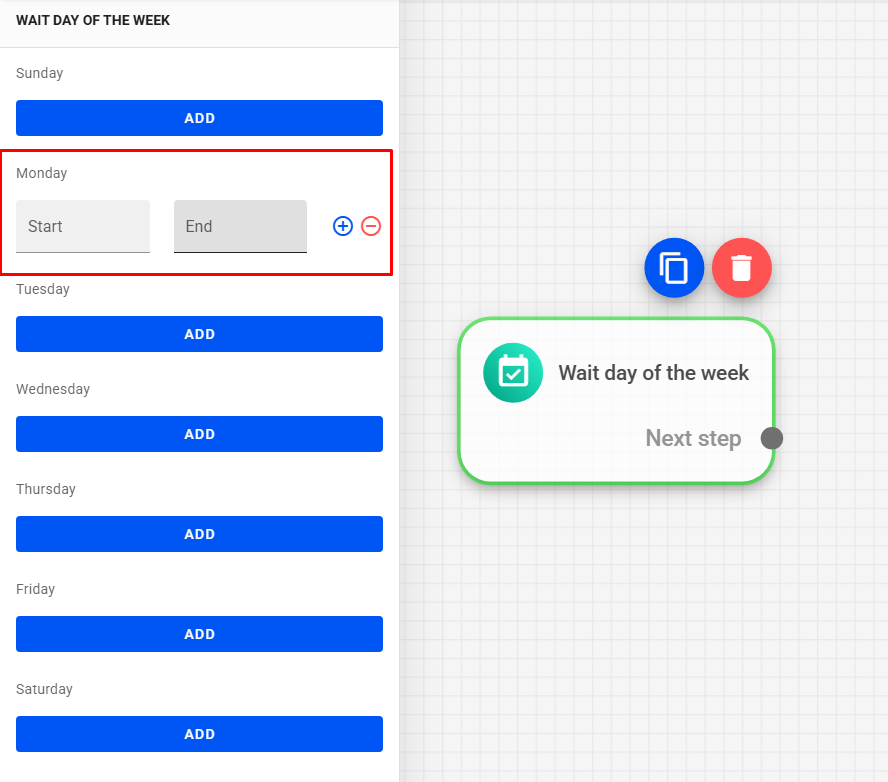
To add a Wait for day of the week in your automation, click on the Wait day of the week block in the editor's side menu.
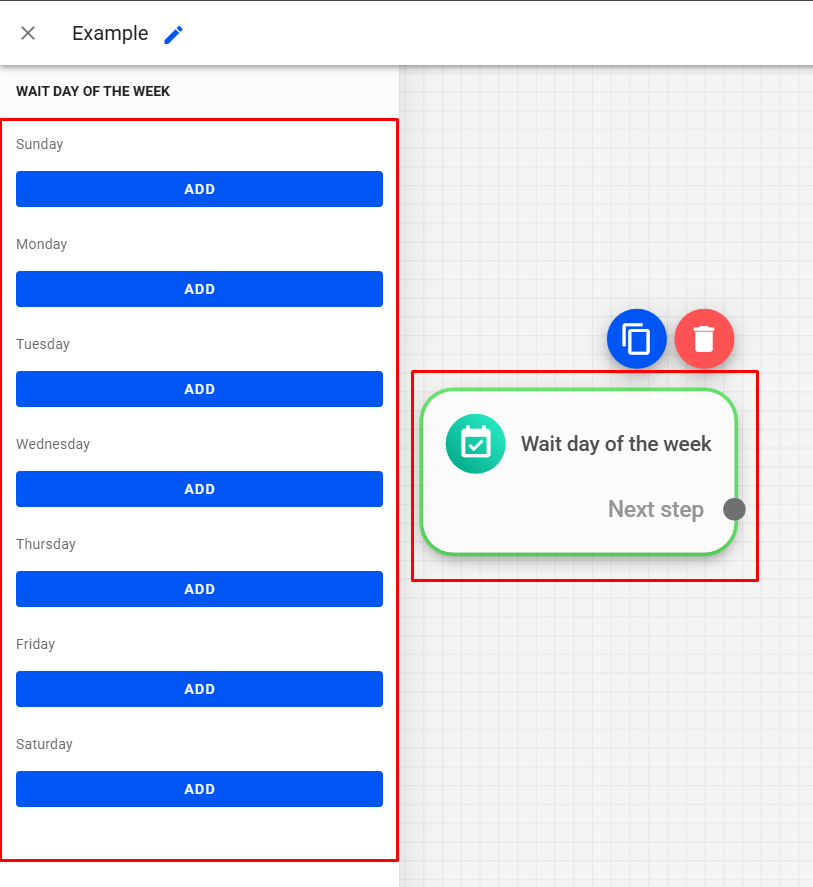
Click on the block to select it.
Click on ADD to add a time interval.

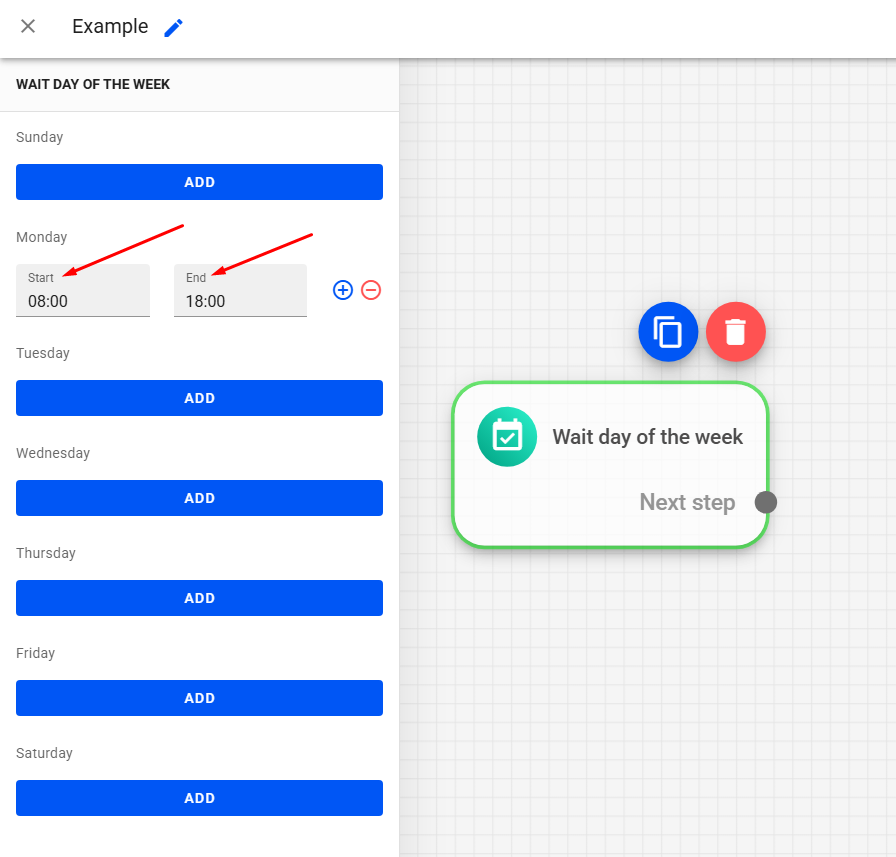
Then, set the desired start and end time.
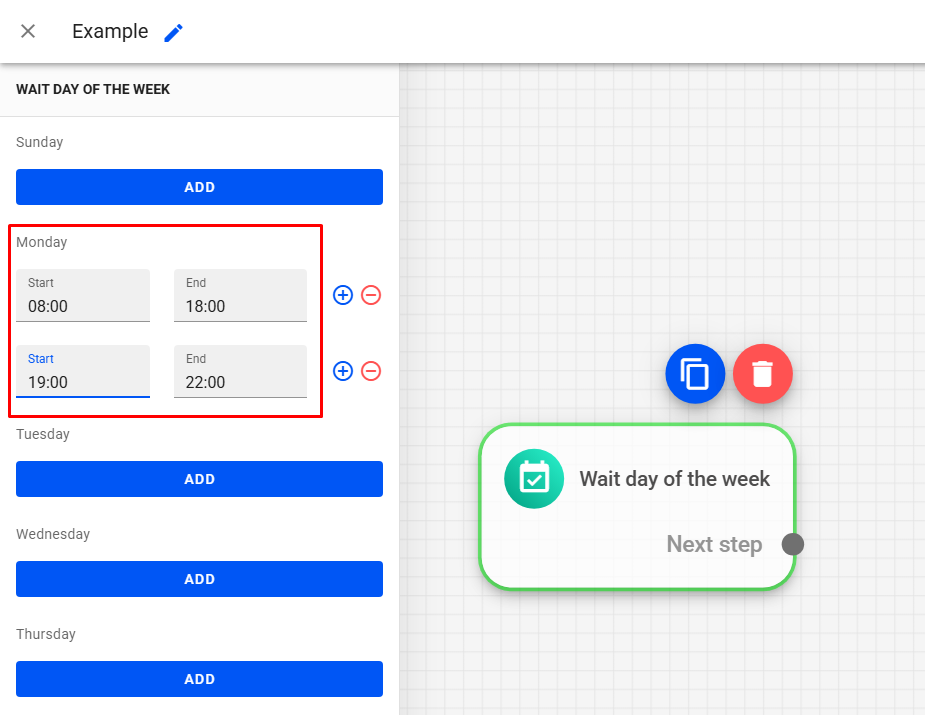
To add a new time slot on the same day, click the blue +.
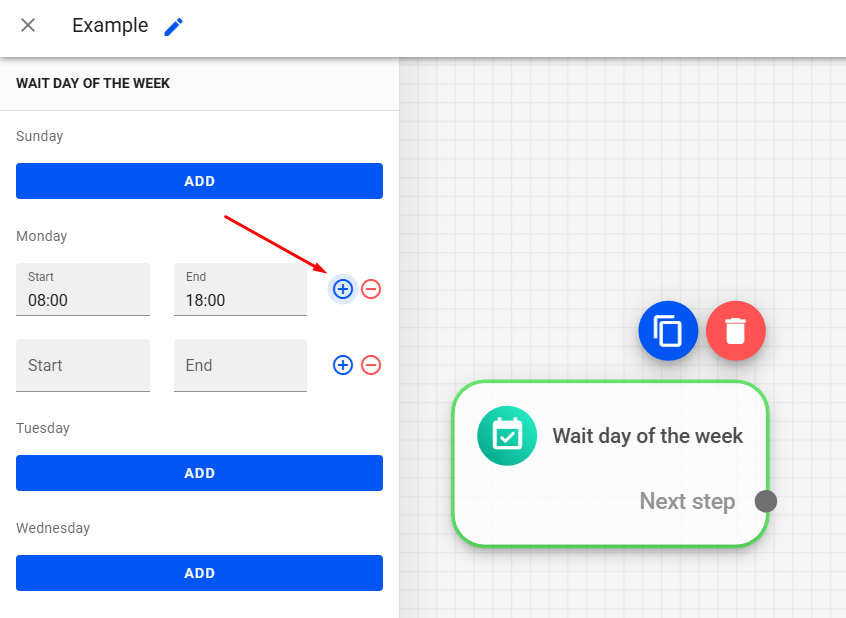
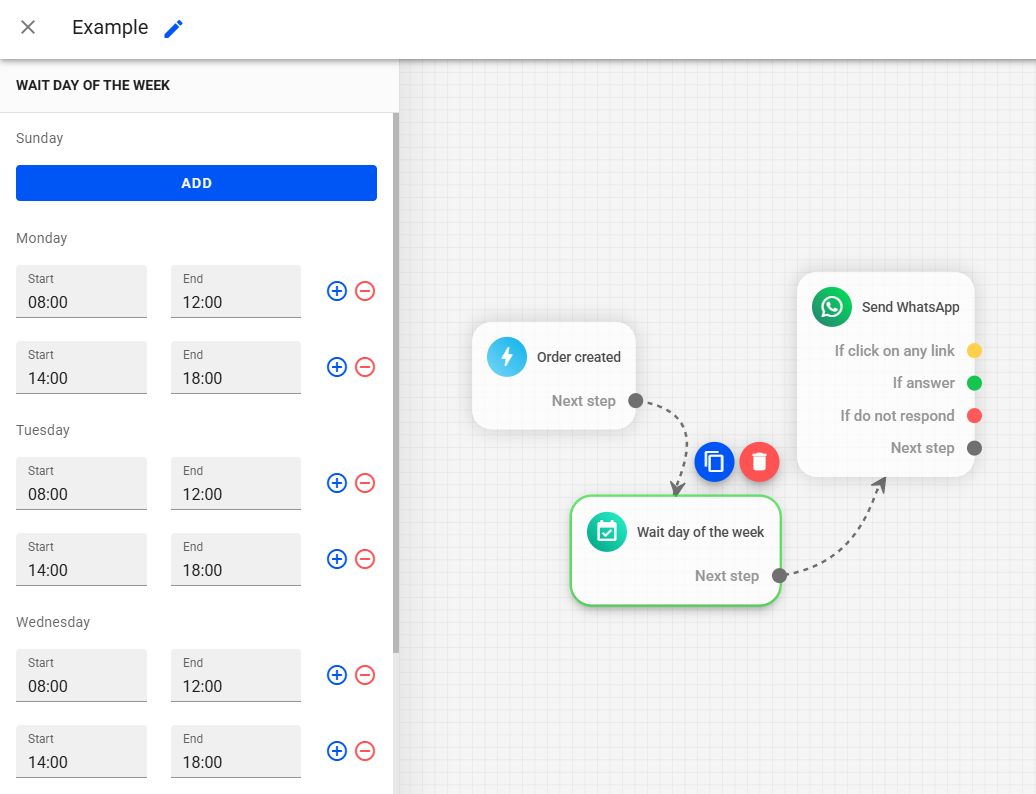
Once done, just use the Wait for day of the week block at the beginning of your automation and link it to the message.
In the example below, we use Wait for day of the week to send Pix recovery messages only on specific days and times, from Monday to Friday from 8am to 12pm and 2pm to 6pm:
How to Use Chat Actions
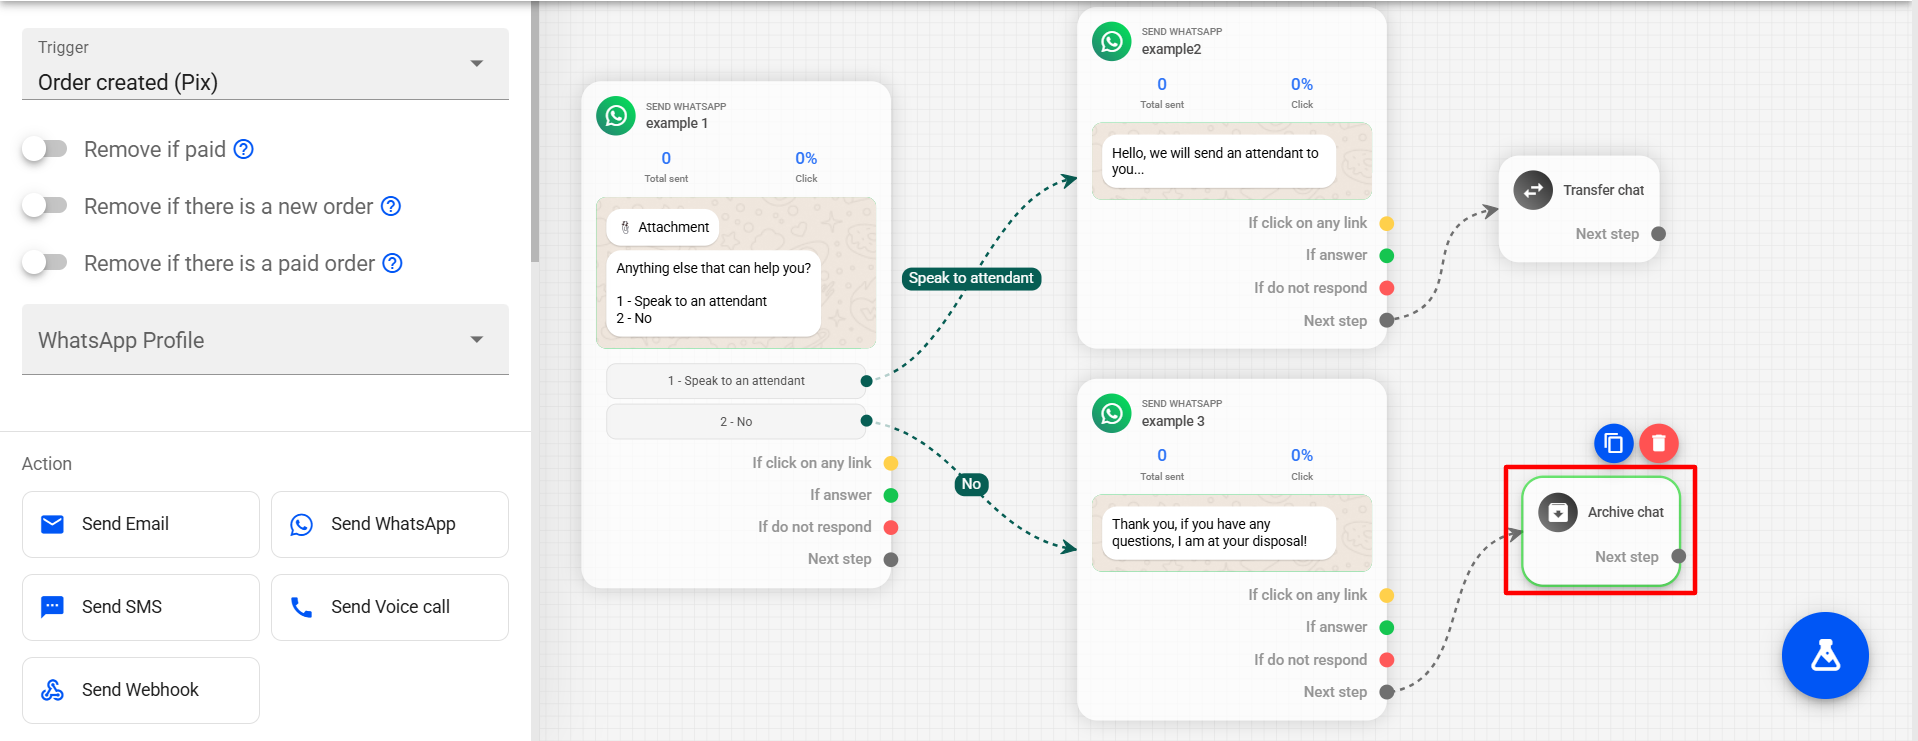
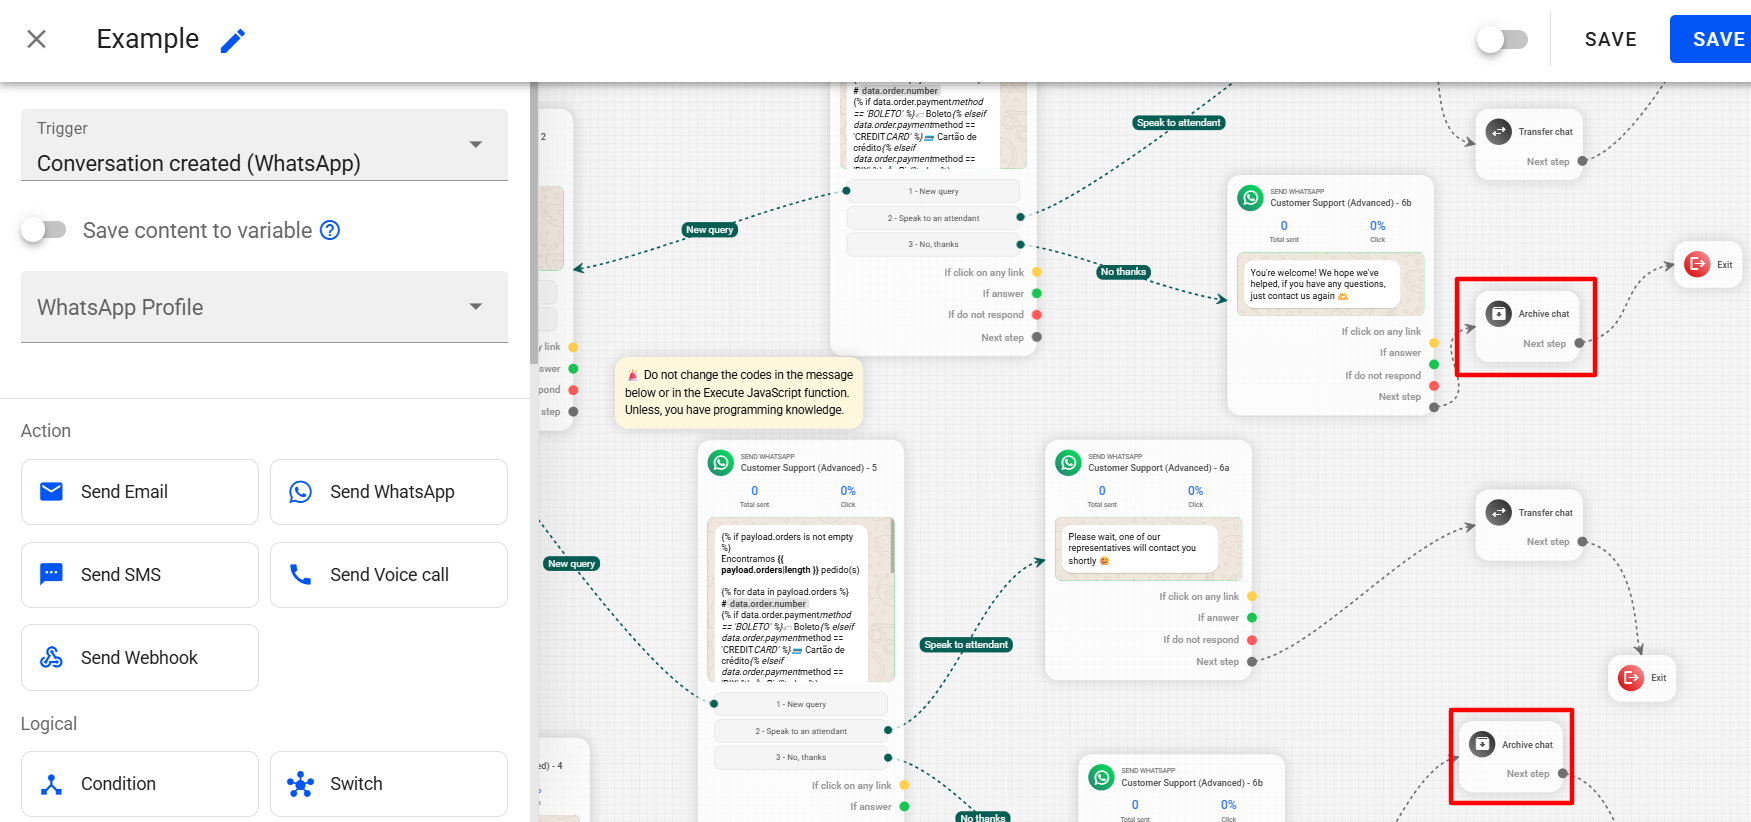
Archive Chat
The Archive chat action automatically archives WhatsApp conversations. This feature is useful when the lead finishes a WhatsApp automation. With the conversation archived, the lead can enter another WhatsApp automation.
To add an Archive conversation block to your automation, click the Archive chat block in the left menu of the editor.
Connect it at the end of the flow so that the conversation is archived.
In this example of our template automation "Customer support (Advanced)", if the lead reaches the end of the automation and has no further requests, the conversation is archived.
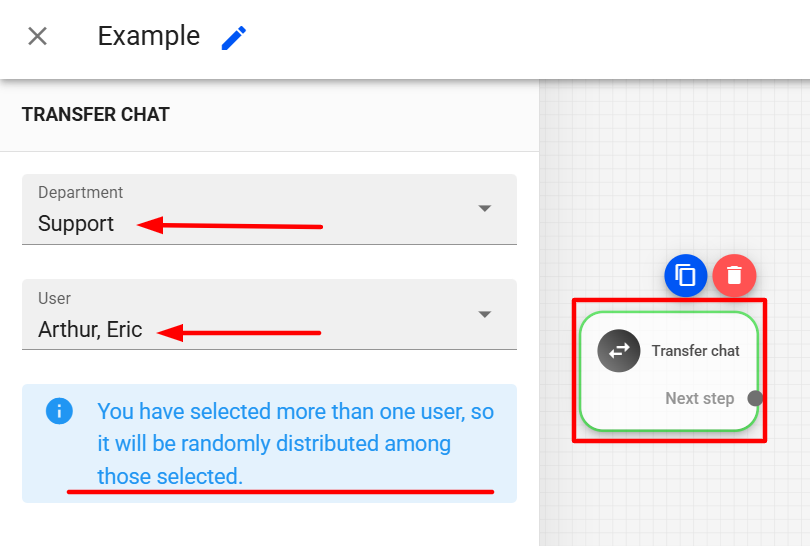
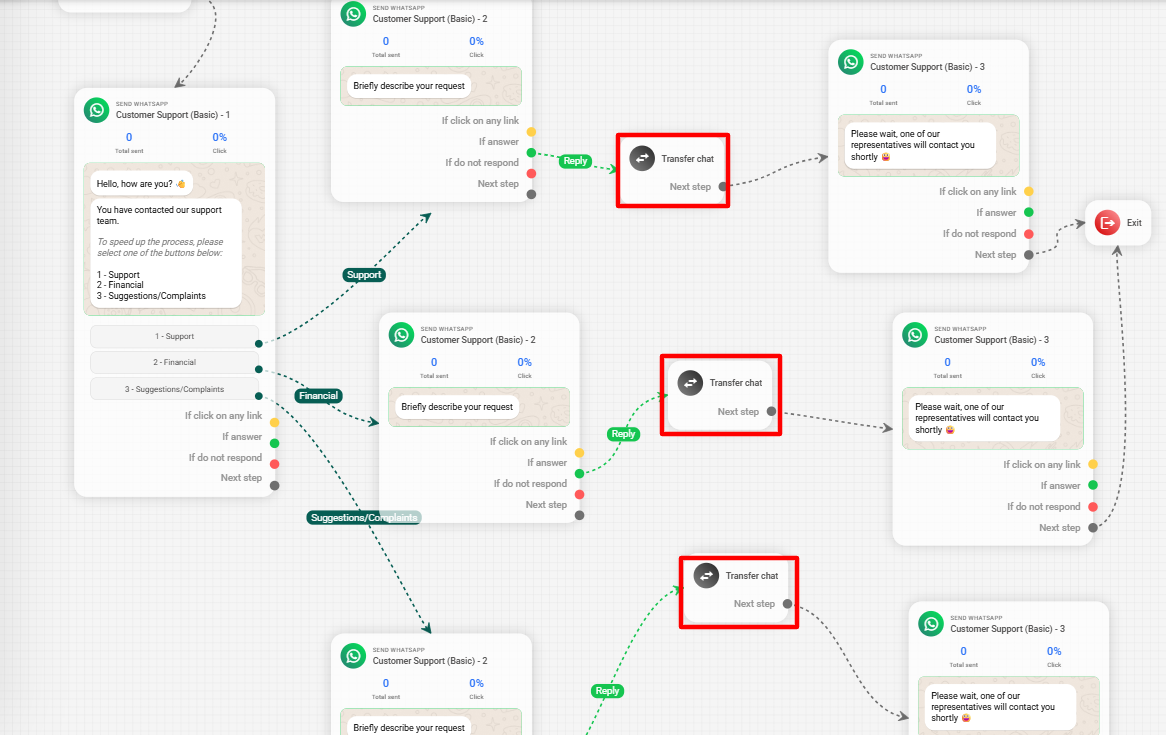
Transfer Chat
The Transfer chat action is used to automatically transfer a WhatsApp conversation that is in an automation to an agent or department in the Reportana chat.
To add a Transfer conversation block to your automation, click the Transfer Chat block in the left menu of the editor.
Click on the block to select it and in the side menu choose the department and/or user(s), or agent(s), to whom you want to transfer the conversation.
If you select more than one user, the conversations reaching the Transfer chat action will be distributed equally among the selected users.
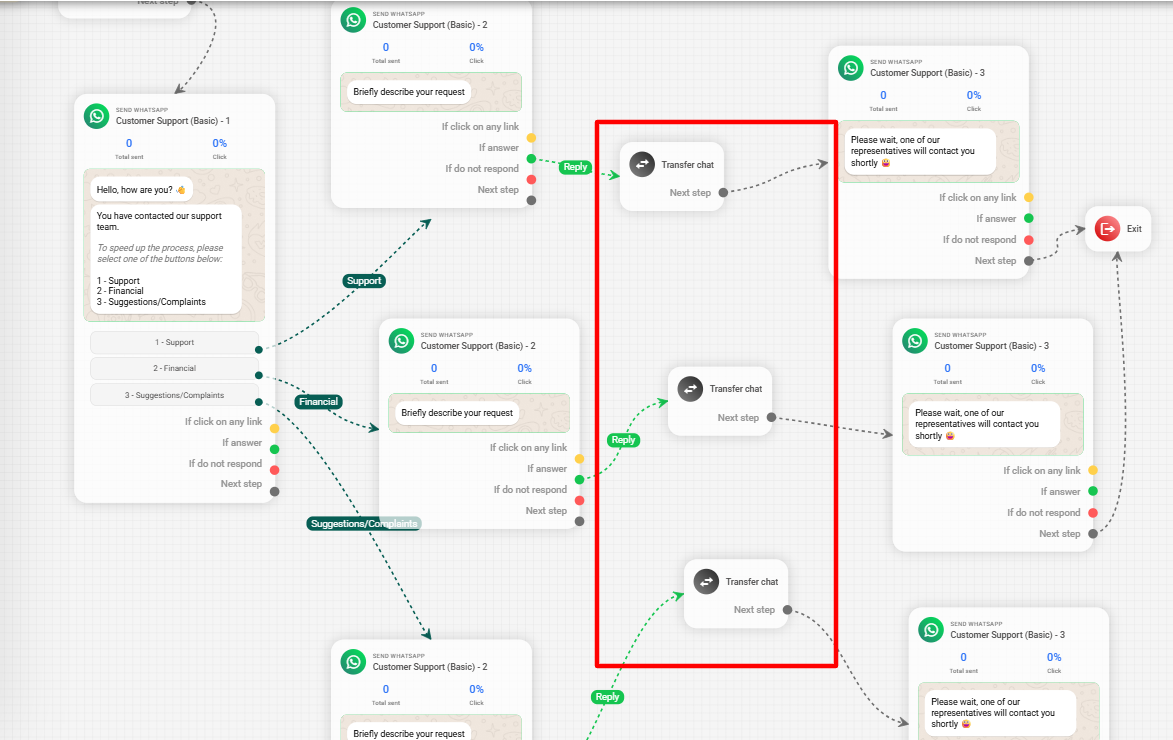
- Connect Transfer chat to the desired branch of the funnel.
In the example of our template automation "Customer support (Basic)", once the client selects the department they want to speak with and describes their request, they are transferred to the respective department and one of its users.
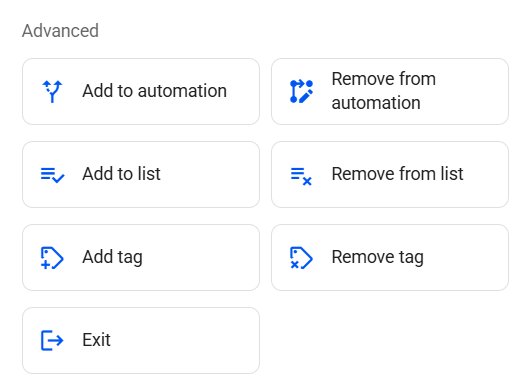
How to Use Advanced Actions
In Advanced, you will find actions related to leads. We have the following actions: Add to automation, Remove from automation, Add to list, Remove from list, and Exit.
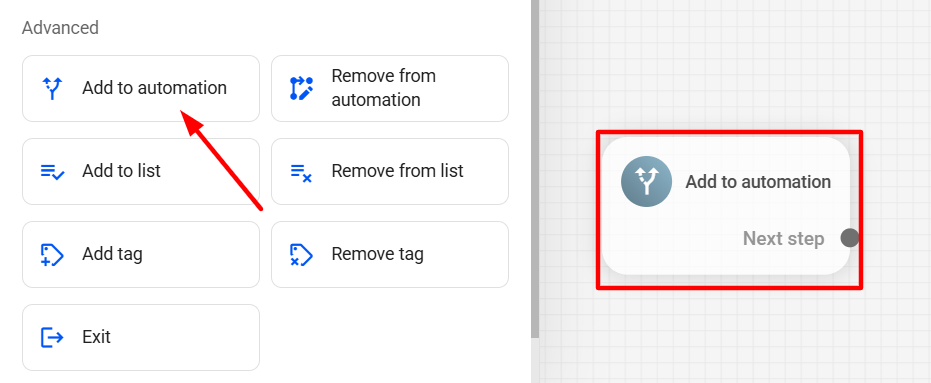
Add to automation
The Add to automation action allows you to send a lead to another automation.
To add an Add to automation block to your automation, click the Add to automation block in the left menu of the editor.
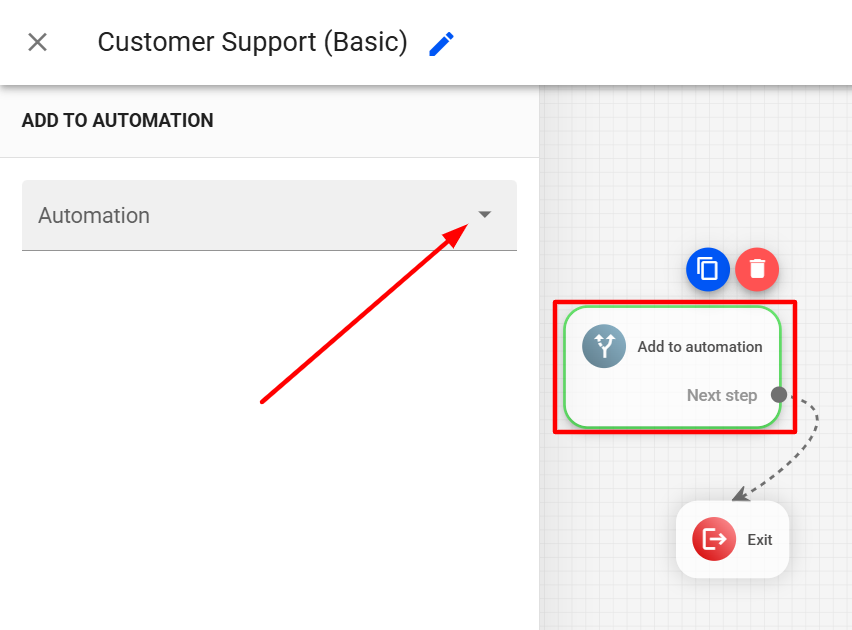
Then, select the Add to automation block and choose the automation to which the lead will be added.
A practical example would be in abandoned cart recovery automations, where we define a condition to check if the customer made a purchase. If the purchase is completed, the customer can automatically be moved to a second automation encouraging a second purchase:
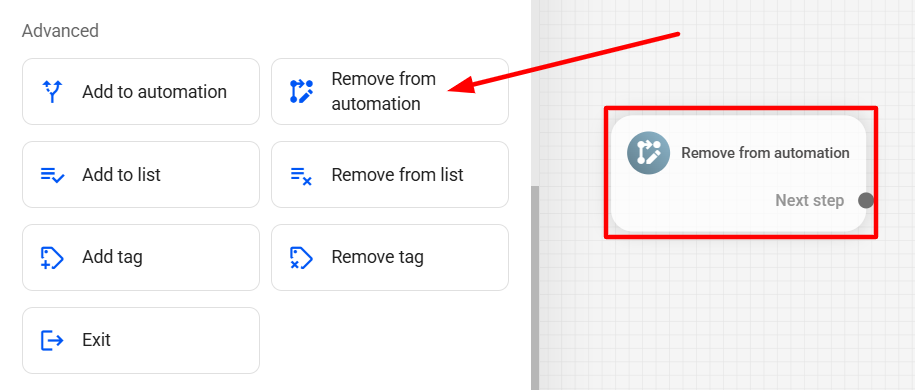
Remove from automation
The Remove from automation action is used to remove a lead from a specific automation.
To add a Remove from automation block to your automation, click the Remove from automation block in the left menu of the editor.
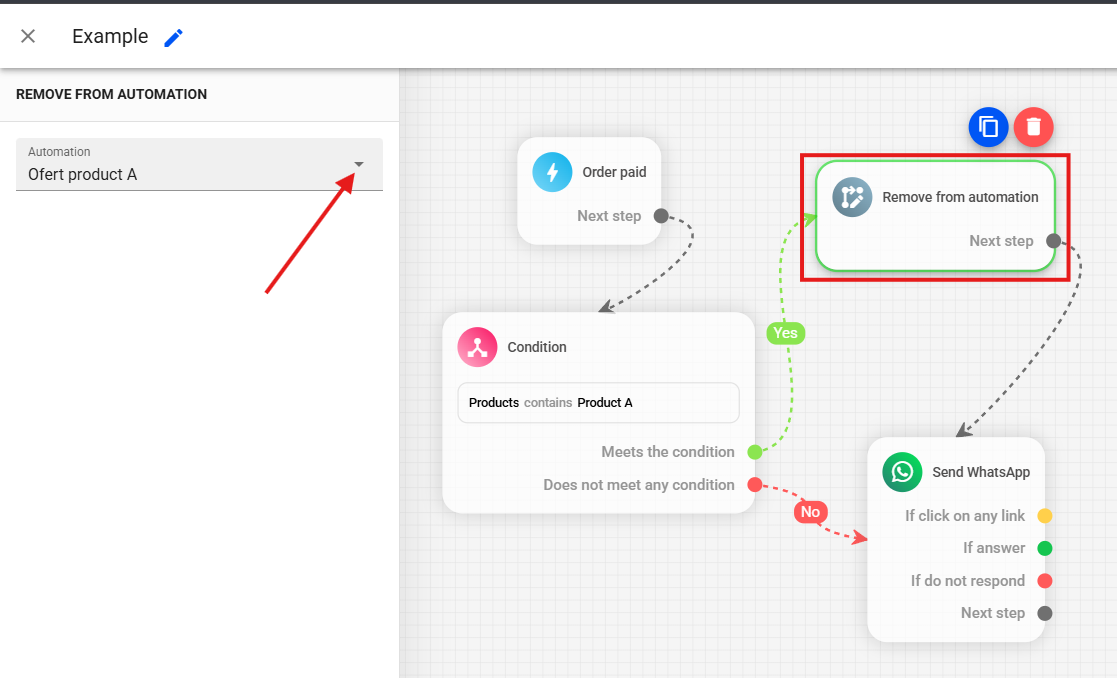
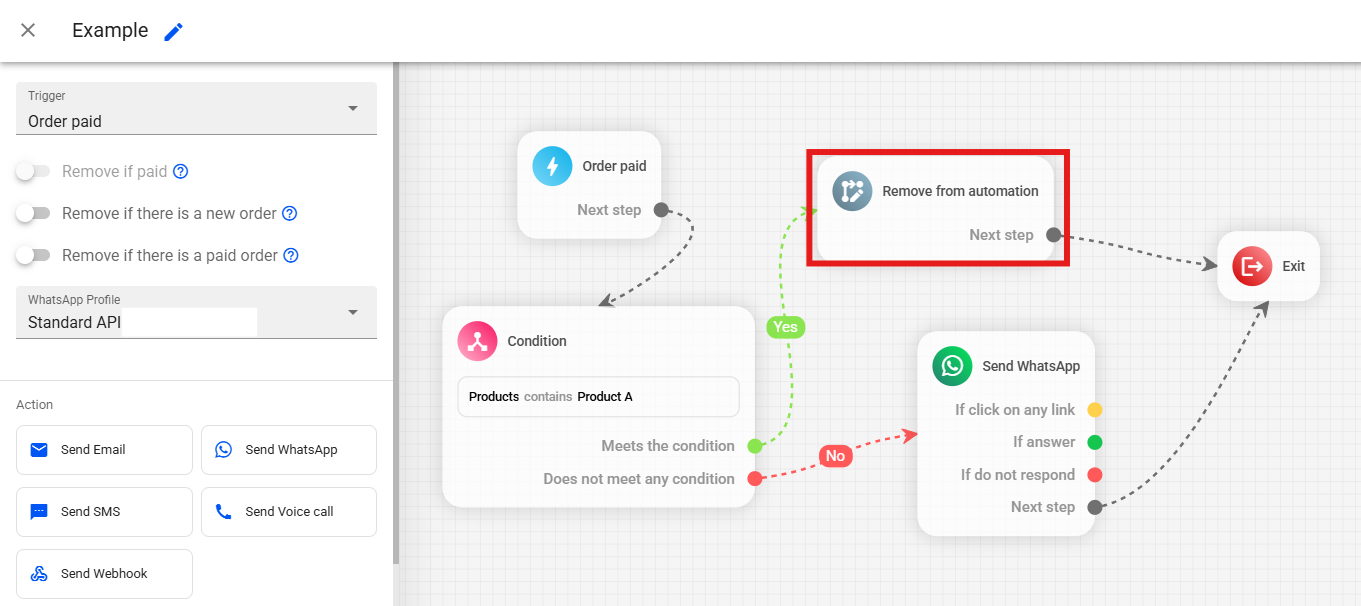
Then, select the Remove from automation block and choose the automation from which the lead will be removed.
An example use would be to remove from a certain automation a lead who purchased a specific product. In the example below, if the paid order contains "Product B", the lead will automatically be removed from the "Product B" offer automation. If not, they remain in the offer automation:
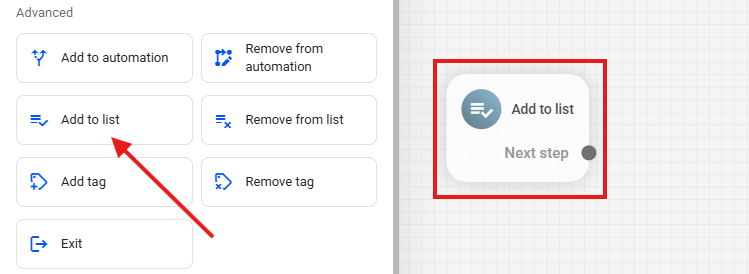
Add to List
The Add to List action is used to include a lead in a second lead list, allowing you to work with leads saved in this new list in other automations and campaigns.
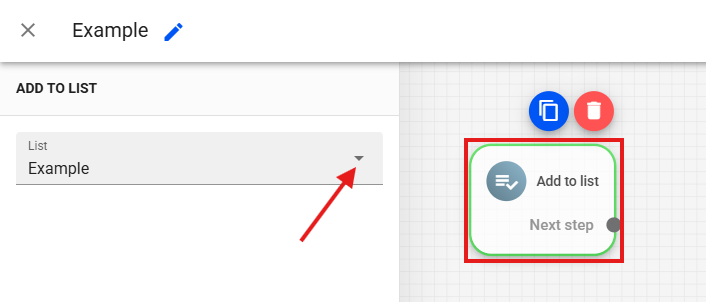
To use it, add the Add to List block in your automation.
Then, select the list to which you want to add the lead through this action.
It is important to note that the information saved in this second list will be the same as in the original list. If the original list in which the automation or campaign is added contains only the phone number or email, only this data will be saved in the second list.
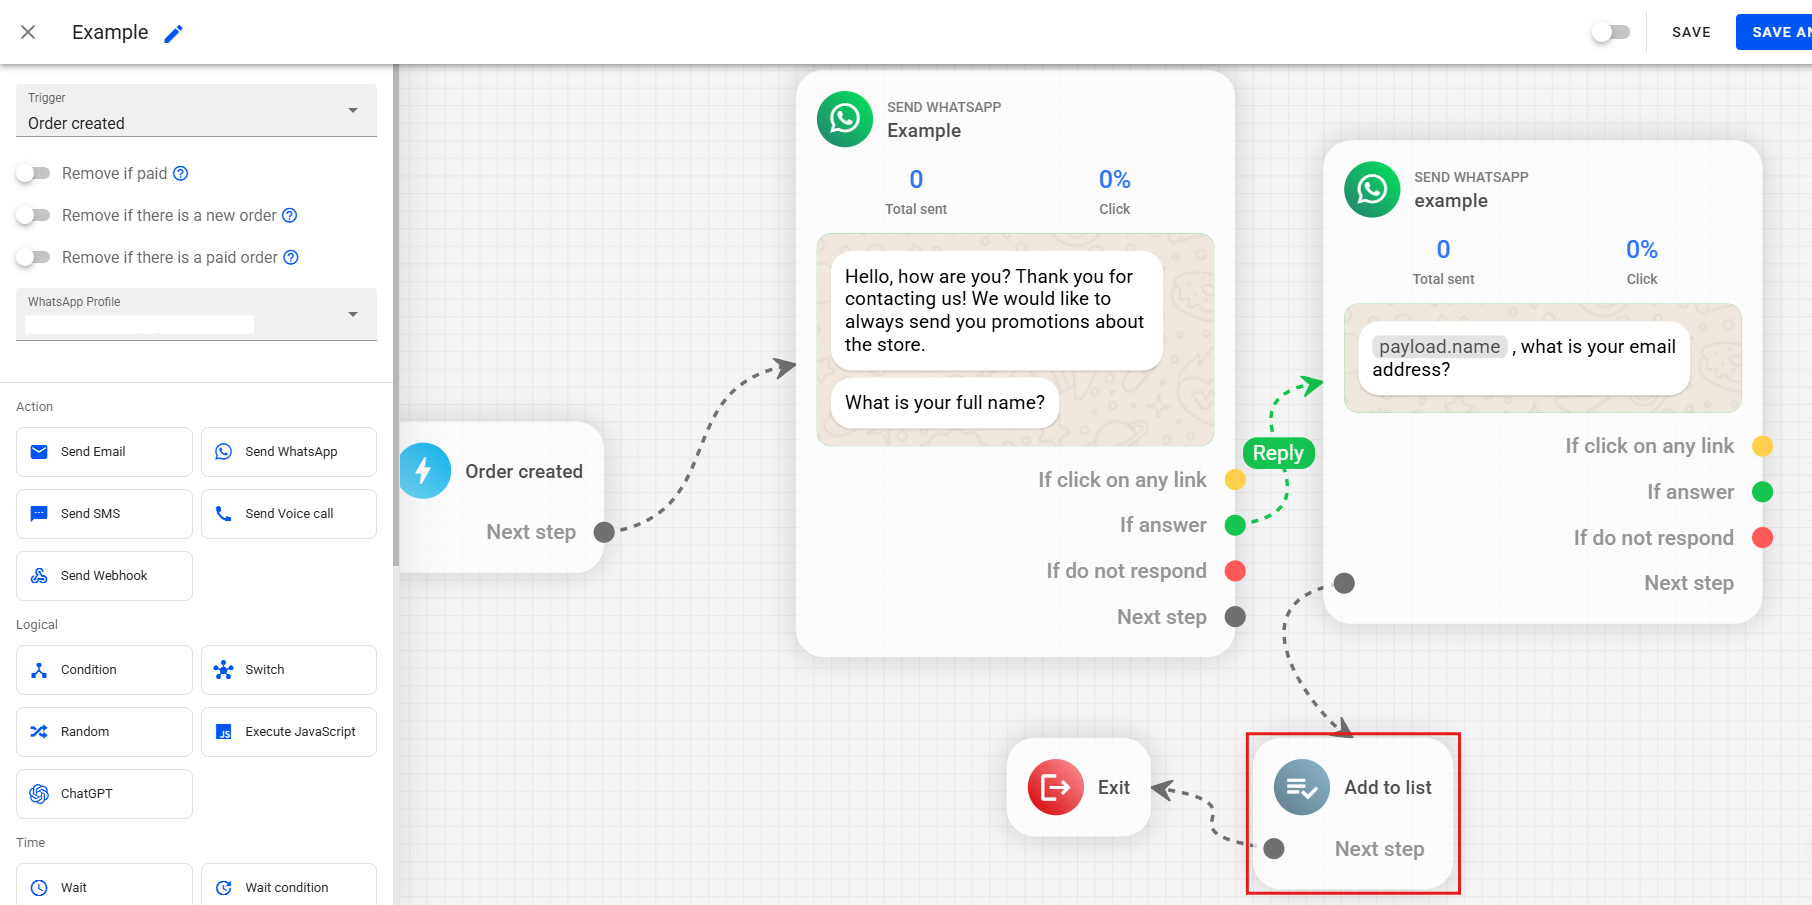
However, using WhatsApp messages we can capture the lead’s email to complete the list, where we can validate certain customer responses, save these responses in variables and in the platform's lead field. As in the example automation below:
In this automation, we use our template automation "Lead capture via WhatsApp". In this structure, we are using Add to list together with the advanced options of WhatsApp messages to capture the customer’s name and email. This way, as soon as the customer provides the data, they will be automatically added to the defined list and the data provided will be saved.
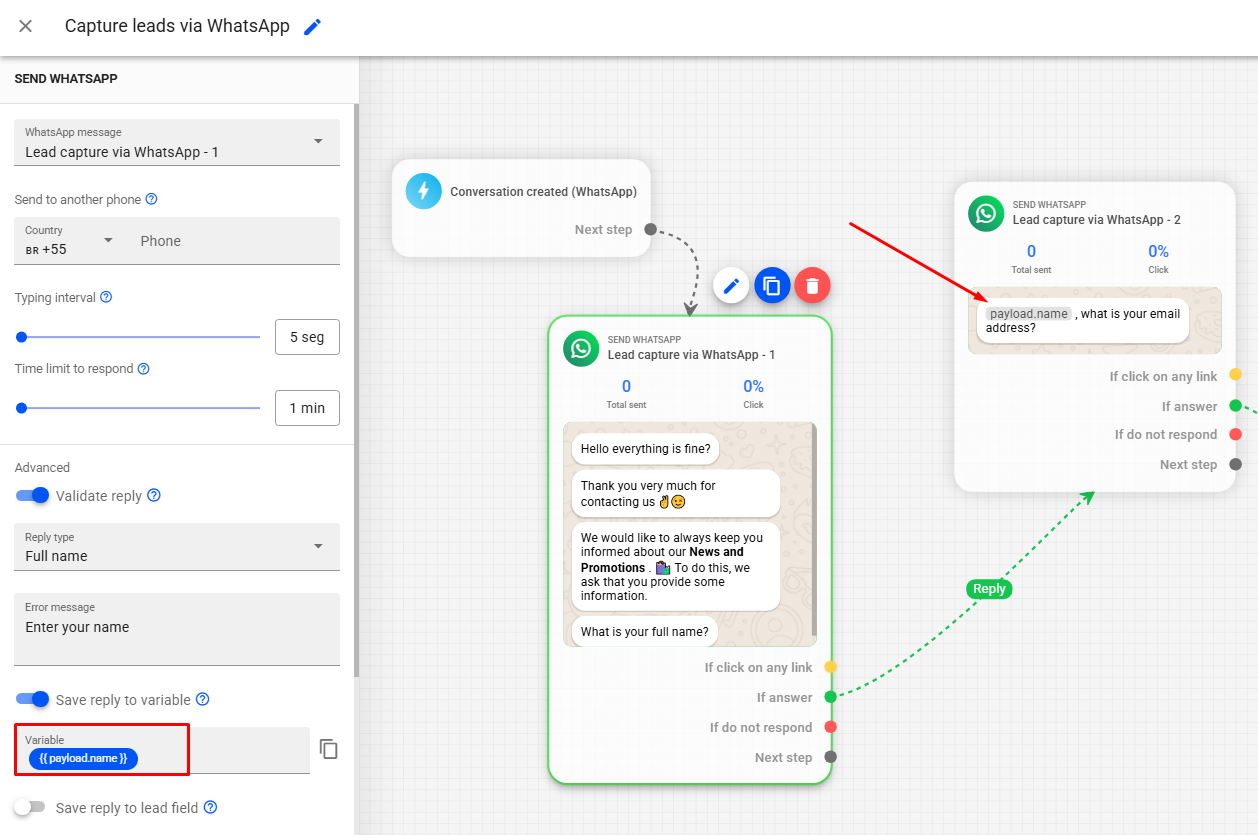
To use the advanced options of our WhatsApp messages, first select the WhatsApp message block in which the customer will provide the information, and you can view the options in the left menu.
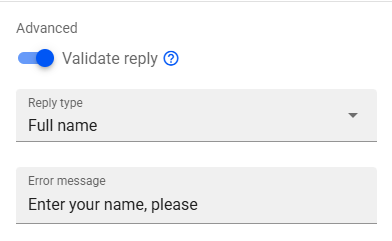
Validate response This option is used to validate that the response provided by the customer is in the format we expect, such as name, email, phone number, etc. As in the example below, where we validate the lead's response to check if they actually sent their full name. If the response is not as desired, an error message is sent.
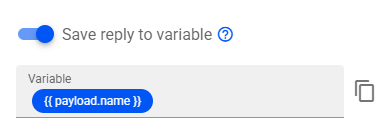
Save response in variable This option is used to save the customer's response in a variable. This variable is only available within the automation in question and can be used later in messages or conditions. In the example below, we save the response in the variable {{ payload.nome }}, so the customer's response, which is variable, is saved for us to use in future messages.
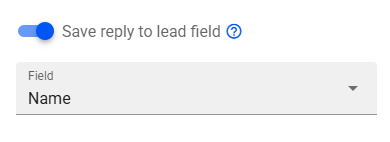
Save response in lead field This option is used to save the information provided by the customer in the platform. You must activate this option and define which variable is being saved. With this option, the data provided by the customer will be saved in the list selected in the Add to list action.


Note: In cases where the customer already has an order or abandoned cart created and synced to the account, it is not necessary to capture this information with the advanced options of WhatsApp messages. When creating an order or cart, the system automatically saves all available data on the platform.
Remove from list
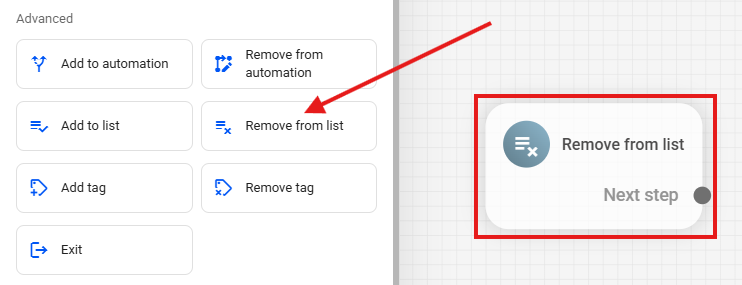
The Remove from list action is used to remove a lead from a specific contact list. This prevents the lead from receiving further campaigns or communications intended for that list.
To add a Remove from list to your automation, click the Remove from list block in the editor's side menu.
Click the Remove from list block. Then select the list from which you want to remove the lead through this action.
In the example below, we use the Remove from list action to exclude the lead from the list if they choose not to receive new messages. Thus, the lead will be automatically removed from the contact list, ensuring they do not receive future messages linked to this list:
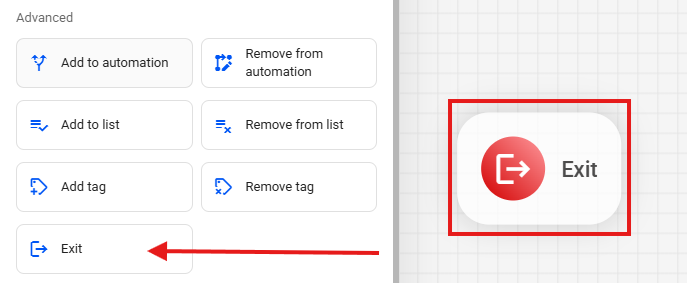
Exit
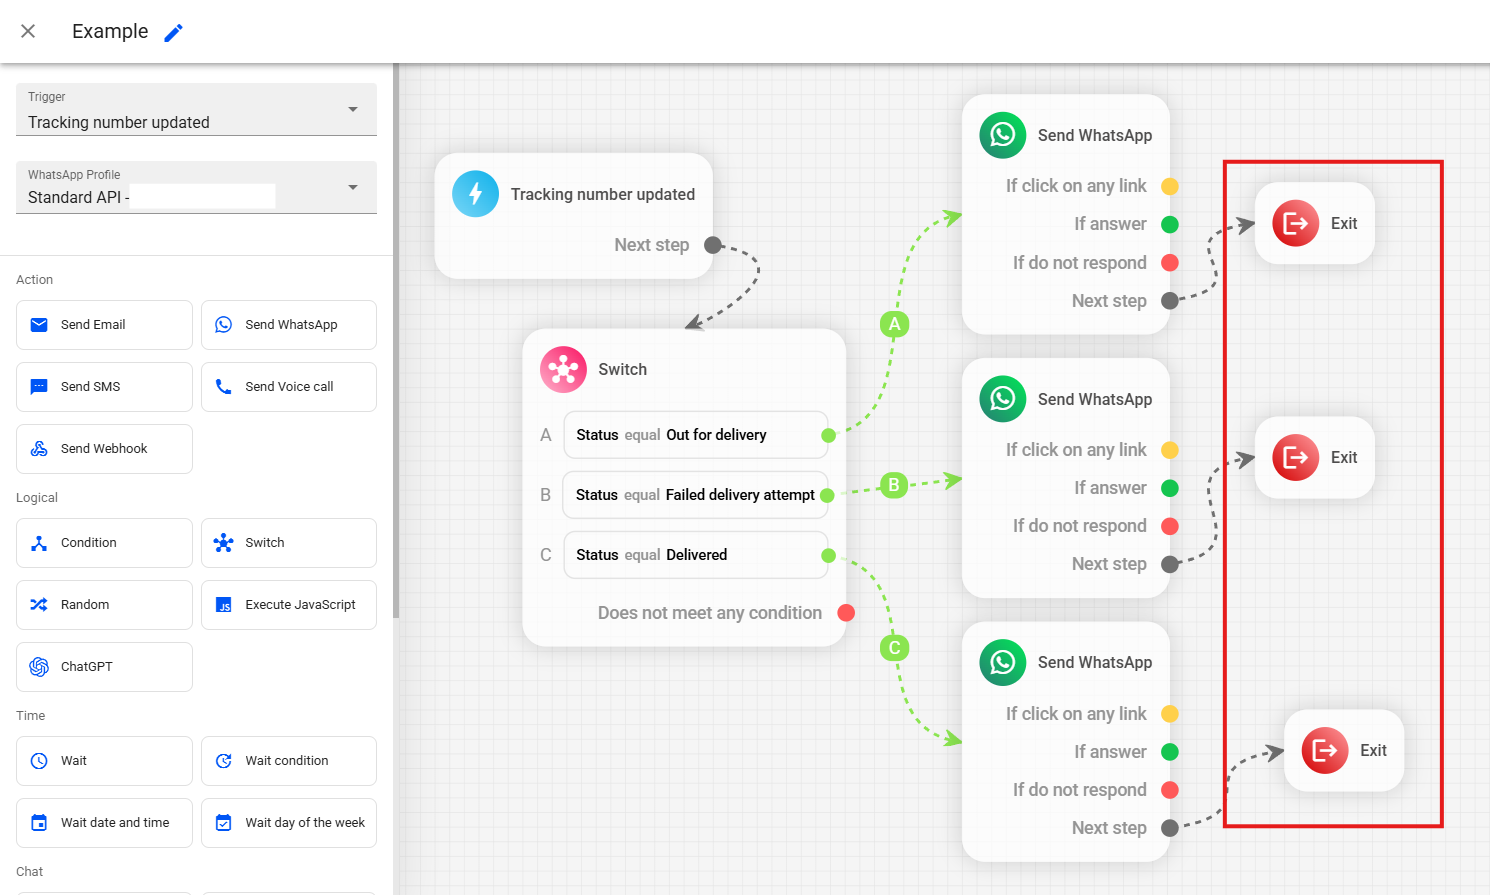
The exit action is used for the lead to leave the automation when reaching the end of one of the flows. We recommend using it at the end of each automation branch, as in the example below:
To add an Exit in your automation, click the Exit block in the editor's side menu.
Connect the exit at the end of each branch of your automation.
Note
It is possible to add notes in the automations to organize them better, set reminders or add important observations.
To add a Note in your automation, click the Note block in the editor's side menu.
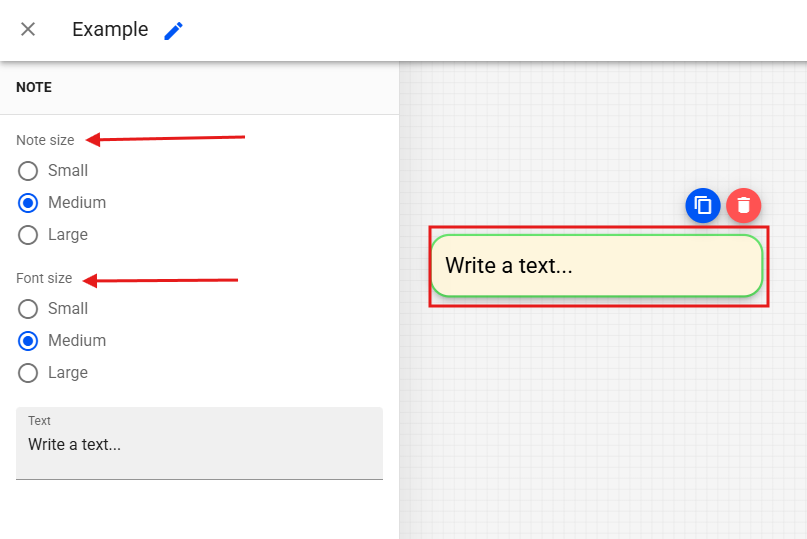
To configure your note, click on the note block to select it, then you will see the following options in the left side menu:
- Size: We can define here the size of the note.
- Font: We can define the font size of the text.
- Text: Space to write the desired text.
In the example below, we use a note to explain the automation's logic.
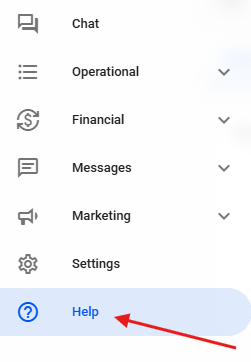
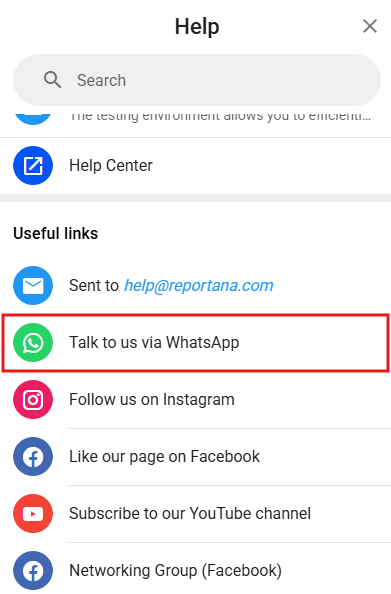
Support
If you have questions or difficulties configuring your automations, contact our support on WhatsApp by accessing Help in the account's side menu ➞ Contact us via WhatsApp. If you're not yet our client and want to ask questions, send an email to [email protected].